Cable Trays
User Guide
Pipe Element : Create Cable Tray
To create a Pipe element, on the Cable Tray tab, in the Create group, click Cable Tray to display the Create Cable Tray Main window.
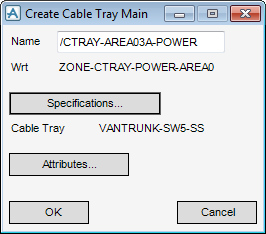
In the Name box, input the name of the new Pipe element.
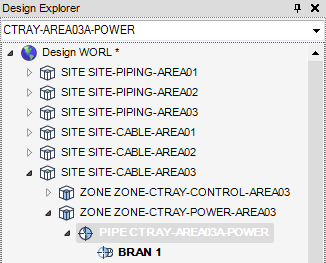
The Wrt position of the new Pipe element within the Model Explorer displays by default.
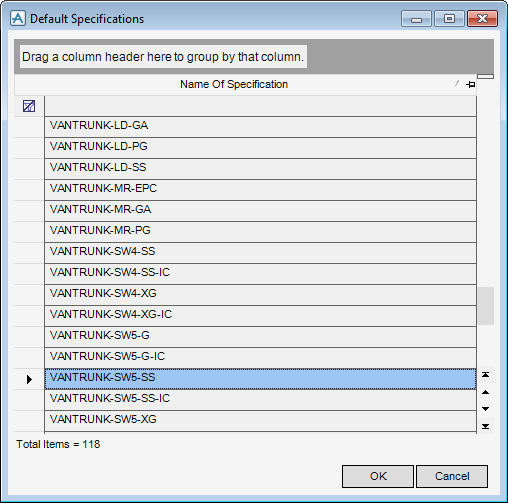
To modify the cable tray specification, click Specifications to display the Default Specifications window.
|
Note:
|
All cable tray components created below the branch use the Specification selected in the list. To use different specifications within a cable tray run, a new branch must be created at each point a different specification is used.
|
Click OK to apply the selected specification to the cable tray or Cancel to discard any inputs and close the Default Specifications window. You are returned to the Create Cable Tray Main window.
To modify the cable tray attributes, click Attributes to display the Cable Tray Attributes window, refer to Database Management Reference Manual for further information.
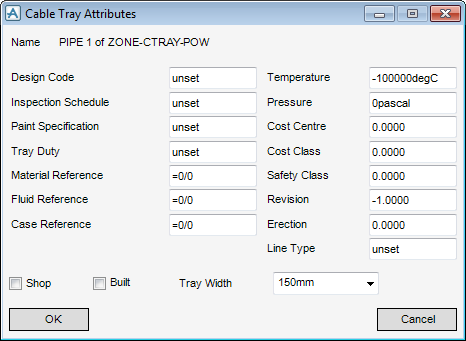
Click OK to save any changes or Cancel to discard any inputs and close the Cable Tray Attributes window. You are returned to the Create Cable Tray Main window.
Click OK, to create a new Pipe and Branch element in the Model Explorer and display the Create Cable Tray Branch window, to define the branch, refer to Branch Element for further information.