Structural Design
User Guide
Create Panels : Create Negative Extrusions
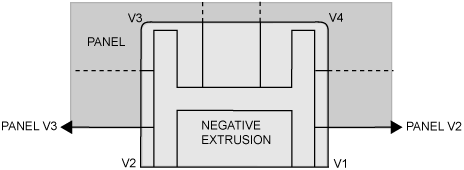
A negative extrusion is created in exactly the same way that the user would position Panel Vertex elements to define the shape of a 2D Panel Loop and then extrude this by the required thickness to create a 3D Panel.
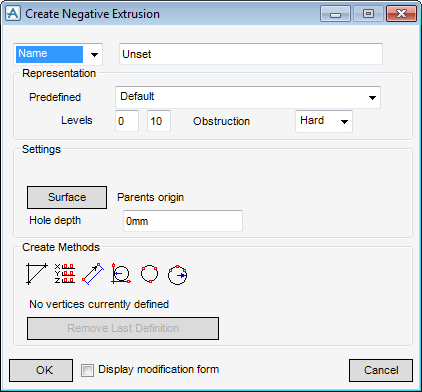
On the Plates tab, in the Create group, click Panels, select Negative Extrusion from the list to display the Create Negative Extrusion window.
To see the negative extrusion volume in the 3D view, select Settings > Graphics > Representation and clear the Holes Drawn check box. Select Apply and OK the change.
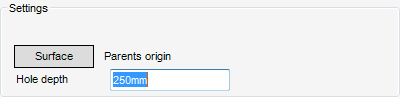
To achieve the correct justification and orientation for the negative extrusion relative to its owning panel, from the Settings pane of the window, click Surface. Then pick the upper face of the panel.
Set Hole Depth (equivalent to the thickness of the negative extrusion) to 250. A large depth like this makes it easy to see the volume of the negative extrusion once created. A depth slightly greater than the panel thickness would normally suffice, since the application automatically adds 1mm to make sure that the hole always cuts through the referenced panel surface. The settings pane of the Create Negative Extrusion window is populated as shown:
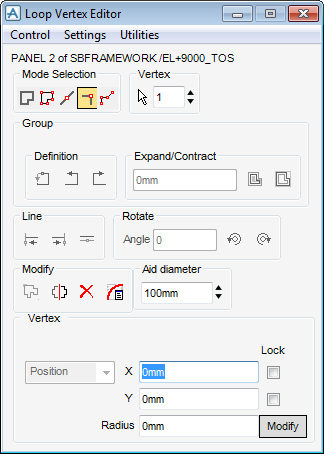
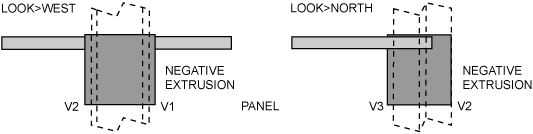
Use any combination of the methods used to create and modify panel vertices (see and Measure Distances/Directions in the Design Model). The user now creates the four vertices needed to define the required hole round the column, as shown in the diagram. For ease of positioning, align V1 and V2 with the outer face of the column (although any position beyond the panel edge would be satisfactory).
(If not, use the Position > Relatively (BY) menu option to move the negative extrusion vertically to a position where it cuts both faces of the panel.)
To see the result of applying the negative volume represented by the negative extrusion to the positive volume of the panel, revert to Holes Drawn On representation. The negative extrusion creates a hole only through its owning panel; it does not affect the column.