DRAW
User Guide
Add and Modify Drawing Objects : Modify Drawing Objects : Chamfer Objects
To chamfer objects, on the Draw tab, in the Modify group, click Fillet, select Chamfer from the drop-down list.
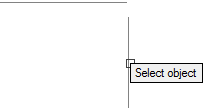
The user is prompted to Select option: <Select object>
The user is then prompted to select first object
The user is then prompted to Select second line
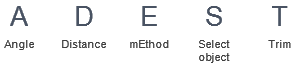
Throughout the chamfer process the user can press ESC to cancel the command. Additional functionality is also available.
 |
|
|
Press the down arrow key and select Angle to set the chamfer angle. Refer to Set Chamfer Angle for further information.
|
|
|
Press the down arrow key and select Distance to set the chamfer distance. Refer to Set Chamfer Distance for further information.
|
|
|
Press the down arrow key and select mEthod to select the chamfer method. Refer to Select Chamfer Method for further information.
|
|
|
Press the down arrow key and select Multiple to chamfer multiple objects. Refer to Chamfer Objects for further information.
|
|
|
Press the down arrow key and select Select object to select an object and begin the chamfer process.
|
|
|
Press the down arrow key and select Trim to turn trimming on or off. Refer to Turn Trim On/Off for further information.
|
|

To chamfer multiple objects, on the Draw tab, in the Modify group, click Fillet, select Chamfer from the drop-down list.
The user is prompted to Select option: <Select object>
The user is then prompted to Select option: <Select object>
The user is then prompted to Select first object
The user is then prompted to Select second line
The user is then prompted to Select option: <Select object>
Throughout the chamfer process the user can press ESC to cancel the command. Additional functionality is also available.
 |
|
|
Press the down arrow key and select Angle to set the chamfer angle. Refer to Set Chamfer Angle for further information.
|
|
|
Press the down arrow key and select Distance to set the chamfer distance. Refer to Set Chamfer Distance for further information.
|
|
|
Press the down arrow key and select mEthod to select the chamfer method. Refer to Select Chamfer Method for further information.
|
|
|
Press the down arrow key and select Select object to select an object and begin the chamfer process.
|
|
|
Press the down arrow key and select Trim to turn trimming on or off. Refer to Turn Trim On/Off for further information.
|
|
To set the chamfer distance from the endpoint of a selected edge, on the Draw tab, in the Modify group, click Fillet, select Chamfer from the drop-down list.
The user is prompted to Select option: <Select object>
The user is then prompted to Specify first chamfer distance <#mm>
Input a dimensional value in the field and press Enter to specify the first chamfer distance.
The user is then prompted to Specify second chamfer distance <#mm>
Input a dimensional value in the field and press Enter to specify the second chamfer distance.
The user can continue to chamfer objects. Refer to Chamfer Objects or Chamfer Multiple Objects for further information.
To set the chamfer distance using a chamfer distance and angle, on the Draw tab, in the Modify group, click Fillet, select Chamfer from the drop-down list.
The user is prompted to Select option: <Select object>
The user is then prompted to Specify chamfer length on the first line <#mm>
Input a dimensional value in the field and press Enter to specify the chamfer length.
The user is then prompted to Specify chamfer angle from the first line
Input an angular value in the field and press Enter to specify the chamfer angle.
The user can continue to chamfer objects. Refer to Chamfer Objects or Chamfer Multiple Objects for further information.
To set the chamfer method, on the Draw tab, in the Modify group, click Fillet, select Chamfer from the drop-down list.
The user is prompted to Select option: <Select object>
The user is then prompted to Select option <Distance / Angle>
Input D at the prompt or press the down arrow key and select Distance to set the chamfer method as distance. Refer to Set Chamfer Distance for further information.
Alternatively, input A at the prompt or press the down arrow key and select Angle to set the chamfer method as angle. Set Chamfer Angle for further information.
The user can continue to chamfer objects. Refer to Chamfer Objects or Chamfer Multiple Objects for further information.
To specify the trimming options for the ends of the chamfer, on the Draw tab, in the Modify group, click Fillet, select Chamfer from the drop-down list.
The user is prompted to Select option: <Select object>
The user is then prompted to Select option <Trim / No Trim>
The user can then chamfer objects. Refer to Chamfer Objects or Chamfer Multiple Objects for further information.