DRAW
User Guide
Add and Modify Drawing Objects : Add Drawing Objects : Draw Clouds and Outlines
To draw a cloud, on the Draw tab, in the Draw group, click Cloud, select Cloud from the drop-down list.
Alternatively, on the Home tab, in the Draw group, click Cloud, select Cloud from the drop-down list.
The user is prompted to Specify the first vertex or <Default>
Input values in the dimension fields and press Enter or click to identify the first point of the cloud.
The user is then prompted to Specify the next vertex or <Finish>
Input values in the dimension fields and press Enter or click to identify the next point of the cloud. An arc is drawn between the first and second points.
The user is then prompted to Specify the next vertex or <Close>
Input values in the dimension fields and press Enter or click to identify the next point of the cloud. An arc is drawn between the specified points.
Throughout the cloud creation process the user can press ESC to cancel the command. Additional functionality is also available.
 |
|
|
Press the down arrow key and select cuBic to draw an outline that consists of polynomial curves.
|
|
|
Press the down arrow key and select Close to link the two endpoints of the cloud together with an automatically drawn arc and end the command.
|
|
|
Press the down arrow key and select Default to draw an outline. Refer to Draw Outlines for further information.
|
|
|
Press the down arrow key and select Finish to end the command.
|
|
|
Press the down arrow key and select Undo to undo the last action.
|
|

To draw an outline, on the Draw tab, in the Draw group, click Cloud, select Outline from the drop-down list.
Alternatively, on the Home tab, in the Draw group, click Cloud, select Outline from the drop-down list.
The user is prompted to Specify the first vertex or <clOud>
Input values in the dimension fields and press Enter or click to identify the first point of the outline.
The user is then prompted to Specify the next vertex or <Finish>
Input values in the dimension and angle fields and press Enter or click to identify the next point of the outline. A vertex is drawn between the first and second points.
The user is again prompted to Specify the next vertex or <Finish>
Input values in the dimension and angle fields and press Enter or click to identify the next point of the outline. A vertex is drawn between the specified points.
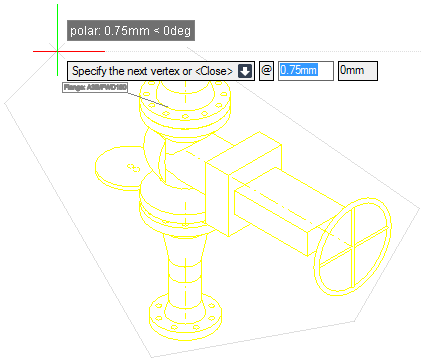
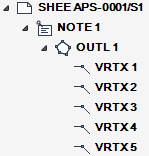
The user is then prompted to Specify the next vertex or <Close>
Input values in the dimension and angle fields and press Enter or click to identify the next point of the outline. A vertex is drawn between the specified points.
Throughout the outline creation process the user can press ESC to cancel the command. Additional functionality is also available.
 |
|
|
Press the down arrow key and select Arc to draw an arc.
|
|
|
Press the down arrow key and select cuBic to draw an outline that consists of polynomial curves.
|
|
|
Press the down arrow key and select Close to link the two endpoints of the outline together with an automatically drawn line and end the command.
|
|
|
Press the down arrow key and select Finish to end the command.
|
|
|
Press the down arrow key and select Line to draw a line.
|
|
|
Press the down arrow key and select clOud to draw a cloud. Refer to Draw Clouds for further information.
|
|
|
Press the down arrow key and select Undo to undo the last action.
|
|