DRAW
User Guide
Create and Modify Views : Format 2D View : Create and Apply Local Rules
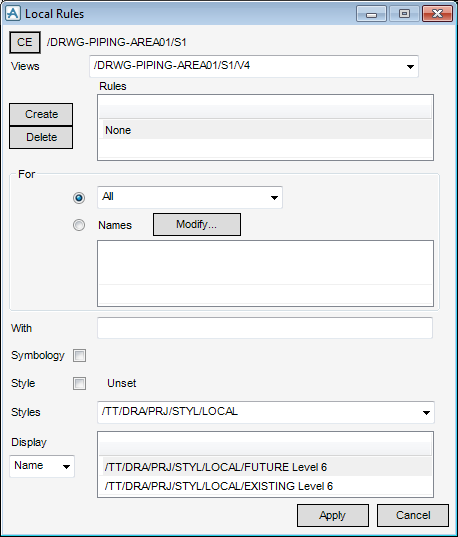
To create, modify and apply a local view rule, select a view, on the Format 2D tab, in the Local Rules group, click Representation to display the Local Rules window.
|
Allows the user to create a rule. Click to display the Create RRUL window.
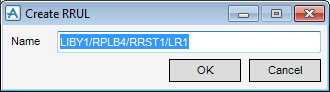 Input a name for the new rule in the Name field.
Click OK to add the rule to the Rules list or Cancel to discard any changes and close the Create RRUL window. The user is returned to the Local Rules window.
|
|
|
Select the All radio button and select the elements the rule is applied to from the drop-down list.
Select the Names radio button and click Modify to display the Names window. Refer to Names for further information.
|
|
|
To apply qualifying restrictions to the elements specified in the For section, input an expression in the With field. For example, if the For section specifies Branches, the following can be input:
|
|
Click Apply to apply the local rules or Cancel to discard any changes and close the Local Rules window.
To specify items by name that a rule is to be applied to, on the Local Rules window, click Modify to display the Names window.

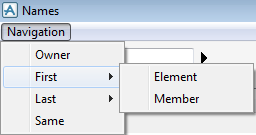
The Names window allows the user to select individual elements from the Members list and copy them to the Names list.
|
Select Element to navigate to the first element in the currently selected hierarchy. The element is selected in the Members List.
Select Member to navigate to the first member of the currently selected element. The element is selected in the Members List.
|
|
|
Select Element to navigate to the last element in the currently selected hierarchy. The element is selected in the Members List.
Select Member to navigate to the last member of the currently selected element. The element is selected in the Members List.
|
|
|
|
|
|
|
|
|
Select Design Members from the drop-down list to pick design elements explicitly.
Select Drawlists from the drop-down list to identify design elements by their presence in other drawlists.
|
|
To create, modify and apply a local hatching rule, select a view, on the Format 2D tab, in the Local Rules group, click Hatching to display the Local Hatching Rules window.
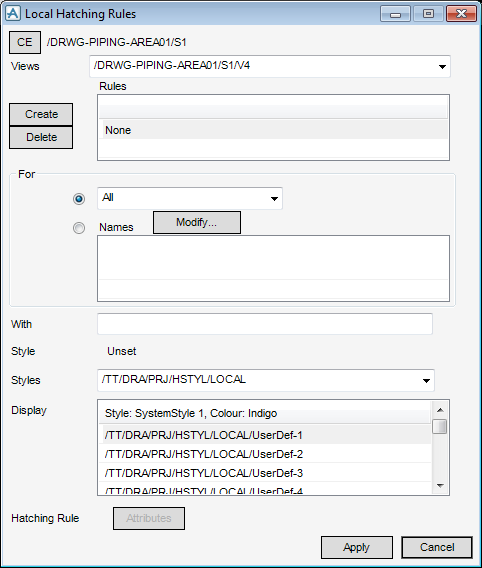
|
Allows the user to create a hatching rule. Click to display the Create HRUL window.
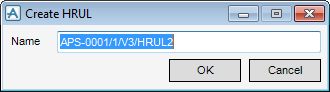 Input a name for the new rule in the Name field.
Click OK to add the rule to the Rules list or Cancel to discard any changes and close the Create HRUL window. The user is returned to the Local Hatching Rules window.
|
|
|
Select the Menus radio button and select the elements the rule is applied to from the drop-down list.
Select the Names radio button and click Modify to display the Names window. Refer to Names for further information.
|
|
|
To apply qualifying restrictions to the elements specified in the For section, input an expression in the With field. For example, if the For section specifies Branches, the following can be input:
|
|
|
Allows the user to define the hatching rule attributes. Refer to Hatching Rule Attributes for further information.
|
Click Apply to apply the hatching rules or Cancel to discard any changes and close the Local Hatching Rules window.
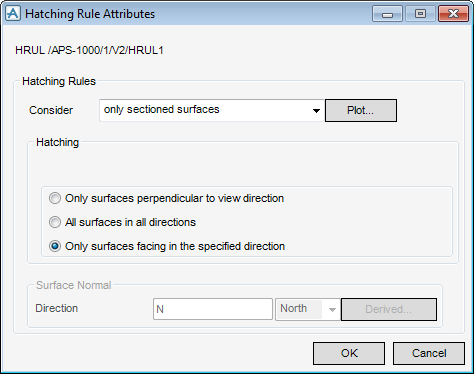
To specify attributes for a hatching rule, on the Local Hatching Rules window, click Attributes to display the Hatching Rule Attributes window.
|
Select only sectioned surfaces from the drop-down list to specify that only surfaces cut by a section plane are considered.
Select all primitive surfaces from the drop-down list to specify that the element need not be cut by a section plane to be considered.
|
|
|
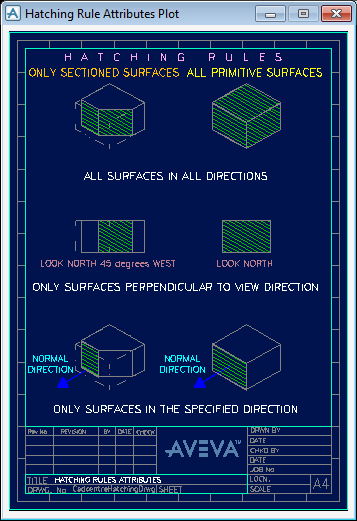
Allows the user to view the Hatching Rule Attributes Plot window which illustrates the hatching rule attributes. Refer to Hatching Rule Attributes Plot for further information.
|
|
|
Select the All surfaces in all directions radio button to specify that all surfaces meeting the criteria in the Consider list are hatched.
Select the Only surfaces perpendicular to view direction radio button to specify that only those surfaces perpendicular to the view are hatched. For example, if the view direction is north, the south face of the element is hatched, assuming it meets the criteria in the Consider list.
Select the Only surfaces facing in the specified direction radio button to specify a direction normal to the surface to be hatched, instead of using the view direction. For example if a box displays in an isometric view with the top surface crosshatched and six surfaces of a box are required to have different hatching styles, this option would be used on six Hatching Rules.
|
|
|
The functionality is only available when the Only surfaces facing in the specified direction radio button is selected.
|
|
|
The functionality is only available when the Only surfaces facing in the specified direction radio button is selected.
Click to select a design element. The Direction (Y) window displays. Refer to Direction for further information.
|
Click Apply to apply the hatching rules or Cancel to discard any changes and close the Local Hatching Rules Attributes window. The user is returned to the Local Hatching Rules window.
On the Hatching Rules Attributes window, click Plot to display the Hatching Rule Attributes Plot window.