DRAW Administrator Guide
Area Based Automatic Drawing Production : ABA Defaults : Create and Modify Template View
To create a template view, on the Area tab, in the Create group, click Template, select View from the drop-down list to display the ABA Template Sheet List window. Refer to Modify Template Sheet for further information.
Double-click the template to create a view. The ABA Template View window displays.
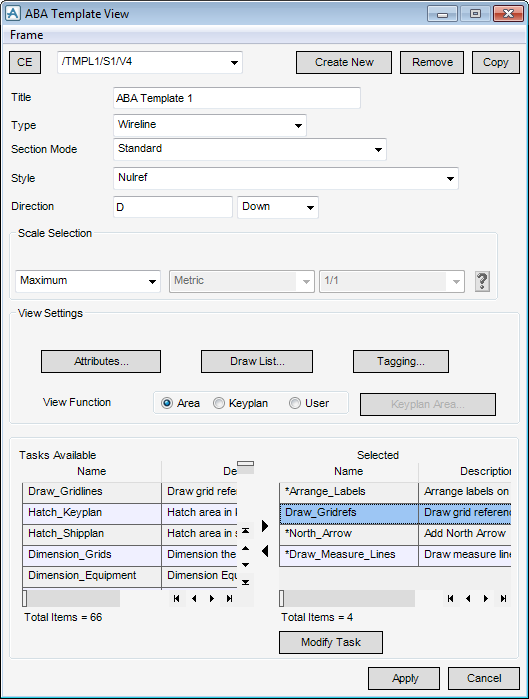
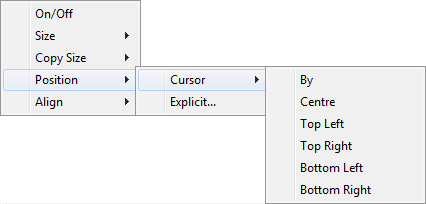
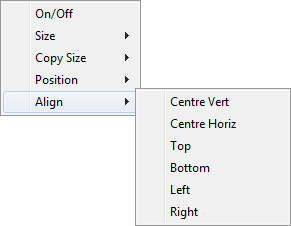
The Frame drop-down menu allows the administrator to define the frame visibility, position and alignment.
|
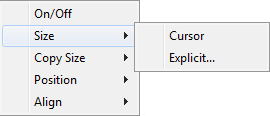
Allows the administrator to define the frame position using a cursor pick in the view. Refer to Define View Frame with Cursor for further information.
|
|||||||
|
Allows the administrator to specify the frame size. Click to display the Explicit Frame Size window. Refer to Explicit Frame Size for further information.
|
|
Allows the administrator to define the frame position using a cursor pick in the view. Refer to Define View Frame with Cursor for further information. The administrator can select:
|
|||||||
To identify the currently selected template view as the current element, click CE. The administrator can select an alternative template view from the adjacent drop-down list.
To delete the current view, click Remove. A Confirm window displays asking the administrator to OK the deletion. Click Yes to delete the View.
Input a suitable title for the view in the Title field
Select the type of drawing to create from the Type drop-down list. The options are:
|
•
|
Select Omit Fractional Pipe Components from the Section Mode drop-down list to remove any piping components that only partly display in the View.
Select a representation style set for the view from the Style drop-down menu.
Input a value in the Direction field to define the direction of the view.
Select the scale using the Scale Selection drop-down list:
|
•
|
Maximum - the contents of the View are made as large as possible whilst still fitting in the View frame.
|
|
•
|
Nearest - automatically sets the scale to display the complete drawing in the View. The administrator can select from Metric, Architectural, or Engineering in the adjacent drop-down list.
|
|
•
|
Specific - allows the administrator to select the type of scaling and the scale itself, from the adjacent drop-down list. For example, Metric - 1/1, Architectural - 1”=1’-0”, or Engineering ‑ 1”=10’-0”.
|
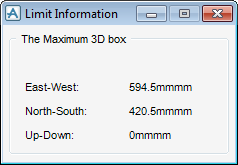
For assistance in determining the scale, click the question mark. The Limit Information window displays, showing the maximum 3D distances for the chosen scale.
The administrator can configure the View Settings:
To change the View attributes, click Attributes to display the User-Defined View Attributes window. Refer to User-Defined View Attributes for further information.
To define the draw list of the View, click Draw List to display the Add Drawing Item Lists window. Refer to Draw List for further information.
The add or remove Tag Rules from the View, click Tagging to display the Add Tag Rule Lists window. Refer to Tag Rules for further information.
The administrator can define the View Function:
Select the Area radio button to produce a graphical representation of the area.
Select the Keyplan radio button to identify the View as a Keyplan View. Refer to Create and Modify Keyplan Layers for further information.
Select the User radio button to specify the requirements for the View.
The administrator can define the Tasks Available:
By default the Name and Description elements in the Tasks Available and Selected lists are sorted alpha numerically (A-Z, 0-9). To reverse the order, click the arrow in the column header of the relevant list.
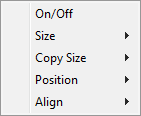
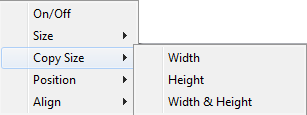
All tasks are processed in the order in which they appear in the Selected list. The administrator can modify the order. Right-click a task in the Selected list to display the drop-down list.
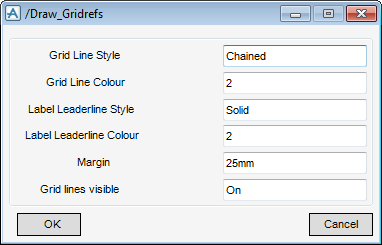
To modify the currently selected task in the Selected list, click Modify Task to display a modify window. For example, if the Draw_Gridrefs task is selected the
/*Draw_Gridrefs window displays.
/*Draw_Gridrefs window displays.
Click Apply to confirm the Template View settings or Cancel to discard any changes and close the ABA Template View window.
To change the View attributes, on the ABA Template View window, click Attributes to display the User-Defined View Attributes window.
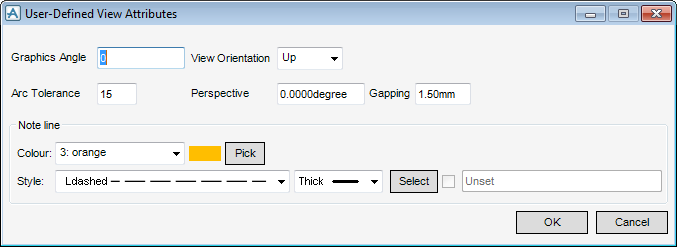
The Note Line colour and style are set in the same way as for the Drawing Templates Attributes window. Refer to Create Template Drawing for further information.
Click OK to confirm the settings or Cancel to discard any changes. The administrator is returned to the ABA Template View window.
To define the draw list of the view, on the ABA Template View window, click Draw List to display the Add Drawing Item Lists window.
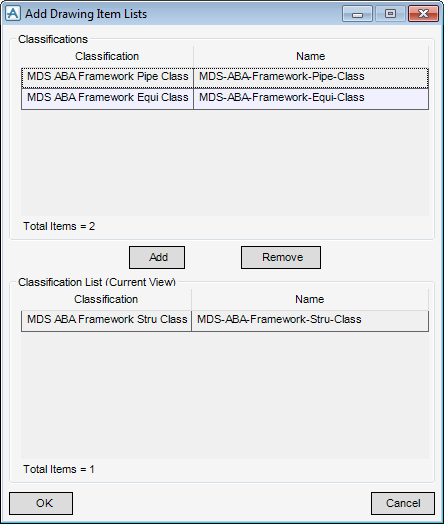
The Add Drawing Item Lists window contains a list of all the available classifications.
To remove the currently selected classification from the Classification List (Current View) and add it to the Classifications list, click Remove.
By default, the Classification and Name elements are sorted alpha numerically (A-Z, 0-9). To reverse the order, click the column header of the relevant list.
The administrator can add or remove classifications from within either the Classifications list or the Classification List (Current View). Right-click a classification to display the drop-down list:
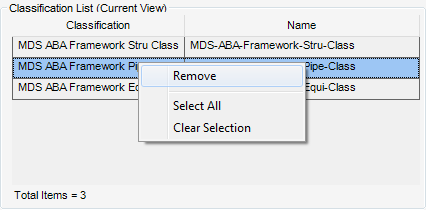
To remove the selected classification from the Classification List (Current View) and add it to the Classifications list, click Remove.
To select all classifications in a list, click Select All.
To cancel the current selection, click Clear Selection.
Click OK to confirm the settings or Cancel to discard any changes. The administrator is returned to the ABA Template View window.
To define the tag rules for the view, on the ABA Template View window, click Tagging to display the Add Tag Rule Lists window.
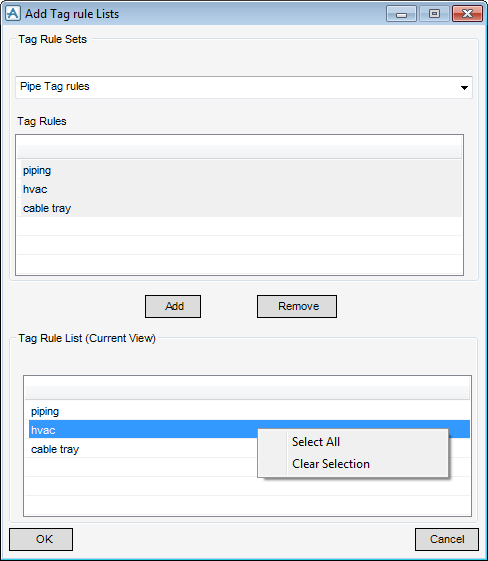
To add the currently selected tag rule in the Tag Rules list to the Tag Rule List (Current View), click Add.
To remove the currently selected tag rule from the Tag Rule List (Current View) and add it to the Tag Rules list, click Remove.
The administrator can select, clear and order tag rules from within either the Tag Rules list or the Tag Rule List (Current View). Right-click a tag rule to display the drop-down list:
To select all tag rules in a list, click Select All.
To cancel the current selection, click Clear Selection.
Click OK to confirm the settings or Cancel to discard any changes. The administrator is returned to the ABA Template View window.
To modify a template view, on the Area tab, in the Modify group, click Template, select View from the drop-down list to display the ABA Template View window.
Make the changes required. Refer to Create and Modify Template View for further information.
Click Apply to confirm the Template View settings or Cancel to discard any changes and close the ABA Template View window.