Cable Design
User Guide
Cableway Branch : Create Cableway Branch : Define the Path/Route
The Define Path / Route Tasks window allows the user to create route points and position these points on a cableway branch. A route point is a reference point inserted at a defined position on the cableway branch and provides a reference for routing the branch and for adding cable tray material. To display the Define Path/Route Tasks window, click Define Path / Route from the Branch Tasks window.
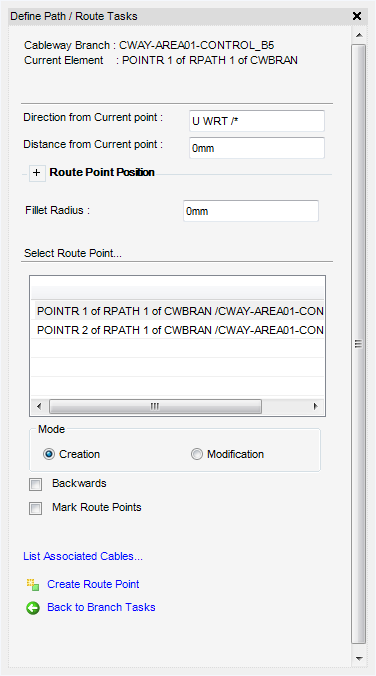
The Define Path / Route Task window is a dual purpose window, which allows the Creation of a new route point or the Modification of an existing route point. For more information on the Modification of an existing route point, refer to Modify Cableway Branch.
The Route Position Point part of the Define Path / Route Task window allows the user to position a route position explicitly by the input of coordinates, by the selection of a position in the 3D view or by copying the position of the previous or next route point.
To pick a position on the cableway branch in the 3D view, from the Route Point Position part of the Define Path / Route Task window, select Pick Position, the user will be prompted to Pick to define position (Snap) Snap:
To copy the position of the previous route point, from the Route Point Position part of the Define Path / Route Task window, select Copy Previous, the position of the previous route point is copied.
To copy the position of the next route point, from the Route Point Position part of the Define Path / Route Task window, select Copy Next, the position of the next route point is copied.
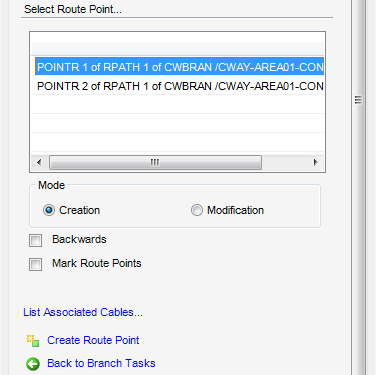
All of the created route points are displayed in the Select Route Point part of the Define Path / Route Tasks window. Click to highlight a route point which displays the position in the 3D view.
|
Click to select Creation or Modification to create a new route point or modify an existing route point.
|
||
|
To reverse the order of route points on the selected cableway branch. The route points are also reversed and displayed in the Select Route Point list. Click to select the Backwards check box.
|
||
|
To display route points on the selected cableway branch the 3D view. Click to select the Mark Route Points check box.
|
||
|
To display associated cables, click List Associated Cables to display the List of Cables window, listing all the associated cables.
|
||
To create route point, click Create Route Point. The new route point is created and displayed in the Model Explorer and displayed in the Select Route Point part of the Define Path / Route Task window.