Stairs Ladders and Handrails
Administrator Guide
Defaults : Create Default
To create a Default element make sure the correct Defaults Area is selected in the Defaults part of the SLH Administration Tasks window.
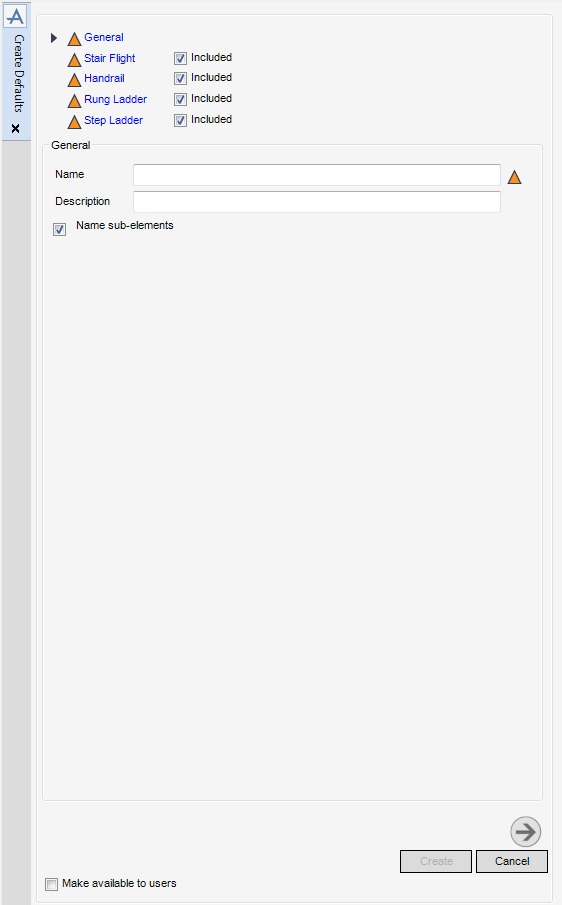
To create a Default element, from the Defaults part of the SLH Administration Tasks window, click Create next to the Defaults drop-down list to display the Create Defaults window.
|
Note:
|
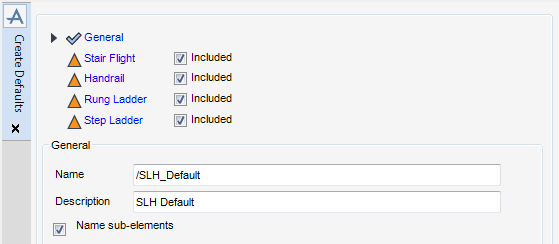
All mandatory parts of the Create Defaults window are indicated with an amber triangle. The SLH application replaces the amber triangle with a green tick when the Create Defaults window has been populated with the required data.
|
The General part of the Create Defaults window displays by default, the administrator can name and describe the new Default element.
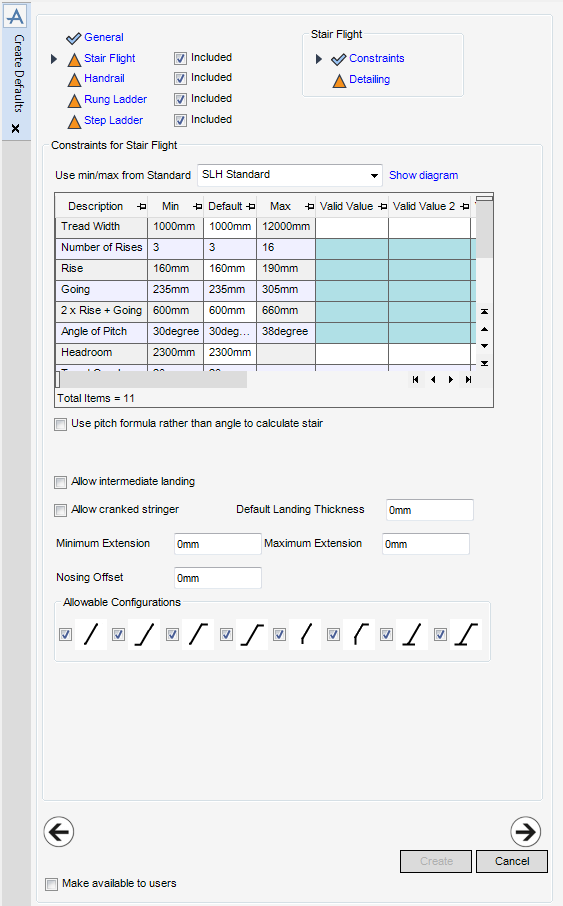
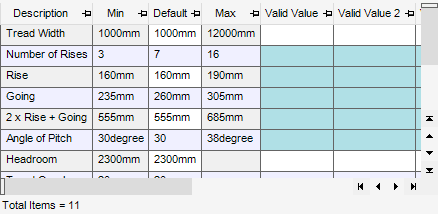
Click Next to display the Constraints for Stair Flight part of the Create Defaults window. Refer to Stair Flight Constraints for further information.
To remove the Stair Flight element from the Defaults, click to clear the Included check box.
Select a standard from the Use min/max values from standard drop-down list to specify the standard on which the defaults are to be based.
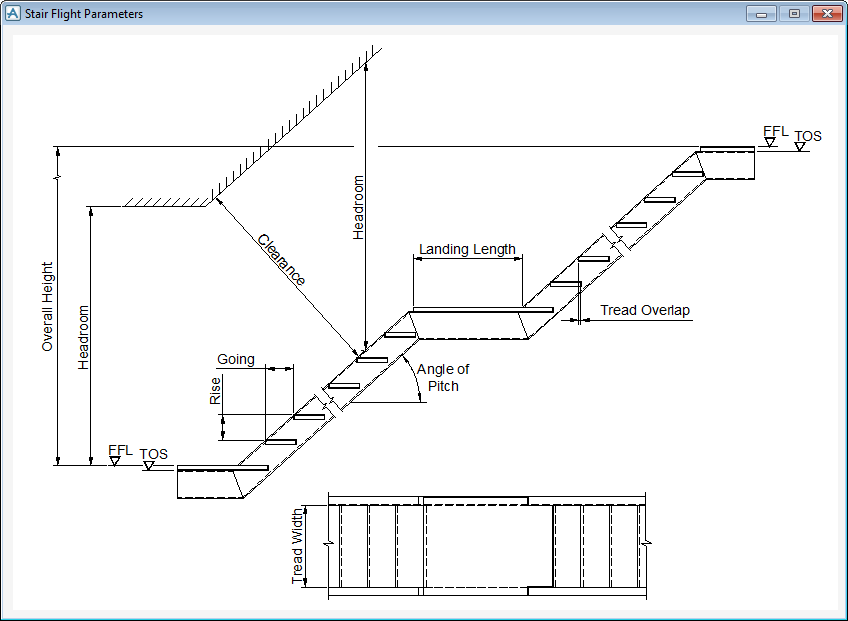
To visualise how the constraints equate to the stair flight, click Show diagram to display the Stair Flight Parameters window.
|
Minimum Extension - default minimum extension.
|
|
|
Maximum Extension - default maximum extension.
|
|
Click Next to display the Detailing for Stair Flight part of the Create Defaults window. Refer to Stair Flight Detailing for further information.
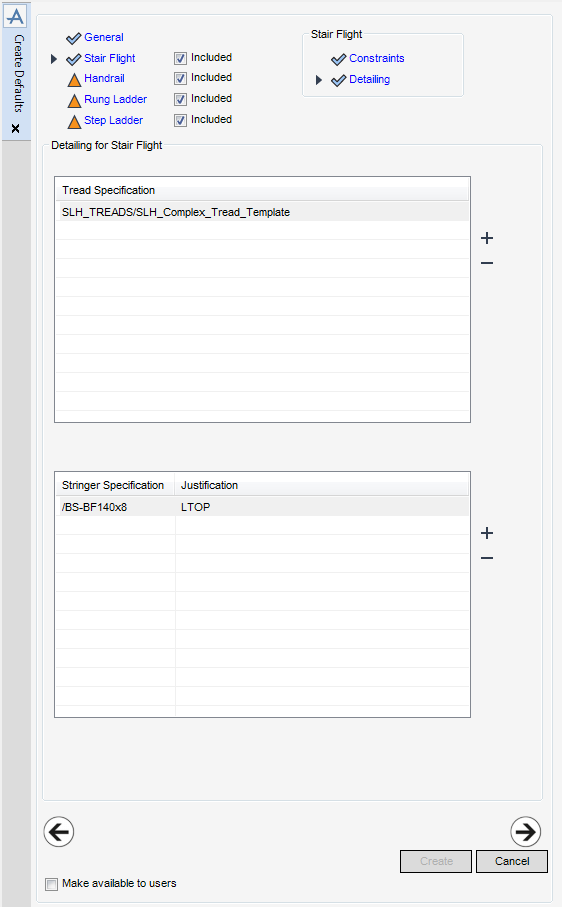
The Detailing for Stair Flight part of the Create Defaults window allows the administrator to define the parts and profiles allowed for the default.
The Tread Specification list allows the administrator to add or remove default tread specifications.
|
Click to display the Tread Specification window.
|
||
|
Click to remove the currently selected tread specification from the Tread Specification list.
|
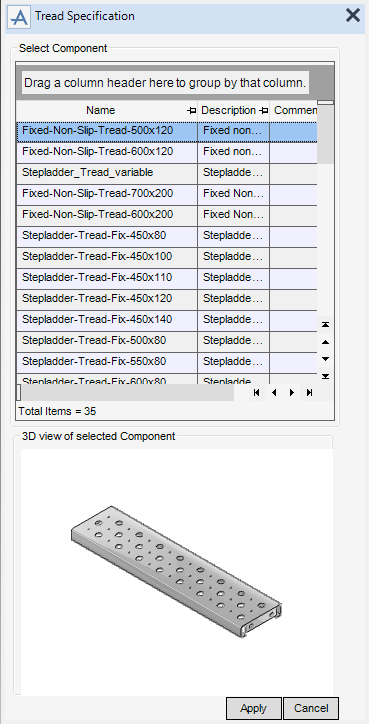
The Tread Specification window allows the administrator to add a tread specification to the Tread Specification list.
From the Select Component part of the Tread Specification window, select the required tread from the list of available components. A graphical representation of the selected tread component is displayed in the 3D view.
Click Apply to add the currently selected tread to the Tread Specification list or click Cancel to discard any changes and close the Tread Specification window.
|
Click to display the Stringer Specification window.
|
||
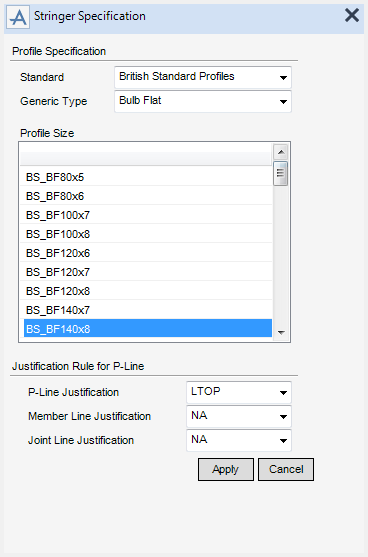
The Stringer Specification window allows the administrator to add a stringer specification to the Stringer Specification list.
|
Select a standard from the drop-down list to specify the profile standard to be used for the stair flight. The selection determines the options available from the Generic Type drop-down list and the Profile Size list.
|
|
|
Select a P-line justification value from the drop-down list.
|
|
Click Apply to add the profile specification to the Stringer Specification list or click Cancel to discard any changes and close the Stringer Specification window.
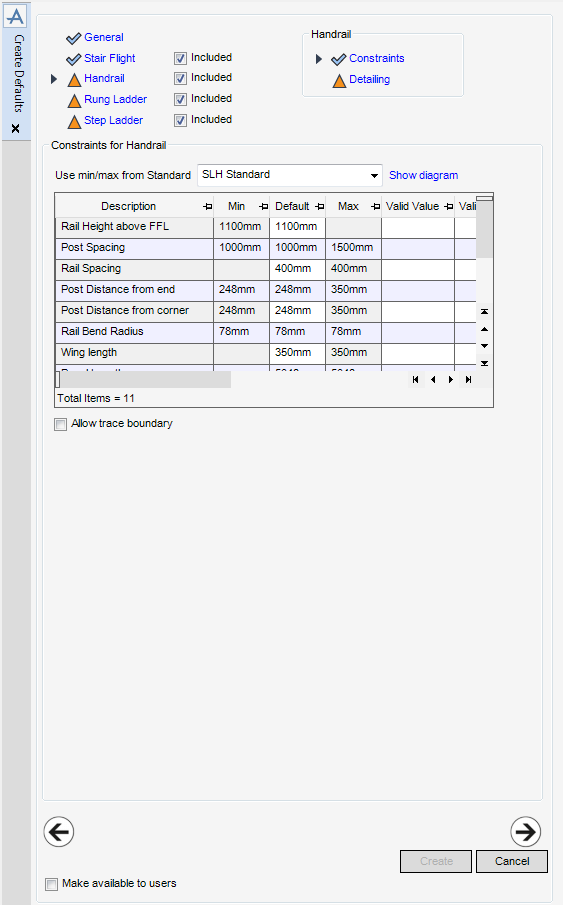
Click Next to display the Constraints for Handrail part of the Create Defaults window. Refer to Handrail Constraints for further information.
To remove Handrail from the Defaults, click to clear the Included check box.
The functionality available from the Constraints for Handrail part of the Create Defaults window is identical to that available from the Constraints for Stair Flight part of the Create Defaults window, with the exception of the Allow trace boundary check box. Refer to Stair Flight Constraints for further information.
Select the Allow trace boundary check box to allow the user to trace the boundary (Copy Route Path) of an extrusion element such as a platform when creating a handrail. By default the check box is not selected.
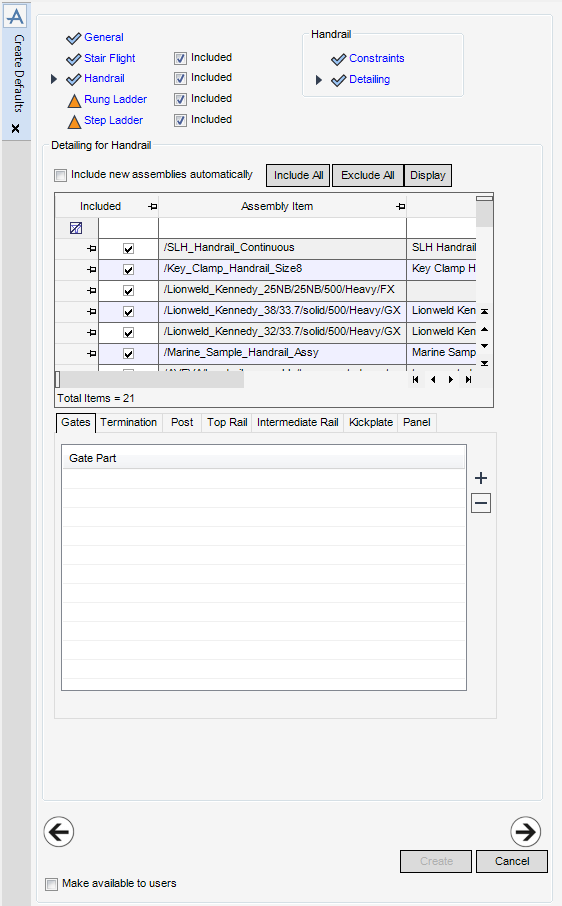
Click Next to display the Detailing for Handrail part of the Create Defaults window. Refer to Handrail Detailing for further information.
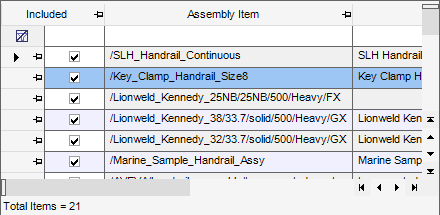
The Detailing for Handrail part of the Create Defaults window is populated with the assembly items in the database. The functionality available allows the administrator to define the assemblies, parts and profiles allowed for the default.
|
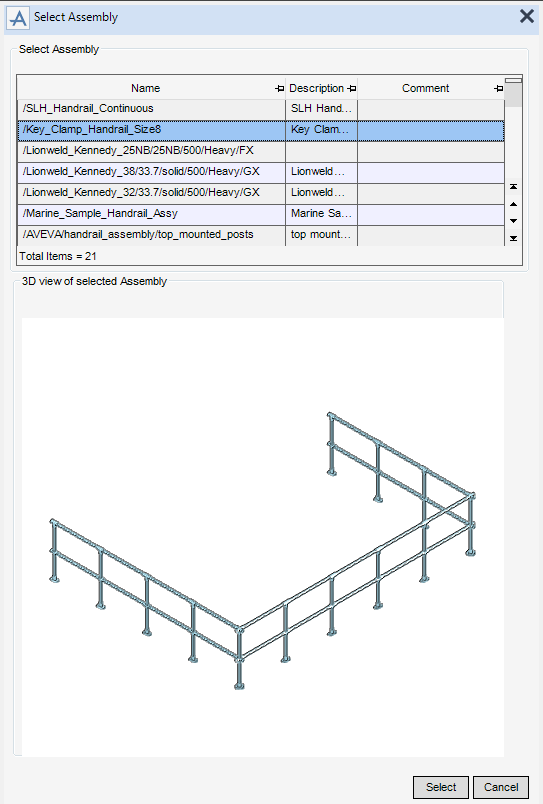
Click to display the Select Assembly window.
|
The Select Assembly window allows the administrator to add an assembly to the list of available assemblies.
Click Select to add the currently selected assembly to the list of available assemblies or click Cancel to close the Select Assembly window.
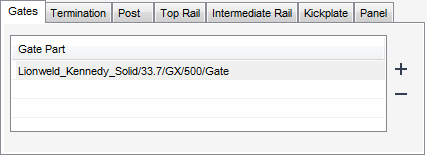
From the Detailing for Handrail part of the Create Defaults window, select the Gates tab to display the Gate Part list.
|
Click to display the Gate Part window.
|
||
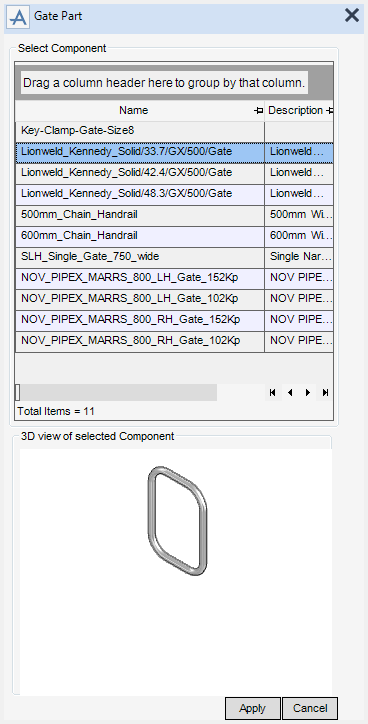
The Gate Part window allows the administrator to add a gate to the list of available parts.
Click Apply to add the currently selected part to the Gate Part list or click Cancel to discard any changes and close the Gate Part window.
From the Detailing for Handrail part of the Create Defaults window, select the Top Rail tab to display the Top Rail Specification list.
|
Click to display the Top Rail Specification window.
|
||
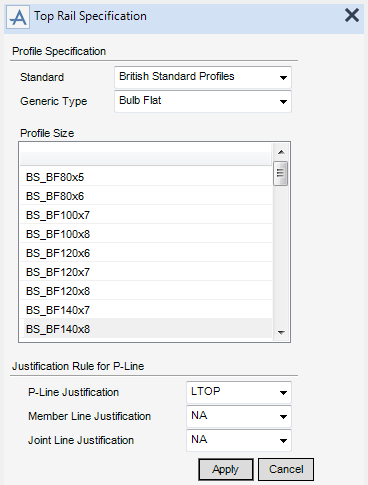
The Top Rail Specification window allows the administrator to add a profile specification to the Top Rail Specification list.
|
Select a standard from the drop-down list to specify the profile standard to be used for the handrail. The selection determines the options available from the Generic Type drop-down list and the Profile Size list.
|
|
Click Apply to add the profile specification to the Top Rail Specification list or click Cancel to discard any changes and close the Top Rail Specification window.
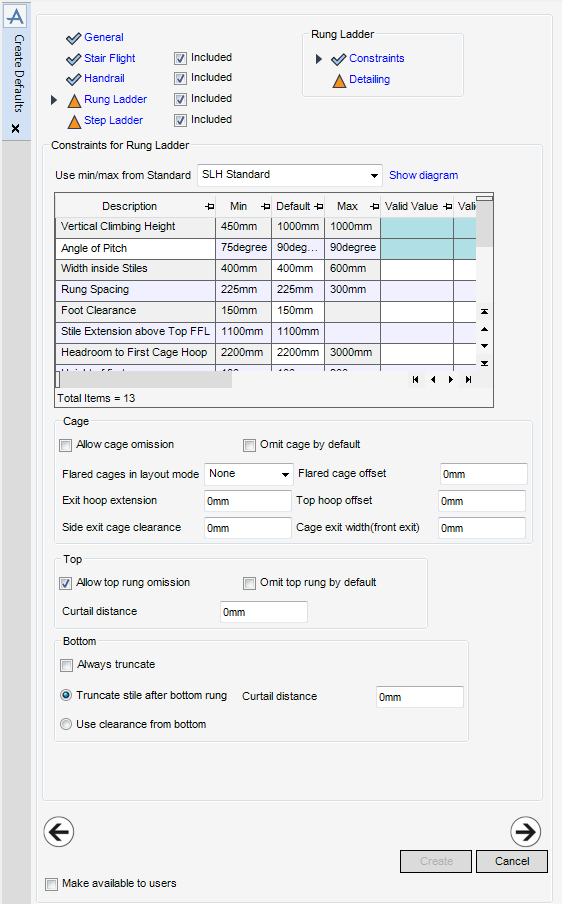
Click Next to display the Constraints for Rung Ladder part of the Create Defaults window. Refer to Rung Ladder Constraints for further information.
To remove Rung Ladders from the Defaults, click to clear the Included check box.
The functionality available from the Constraints for Rung Ladder part of the Create Defaults window is identical to that available from the Constraints for Stair Flight part of the Create Defaults window. Refer to Stair Flight Constraints for further information.
The Cage part of the Create Defaults window allows the administrator to define the defaults and specify the allowable configurations for the rung ladder cage.
The Top part of the Create Defaults window allows the administrator to define the defaults for the top of the rung ladder.
The Bottom part of the Create Defaults window allows the administrator to define the defaults for the bottom of the rung ladder.
|
Select the radio button to allow the user to truncate stiles below the bottom rung, the Curtail distance field is displayed.
|
|
|
Select the radio button to allow the user to truncate stiles from the finished floor level, the Clearance from FFL field is displayed.
|
|
Click Next to display the Detailing for Rung Ladder part of the Create Defaults window. Refer to Rung Ladder Detailing for further information.
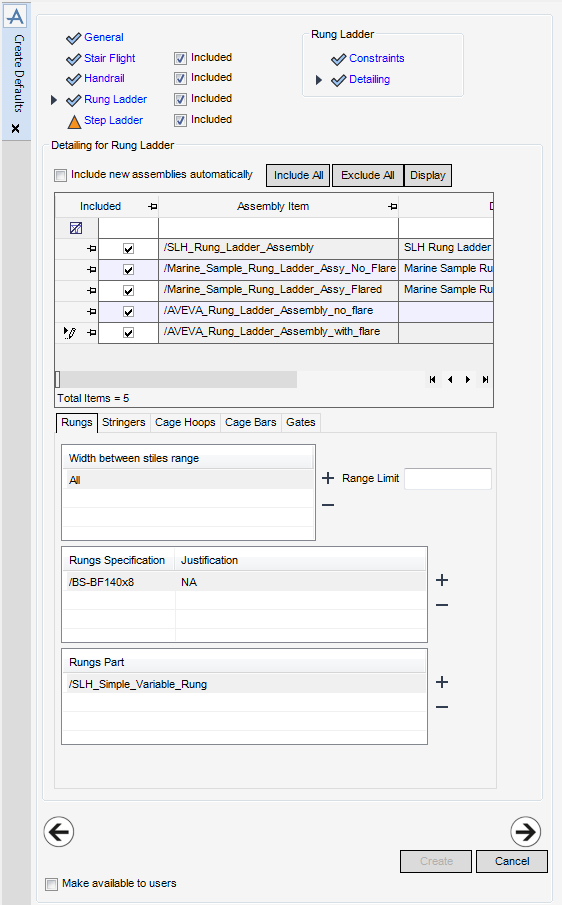
The Detailing for Rung Ladder part of the Create Defaults window allows the administrator to define the assemblies, parts and profiles allowed for the default.
The functionality available from the Detailing for Rung Ladder part of the Create Defaults window is identical to that available from the Detailing for Handrail part of the Create Defaults window. Refer to Handrail Detailing for further information.
The bottom of the Detailing for Rung Ladder part of the Create Defaults window allows the administrator to define the range limits, specifications and parts for the rung ladder assembly.
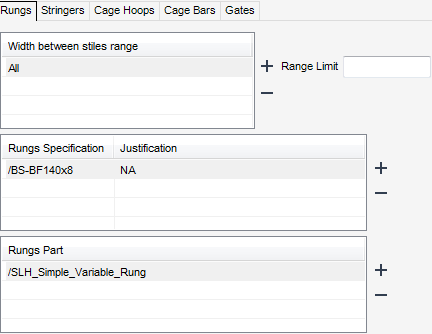
From the Detailing for Rung Ladder part of the Create Defaults window, select the Rungs tab to display the Width between stiles range list.
Profile Specifications can be added and removed from the list of defaults. The available Profile Specifications are determined by Range Limit values. Refer to Rung Ladder Range Limit for further information.
From the Detailing for Rung Ladder part of the Create Defaults window, select the Rungs tab to display the Rungs Specification list.
All of the functionality for the addition and removal of Rung Specifications, Stringer Specifications, Cage Hoop Specifications and Cage Bar Specifications is identical to that available from the Detailing for Handrail part of the Create Defaults window. Refer to Handrail Profile Specification for further information.
Parts of the rung ladder can be added and removed from the list of defaults. The available Parts are determined by Range Limit values. Refer to Rung Ladder Range Limit for further information.
From the Detailing for Rung Ladder part of the Create Defaults window, select the Rungs tab to display the Rungs Part list.
All of the functionality for the addition and removal of Rung Parts, and Gate Parts is identical to that available from the Detailing for Handrail part of the Create Defaults window. Refer to Handrail Part for further information.
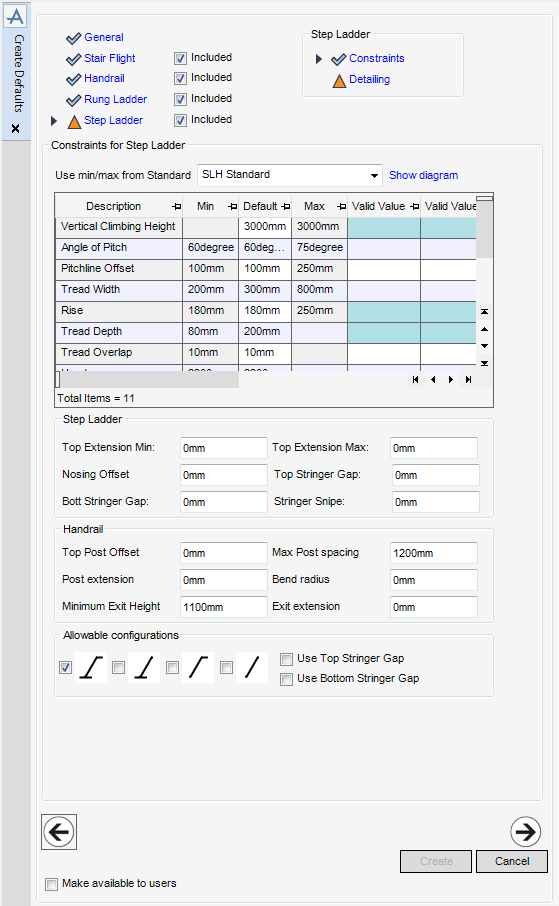
Click Next to display the Constraints for Step Ladder part of the Create Defaults window. Refer to Step Ladder Constraints for further information.
The functionality available from the Constraints for Step Ladder part of the Create Defaults window is identical to that available from the Constraints for Stair Flight part of the Create Defaults window. Refer to Stair Flight Constraints for further information.
The Step Ladder part of the Create Defaults window allows the administrator to define the defaults for the step ladder.
The Handrail part of the Create Defaults window allows the administrator to define the defaults for the handrail.
The Allowable configurations part of the Create Defaults window allows the administrator to define the available configurations for the step ladder.
|
Select the check box to allow a top stringer gap for to plane with no extensions and no extensions step ladders.
|
|
|
Select the check box to allow a bottom stringer gap for top extension and no extensions step ladders.
|
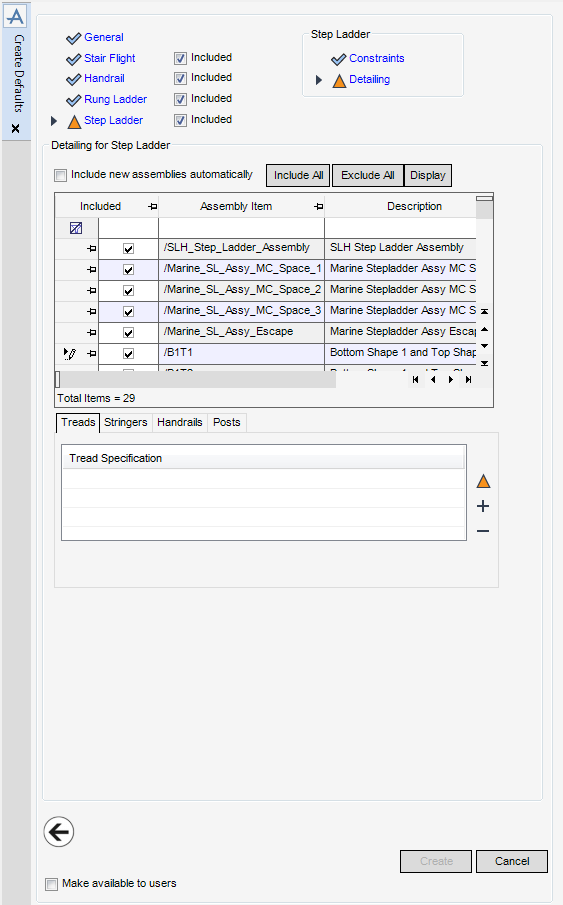
Click Next to display the Detailing for Step Ladder part of the Create Defaults window. Refer to Step Ladder Detailing for further information.
The Detailing for Step Ladder part of the Create Defaults window allows the administrator to define the assemblies and profile specifications allowed for the default.
The functionality available from the Detailing for Step Ladder part of the Create Defaults window is identical to that available from the Detailing for Handrail part of the Create Defaults window. Refer to Handrail Detailing for further information.
From the Detailing for Step Ladder part of the Create Defaults window, select the Treads tab to display the Tread Specification list.
|
Click to display the Tread Specification window.
|
||
The Tread Specification window allows the administrator to add a profile specification to the Tread Specification list.
Click Apply to add the profile specification to the Tread Specification list or click Cancel to discard any changes and close the Tread Specification window.
Click Create to create the defaults.
Select the Make available to users check box to allow the user to access the default.
|
Note:
|

