Supports
User Guide
Support Editor : Create : Create Framework Support Weld
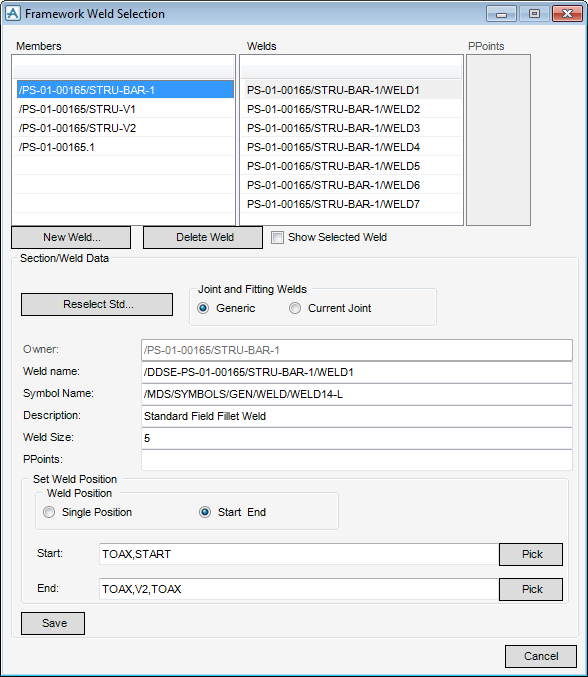
The top part of the Framework Weld Selection window displays a list of available framework members, welds and ppoints. You can create, modify, delete and show a weld.
|
Select a weld from the list to define the weld to be modified. By default, the Section Weld Data and Section Weld Position parts of the Framework Selection window are populated with the details of the currently selected weld.
|
|
|
Allows you to create a new weld for the currently selected support. Refer to Create New Weld for further information
|
|
|
A confirm window displays asking you to OK the deletion. Click Yes to delete the weld.
|
|
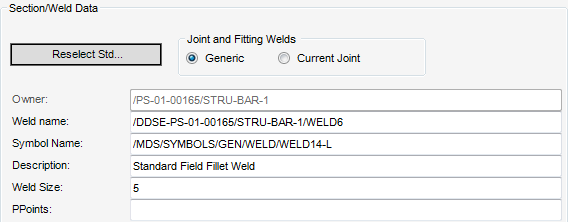
The Section/Weld Data part of the Framework Weld Selection window allows you to reselect a weld and define the weld specification.
|
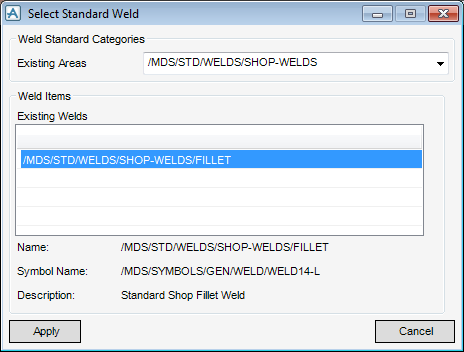
Click to display the Select Standard Weld window. The functionality of the Select Standard Weld window is explained as part of the process to create a weld. Refer to Create New Weld for further information.
|
|
|
Alternatively click Pick to define the weld start point using a cursor pick in the 3D view. Refer to Weld Start/End Position for further information.
|
|
|
Alternatively click Pick to define the weld end point using a cursor pick in the 3D view. Refer to Weld Start/End Position for further information.
|
Click Save to apply the weld to the framework support or Cancel to discard any changes and close the Framework Weld Selection window.
Select a weld type from the Existing Areas drop-down list. By default, the Existing Welds list is populated with the welds that are available.
Select a weld from the Existing Welds list. By default, the Supports application displays the name, symbol name and description for the currently selected weld.
Click Apply to populate the Framework Weld Selection window with the weld details or Cancel to discard any changes and close the Select Standard Weld window.
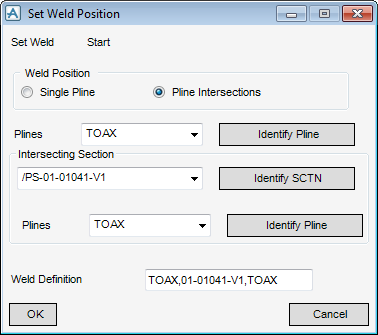
The top of the Set Weld Position window displays Start or End, indicating the currently selected weld position.
|
Select a PKEY from the Plines drop down list. You can then click Identify Pline to select a Pline using a cursor pick in the 3D view.
You are prompted to Identify PLIN
|
|
|
Select an intersection from the Intersecting Section drop down list. You can then click Identify GENSEC to select a GENSEC using a cursor pick in the 3D view.
You are prompted to Identify element
|
|
Click OK to apply the weld position or Cancel to discard any changes and close the Set Weld Position window.


