Common Functionality
Hole Management System : Hole Management Utility
The Hole Management Utility which creates and manages penetrations is available only in the Pipework and HVAC Designer applications, on the Piping or HVAC tab, in the Penetrate group, click Pipe, select Penetration Utility from the drop-down list to display the Managed Hole Utility window.
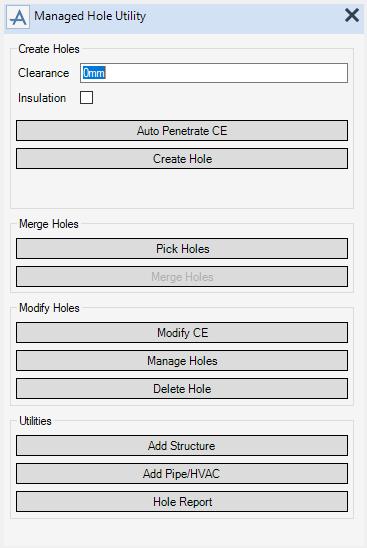
In the Clearance text field, enter how much clearance to apply to the penetrating item. The clearance is not applied if the software detects a clash with a pipework or HVAC component that has hole size properties.
|
Note:
|
Select the Insulation check box to apply insulation to the penetrating item.

Click Auto Penetrate CE to automatically create holes in the selected Current Element.
The clash analysis by the software can take a few minutes, a progress message and bar is displayed. Once the analysis has taken place, the Hole Association Manager window displays the details of the newly created virtual holes. Refer to Hole Management for further information.
|
Note:
|
The Hole Association Manager window is not displayed if no virtual holes are created.
|
If more than 30 virtual holes have been created a confirmation message to display the Hole Association Manager window is displayed.
To create holes individually click Create Hole, you are prompted to pick a panel, pipe or HVAC branch that penetrates the selected panel, section or wall element. The creation of the hole is identical to the automatic hole creation.
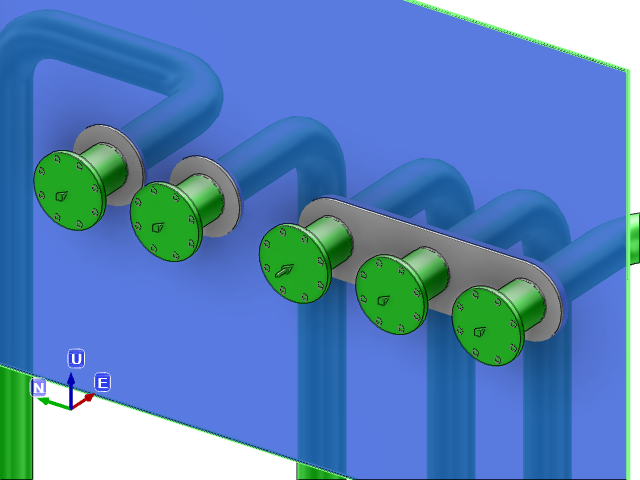
To merge holes, from the Merge Holes part of the Managed Hole Utility window, click Pick Holes, you are prompted to pick a Managed Hole fitting to be combined into a single merged hole.
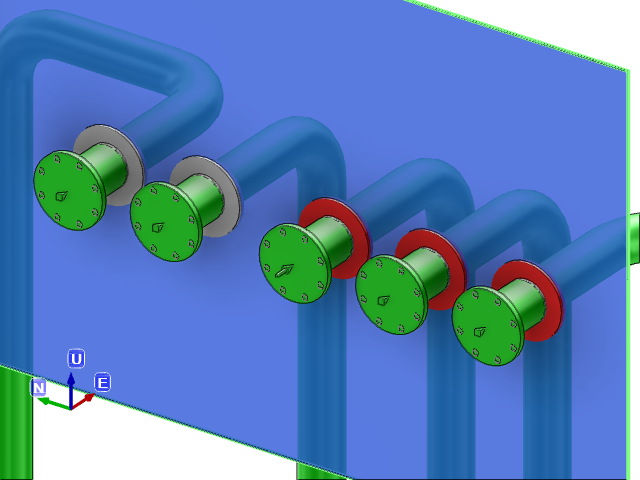
Click Merge Holes, the software creates a merged hole containing the selected penetrations. To change the shape of the merged hole, refer to Modify Holes for further information.
To modify a created hole, from the Modify Holes part of the Management Hole Utility window, click Modify CE to display the Hole Management Definition window, modify the created hole as required, the Free Hole Boundary Editor can also be started from this window.
Click Manage Holes to display the Hole Association Manager window. Refer to Hole Management for further information.
All panels within the volume of the selected pipe or HVAC can be added to the 3D view. To do this, from the Utilities part of the Managed Hole Utility window, click Add Structure.
To view all pipe or HVAC elements within the volume of the selected structural panels, from the Utilities part of the Managed Hole Utility window, click Add Pipe/HVAC.
To generate and define a report on selected holes, click Hole Report. The report can then be printed or exported to Excel.
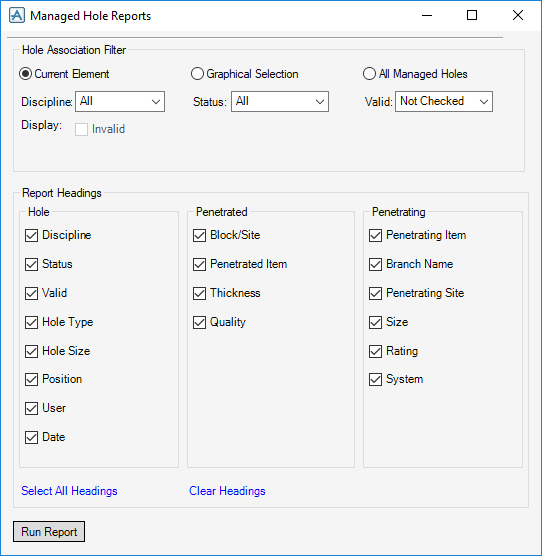
The Hole Association Filter pane searches for Managed Holes and displays the search results in the Hole Report. The filter criteria specify which Managed Holes is selected:
|
In the Report Headings pane select headings using the check boxes that are required on the report from the three categories, Hole, Penetrated structural item and Penetrating items.
The Managed Hole Report window displays the report generated by the specified selection criteria and report headings.
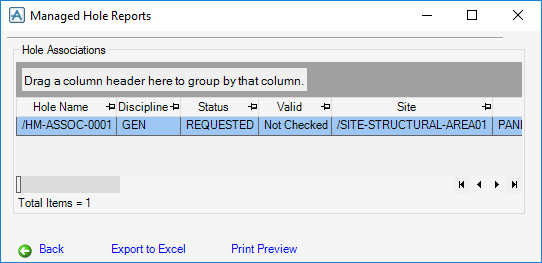
Use the grid column functions to sort and filter columns before printing the report or exporting it to Excel. Select Print Preview to view the report or select Export to Excel to export the report to Excel.
Right-click the Hole Associations list to display the following pop-up menu: