Piping
Model Pipe : Modify
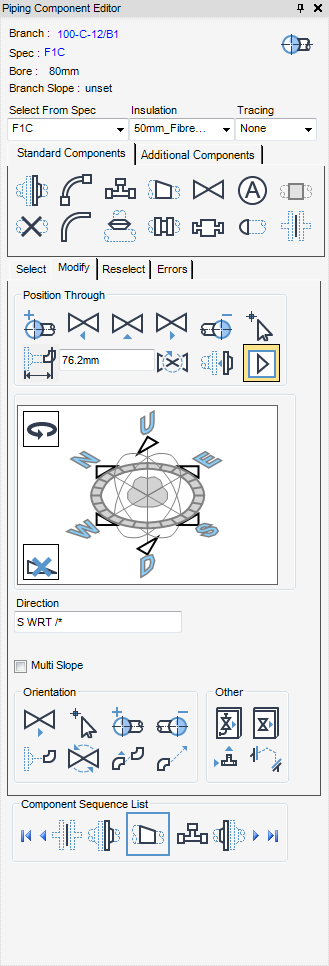
The Pipe Editor: Modify Pipe windows displays by default when a new pipe element is created. It is a dual purpose window which allows the definition of branch attributes and/or connect the branch head and branch tail or modify an existing branch.
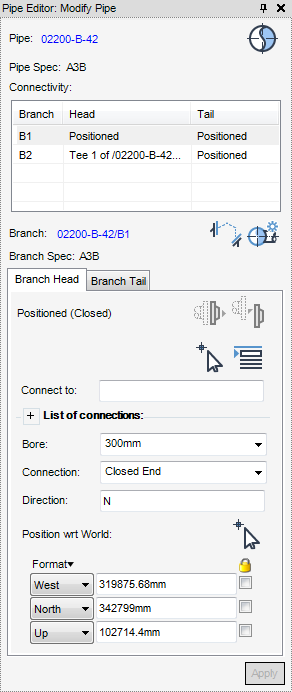
To modify head and tail details, connections, specifications is identical to that described in Branch Element, refer to Branch Element for further information.
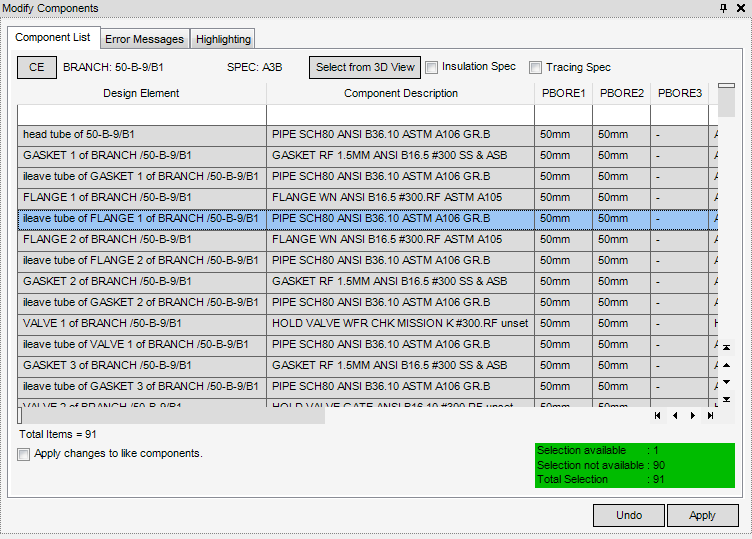
Select another branch in the design hierarchy, then click CE to populate the Modify Components window with its attributes.
To highlight selected components within the pipe or branch, click to highlight the components in the 3D graphical view, then click Select from 3D View. The selected components are highlighted in the Modify Components window.
The Insulation Specification can be added to the Modify Components window, click to check the Insulation Spec check box, the insulation specification displays in a separate column in the Modify Components window.
The Tracing Specification can be added to the Modify Components window, click to check the Tracing Spec check box, the tracing specification displays in a separate column in the Modify Components window.
Apply changes to like components check box - checking applies one component change to all like instances in the Component List.
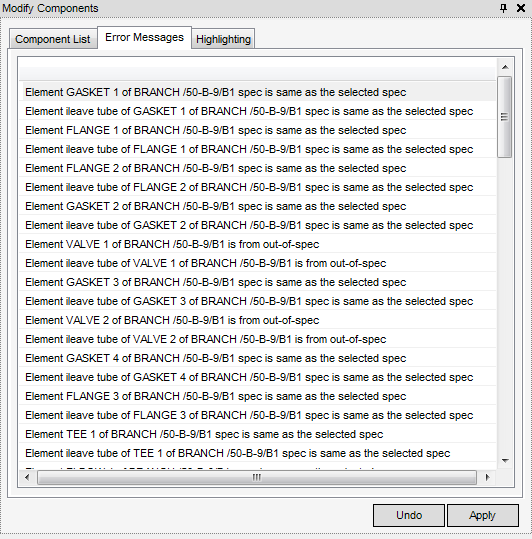
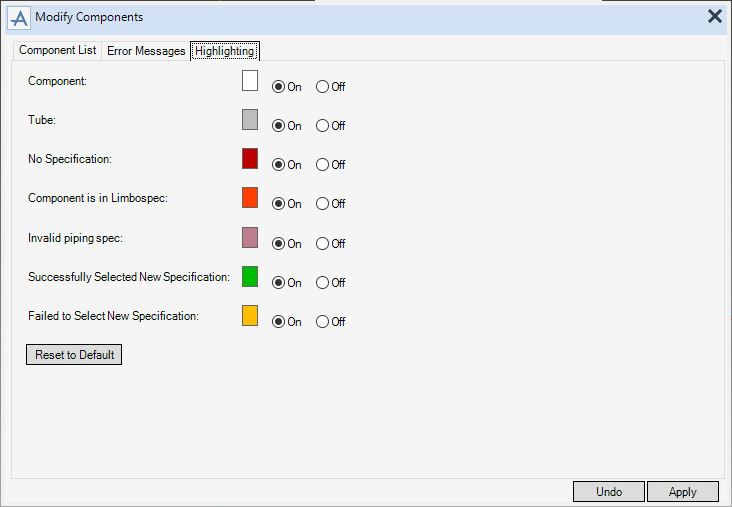
With the Error Messages tab selected, the Modify Components window lists the components selected for modification which produce an error in the selection process. When the selection process takes place, each selected item is scanned to find an equivalent in the new specification. Where an item cannot be found, an error is indicated with a description in the error list.
With the Highlighting tab selected, define the colour's used in the component list when selecting components from the list. Once a highlighting colour scheme has been defined this is restored upon re-entry into the discipline.
|
Note:
|
The name of this window changes depending on which of the colours is selected on the Modify Components window. For example:
|
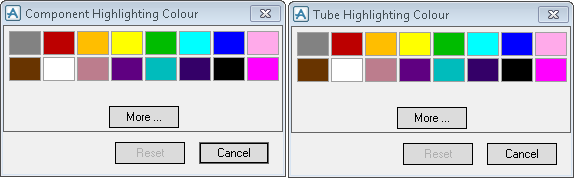
By default, the Highlighting Colour window is displayed with a limited selection of colours, to extend the colour selection, click More.
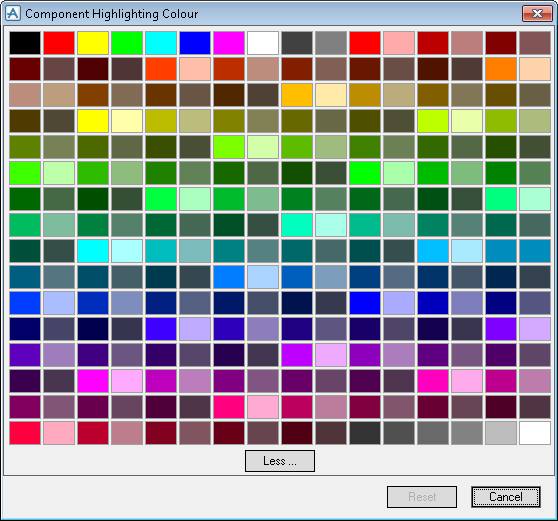
Select the required highlighting colour, then click Reset, once set the colour palette changes to that colour and the highlighting is changed in the component list.
Specific highlighting can also be turned On and Off using the radio buttons next to each highlighting colour palette.
|
Note:
|
To display the Modification Options drop-down list, right-click over a highlighted line(s) in the Modify Component window.
Use the Select Piping Spec window, to modify the specification of selected components in the Modify Components window.
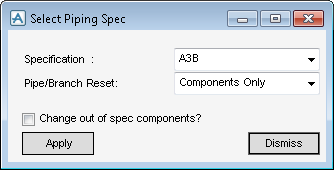
From the Specification drop-down list, select a new specification.
Click to select the Apply changes to out of spec check box, this forces the selection process to look at all components regardless of their original specification.
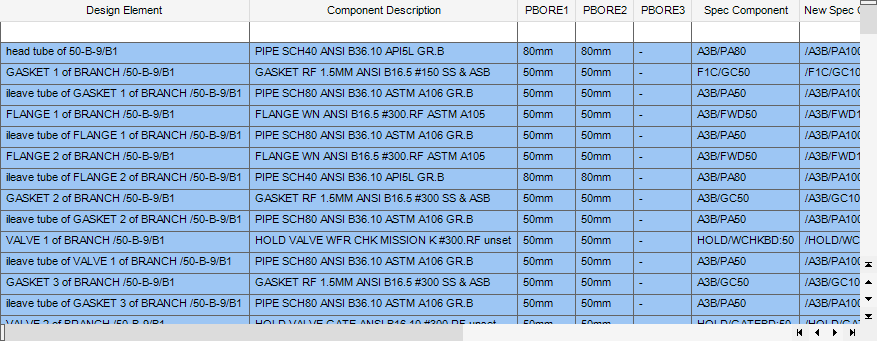
Click Apply to start the search process to find equivalent components in the selected specification and close the Select Piping Spec window. The Component List is refreshed to show the new components.
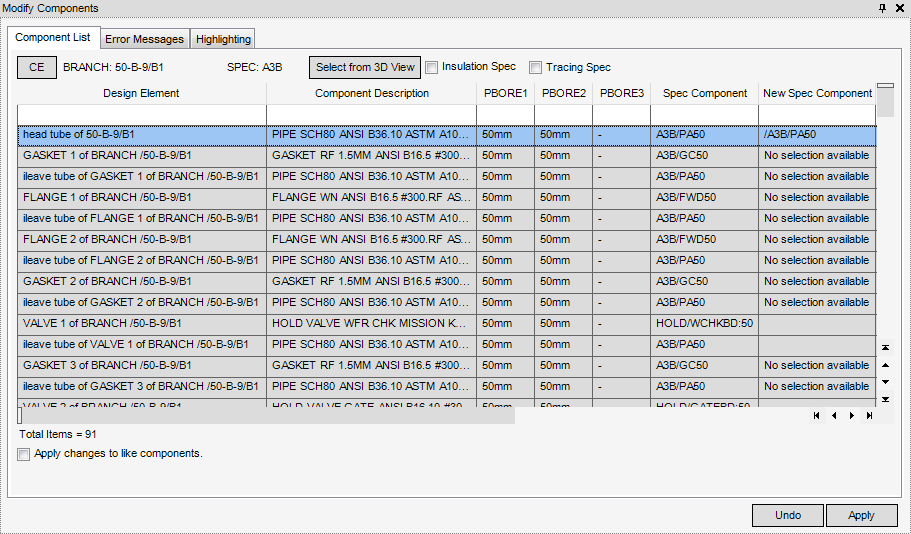
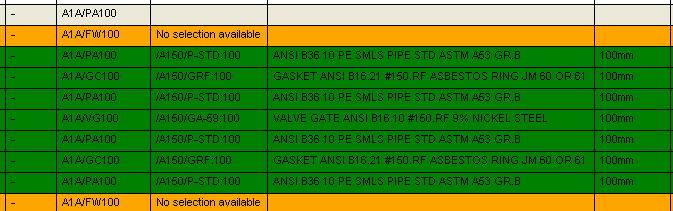
Any items which cannot be found in the new specification are listed as having ‘No selection available’ and are not changed if the other changes are applied.
In the component list the components that are selected are highlighted appropriately. The components with a selection available and with no selection available are highlighted using the colour scheme which is defined in the highlighting tab, refer to Select Component for further information.
If the results are satisfactory, click Apply, to accept the changes. Select the Error Messages tab to display a list showing any anomalies and these can the be corrected by inserting or deleting reducers.
Click Undo to discard any changes and return the attributes to the default, or Dismiss to close the Component Changes window.
Use the Select Bore window, to modify the bore of selected components in the Modify Components window.
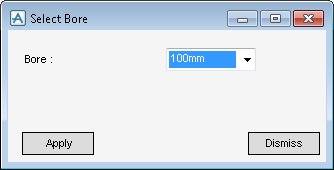
From the Bore: drop-down list, select a new bore, click Apply to start the search process to find equivalent components in the selected specification and close the Select Bore window. The Component List is refreshed to show the new components.
In the component list the selected components are highlighted appropriately. The components with a selection available and with no selection available are highlighted using the colour scheme which is defined in the highlighting tab, refer to Select Component for further information.
Use the Select Insulation Spec window, to modify the insulation specification of selected components in the Modify Components window.

From the Insulation spec: drop-down list, click Apply to start the search process to find equivalent components in the selected specification and close the Select Insulation Spec window. The Component List is refreshed to show the new components.
Use the Select Tracing Spec window, to modify the tracing specification of selected components in the Modify Components window.
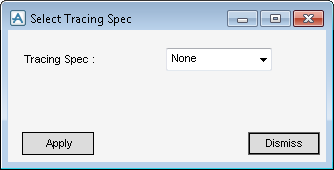
From the Tracing Spec: drop-down list, click Apply to start the search process to find equivalent components in the selected specification and close the Select Tracing Spec window. The Component List is refreshed to show the new components.
For components where no selection is available, opt to choose the component. Right-click over the component in the display list in the Modify Component window and select Select Component to display the CHOOSE OPTION window.
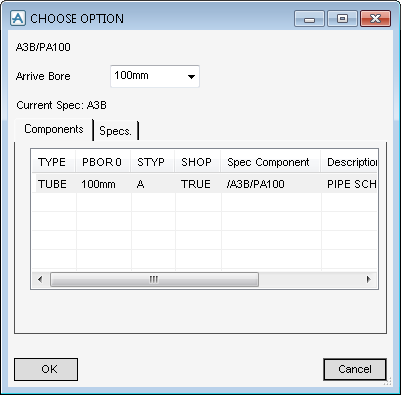
The Specs tab is selected first to set the new specification. The Components tab is then selected so that an equivalent item can be chosen from a scrollable list of suitable components.
Click OK to add the selected equivalent component to the Component List on the Modify Components window. Once the selection is complete, click Apply to change the components for ones complying with the new specification.
If the changes are unacceptable, click Undo to revert back to the original design.
If the above process results in some items having no selection available, opt to choose the component using the same method as in Pipe Component Bore and Specification.
Select to check the Apply changes to like components check box. With this option applied component changes are automatically applied to all elements in the list that have the same type as the one being changed via the above process.
Use to select this option to select all the components in the Modify Components window.
Use to select this option to remove one or all new specifications added to the Modify Components window.