Structural Design
User Guide
SDNF Export/Import : Import from SDNF
To import a steel structure from a SDNF file, on the Sections, Plates or Stairs Ladders Handrails tab, in the SDNF group, click Import to display the Import window.
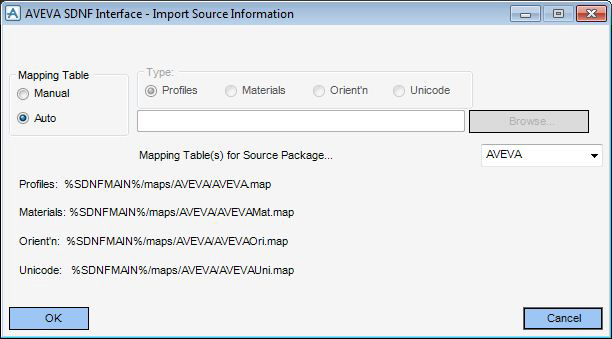
Clicking Source Information displays the Import Source Information window which contains information about the 3D steel detailing package which the SDNF file is being transferred from.

The interface requires at least two external mapping tables for each Source Package to check that the design can accept the data. It also may use the Profile Orientation and/or the Unicode mapping table if necessary. The mapping tables are for the Steel Profiles, Materials, Unicode text string and for mapping the Profile orientations between the Neutral File and Design. The section Customise SDNF explains how the user can arrange these files on the file system and what format they are to be. The interface also needs to know where the external mapping files are located on the users computer network. For this internal mapping tables are required. Refer to Customise SDNF which explains how the user can configure the interface to let it know where all the files are located.
The current file settings are indicated on this window. The user will notice that changing the Source Package by using the Source Package selector button on the right hand side of the window may cause the text to change giving the full path names of the respective files.
|
Note:
|
Do not be concerned that the path name may be truncated by the insertion of the ellipsis (…): it is modified only for display purposes on the window.
|
The system also checks that these files are compatible with the Source Package by checking the identification line at the top of each mapping table. Refer to Internal Mapping Files for details about the format of these mapping files.
The two main options are Auto and Manual which are activated by selecting the appropriate radio button on the left hand side of the window.
The Auto option causes the interface to select automatically the mapping tables for the Source Package indicated by the Source Package selector gadget on the right hand side of the window, according to the system configuration files. When the user comes to execute the Import process, the Auto flag will cause the correct mapping files to be used based on the Issue field in the Input file header. Refer to Technical Information for details about the format of the header of an SDNF file.
The Manual option activates other buttons, which are initially greyed out for the Auto option. Selecting this option changes the window to be similar to below.

The user can select the file type using the Profiles/Materials/Orient'n or Unicode radio buttons above the text data entry field and enter the full path name of the file in the data entry area. The user can also include system environment variables in the path name as long as they are in the proper AVEVA E3D™ format, e.g. %ENVVAR% being the AVEVA E3D™ representation of the ENVVAR environment variable.
The user can either choose by hand which mapping file to use by entering its name in the text data entry field, or by using the Browse option to bring up a File Browser. Use this browser to search for the relevant mapping file.
Once all the correct data has been entered on the Source Information window, click OK and it will update the interface variables. Clicking CANCEL closes the window, leaving the original interface variables unchanged.
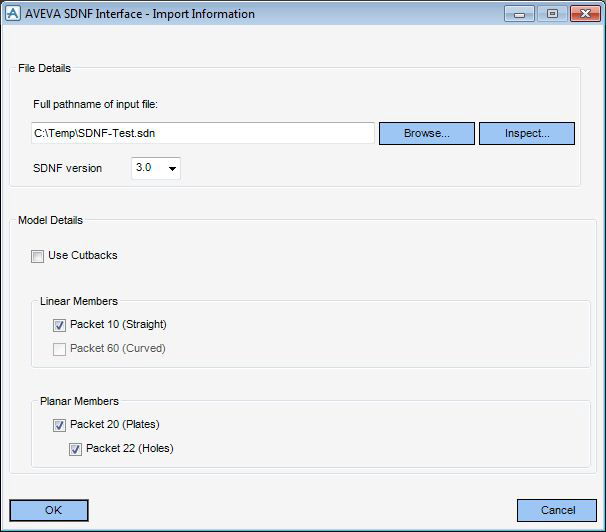
Clicking Import Information displays the Import Information window which contains information about the import process.
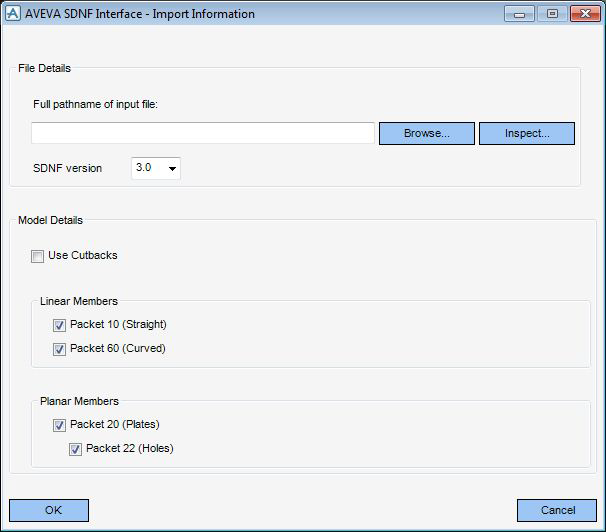
The user either types the full folder path name of the input file, or clicks Browse to bring up a File Browser. The use of this window is as described in the section above. The interface tests to see if the file exists and if it does not the user will be warned. As well as testing for the existence of the file, it is also tested for being a valid SDNF file by inspection of its header details.
In addition to the basic check for the input file being in SDNF format, the initial comments are scanned for the presence of a data table, which may list the Packets to follow and the number of items to be transferred in each one. If this table is present, it will be analysed and the buttons determining which Packets may be Imported will be activated or inactivated accordingly. This table is described in Technical Information.
On entering the name of the file, if it is from a recognised SDNF Source Package and if Auto mode is set on the Source Information window, the Profile and Material mapping files will be selected automatically and indicated in the Source Information window, if it is currently shown, along with the updated Source Package selector gadget.
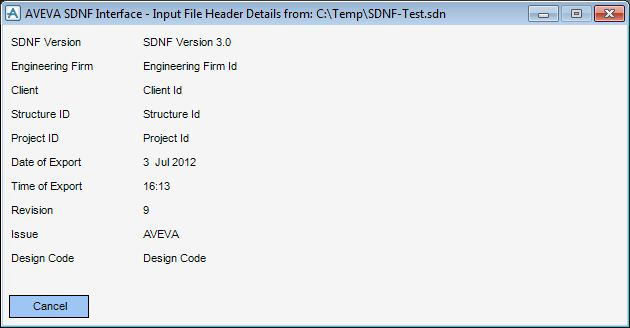
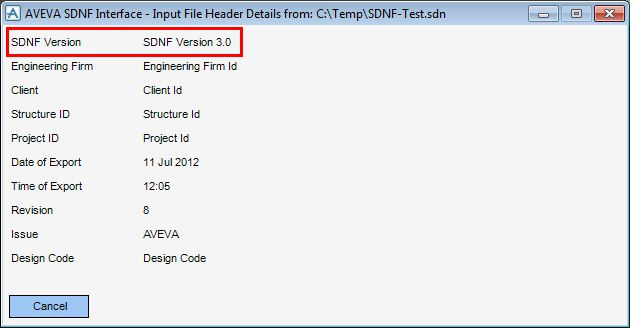
The user can view the SDNF Header (Packet 00) of the chosen input file by clicking Inspect, which displays the Input File Header Details window with which the user can determine whether the file is the correct one to Import.
Using the toggles on the Import Information window, if they are active, the user can select whether to import Packet 10 (Linear Members), Packet 60 (Curved Members) and/or Packet 20 (Plates) or Packet 22 (Holes).
|
Note:
|
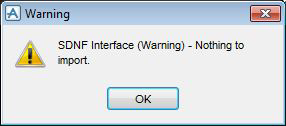
The user cannot import Packet 40 (Connection Details) with this version of the interface. The interface will check that the user is attempting to Import something if both options are unchecked!
|
Once all the correct data has been entered on the Import Information window, click OK and the interface variables will be updates. Clicking CANCEL closes the window, leaving the original interface variables unchanged.
Auto-detection of SDNF Formats
The user can set up the default SDNF format version in the SDNFUserData.pmlfnc file, the default version of which can be found in the SDNF\dflts\user\SDNFPML\functions folder in the user data folder. This is the !!SDNFSDNFVersion variable which must be precisely one of the 2 suggested text strings.
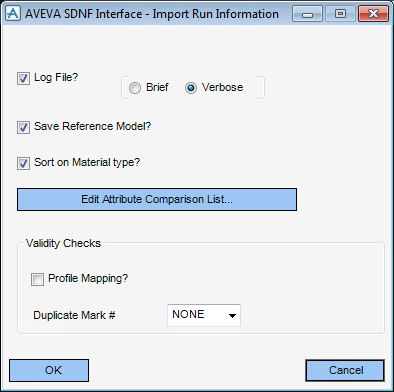
Clicking Run Information displays the Import Run Information window which allows the user to view the Log File after the import process is complete by clicking the Log File? check box.
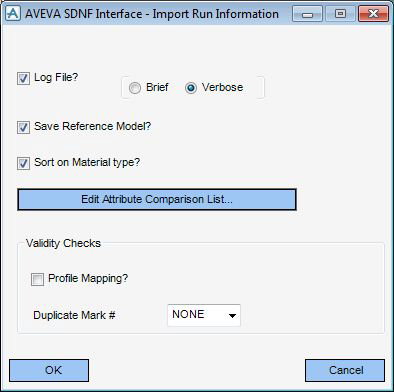
Clicking either the Brief or Verbose radio buttons the user can choose which format messages are displayed.
As part of the Import process a reference model is constructed against which comparisons will be made. Save Reference Model allows the user to keep this. Otherwise it will be deleted on completion of the Import process.
After the Import merging process has been performed, the user can sort all new items into FRMW (Framework) elements according to their Material type. This option is selected by clicking the Sort on Material Type option.
During the Import process, comparisons are made for Linear and Curved Members and Plates between the existing model data and the imported model data. The default AVEVA SDNF system configuration compares all the relevant data entries transferred in the SDNF file between the models. However, the user can select which attributes may be ignored by the comparison process by clicking Edit Attribute Comparison List.
Profile Mapping? enables the user to see if the incoming Linear Member Profile specifications will be successfully mapped between systems. This is a relatively fast transaction as the SDNF file is just passed through the external program without any subsequent import or comparison in AVEVA E3D™. the user will then be able to see the log file produced and take appropriate action.
There is a risk in the external detailing package that entity mark numbers may be duplicated. The Duplicate Mark numbers selector gadget enables the user to check for duplicate numbers in the incoming model. There are three options: NONE, NEW and GLOBAL. NONE deactivates the gadget and no checks are made. The import process just goes through unhindered. The NEW option allows the user to check only the new imported items for duplicate mark numbers, while the GLOBAL option enables the user to search all the available Design databases for duplicate numbers. Obviously these searches may involve a certain amount of time, but for the sake of validity, they would be worth using.
Once all the correct data has been entered on the Run Information window, click OK and the interface variables will be updated. Clicking CANCEL closes the window, leaving the original interface variables unchanged
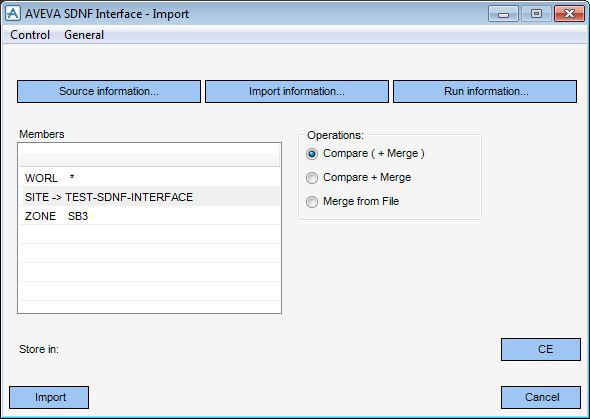
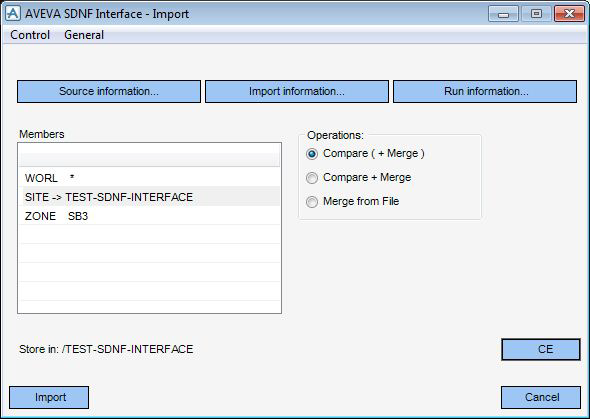
On the AVEVA SDNF - Import window the Members list can be used to navigate around the database hierarchy.
The user must state where the Imported model is to be located. This must be a SITE, ZONE or STRU element. Using the Members list, navigate round the database to the correct storage location and click Store in: CE. The window text indicates where the Imported model will reside. If there is not enough space on the window, the SITE's reference number is output rather than its name.
The Import process is essentially a three phase operation. First a reference model is built which is then compared with the original model identified during the Store in: CE operation. Then, if required, the changes, additions and deletions encountered in the comparison phase are transferred to the actual model. Thus, using the Operations toggles, the user can control how the Import process is to proceed.
|
Note:
|
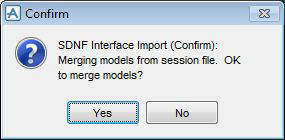
Compare ( + Merge ) will import the model and compare the reference model with the location chosen to be the storage area. At this point the user will be asked whether to merge the models. Clicking YES will continue with the merge process and complete the Import.
Compare + Merge just goes through the complete Import process - i.e. the import, comparison and merging are all completed without any interaction with the user. This is only to be performed if the user is absolutely sure that they will get the desired result.
Merge from File takes a merge command file produced during the current Design session only and imports it directly into the model. The reference model must not have been deleted beforehand. Otherwise, the user may lose any elements added to the model by the external detailing package.
The Control item on the Import window has just one option, Exit, which will remove all forms and menus and global variables associated with the interface.
Import executes the Import process. As it proceeds the user is kept informed of the progress.
The Control item on the Import window has just two options; Re-initialise and Exit. If the user changes any mapping files or any other variables, Re-initialise will reload these files to save the user having to rebuild the whole User Interface from scratch. The Exit command will remove all forms and menus and global variables associated with the interface.
The General item has one option, Highlight which displays the Highlighter window enabling the user to identify new, changed and deleted items in the model.
After clicking OK the fields in the window are checked for validity:
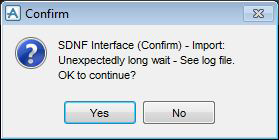
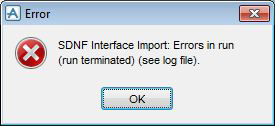
Click YES and the interface will wait for another period of time. Clicking NO will cause the interface to stop where it is. Finally the system will indicate its completion, whether successful or not. This completion message should be read in conjunction with the log file, if any errors are indicated.

Clicking YES will cause the interface to continue with the Merge process.
Click NO and the Import process will skip the Merging, but the user will then be given a chance to store the Merging commands in a file for use later on only in the current AVEVA E3D™ session. The user cannot use a file from a previous SDNF session as the Import data may be incorrect.

The user can save the Merge command file and then be prompted whether to see the Import log file. This Merge command file may then be used in the Merge from File option on the AVEVA SDNF - Import window. This later option needs the reference model from this run to be kept. Therefore, the user does not have the option below.
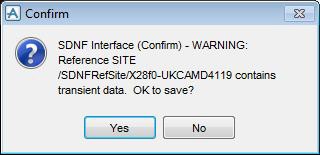
If the user has Merged the models, they will then be asked if they want to keep the reference model, verifying the option selected on the Run Information window.

Finally, the user will then be asked whether to view the log file, if they have chosen that option on the Run Information window.
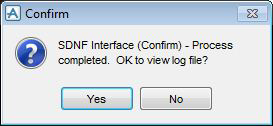
If the user wants to inspect the log file, they can then save it with the File > Save as option in the SDNF File Viewer window which will bring up a File Browser, or by clicking Save as to the suggested filename. If the file exists, the user will be asked whether they want to overwrite it. The log file window can then be closed by clicking Cancel.
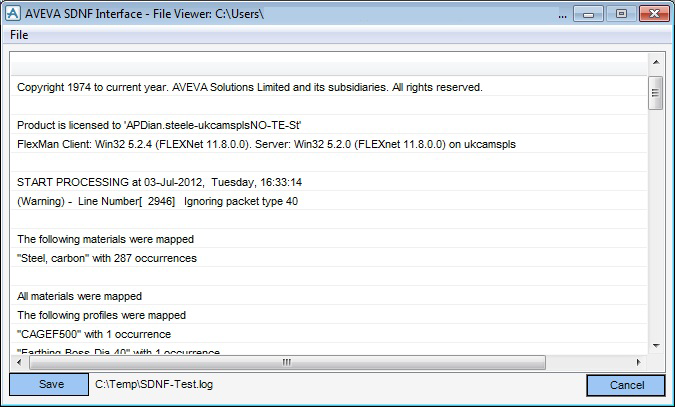
If the user has chosen Brief mode on the Run Information window for displaying the log file, the window displaying the log file will filter out all Warning messages, leaving only the Error messages. To save the log file, however, all messages will be retained in the file.
|
Something strange here. The Design macro file has not been generated or it has been deleted, or is not found in the expected folder. Are there issues regarding access rights to the %AVEVA_DESIGN_WORK% folder?
|
|
There are three conditions the AVEVA SDNF looks for:
|
•
|
|
•
|

The Comparison process allows any potential changes, additions and deletions to the original model to be detected and enhanced in a 3D Volume View window, if there is one present and if the items are in the current Drawlist.
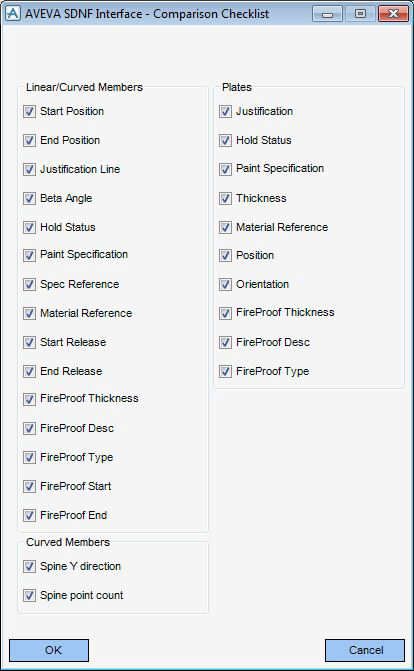
As for both Linear Members and Plates the user can select which attributes are significant for Comparison. This is performed using the Comparison Checklist window which is a child of the Import Run Information window. By default, all the attributes transferred through the SDNF file are compared.
The log file messages recording any differences are of two formats: in Brief mode the results are presented on one line; in Verbose mode the user is told what the old value was and the new value is so that they can see how the model has been changed. Refer to Brief Format for details about the brief log file format.
The log file messages recording any differences are of two formats: in Brief mode the results are presented on one line; in Verbose mode the user is told what the old value was and the new value is so that they can see how the model has been changed. Refer to Brief Format for details about the brief log file format.
See the diagram in Comparison and Merging Processes illustrating the route by which information is transferred from the Import, through the Comparison and on to the Merging processes.
The AVEVA SDNF interface manages the Comparison and Merging of imported models so that other important engineering data is not lost or overwritten. However, other data, including connectivity may be lost.
The user can separate the Comparison and Merging processes, so that they are able to view the log file in between operations. If the user chooses the Merge from File option on the main SDNF Import window, the Comparison process is deemed to have been completed and so all that remains to be done is the actual Merging. This is why the reference model for the current session must still be available. The user will be prompted for confirmation.
After the main model Merging has been completed, if the user has chosen the Sort on Material Type option on the Import window, any new items will be sorted into FRMW groups according to their material type as specified by the :SDNFMGRADE attribute.
For example, a new STRU may be created with the name of /SDNF-NEW-DEMO-SYSTEM/A.1 under the container element as specified in the Store in: field on the SDNF Import window. The components of this name are as follows:
For example, a new STRU may be created with the name of /SDNF-OLD-DEMO-SYSTEM/A.1 under the special SITE /SDNF-OLD-DEMO-SYSTEM. The components of this name are as follows:
As has been described in Comparison and Merging Processes there are two validation checks the user can perform prior to the full import and merging of models.
The first option is for profile mapping. The Profile Mapping? Option on the Run Information window turns this on. The Import process initialises normally and calls the external program to process the incoming SDNF file. In so doing it checks for a complete mapping of the profiles in the mapping tables. A log file is produced. No further Import actions are undertaken with this option.
The options for this check are NEW and GLOBAL. NONE turns the facility off. NEW checks among all this run's imported members contained in the reference model for duplicate mark numbers, while GLOBAL checks the whole structural database, both imported and existing elements. These can be quite slow options as the reference model must be created and compared anyway.
See Sample Validity Check Log File for a sample log file.
The user can display an SDNF Highlighter window from either the Import or Export windows by the General > Highlight menu bar option. This window allows the user to identify in a graphical window whatever they want, either according to Import date, or by Transfer/Revision number combinations. The Select by toggle switches the window into the appropriate mode. Both these options work from the start element selected and will indicate only those items that are in the drawlist.
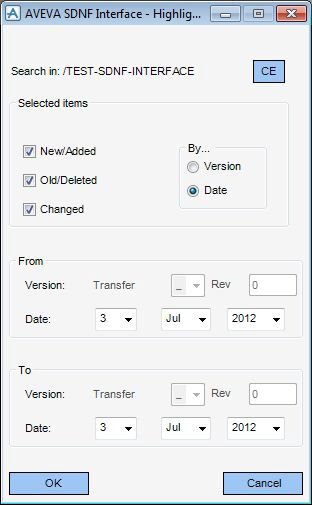
In the Selected items box, the user can select any combination of Added, Changed, or Deleted Items for identification, according to the date range described below.
By selecting the inclusive dates defining the limits of the range using the From and To date selector gadgets the user can locate on the screen those items in the current drawlist which have been changed, added or deleted.
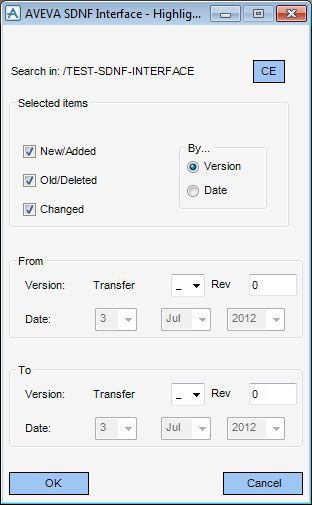
By selecting the versions defining the limits of the range using the From and To version selector gadgets the user can identify on the screen those items in the current drawlist which have been changed, added or deleted.
The following test can be performed after installing the AVEVA SDNF product to make sure that the installation is complete and correct. This test must follow immediately the Export test described in Testing AVEVA SDNF Export. The user will find all the required testing material below the sub-folder SDNF\test\results\export in the user data folder.
Take the SDNF file exported in the export test and modify it in a text editor. While referring to the description of the SDNF format, modify a mark number, a material, some positions etc. Comparing the files SDNF-Test.sdn in the SDNF\test\results\export and the SDNF\test\results\import folders, which is found in the user data area, gives the user some examples of edits that can be tested. Make sure that the resultant SDNF file is valid SDNF. Save the modified file under a different name, or in a different folder.
When that is finished, bring the SITE into view by adjusting the view limits in the 3D Volume View window.
Change the view in that window by selecting the 3D VIEW tab, in the Manipulate group, select Isometric and select Iso 3 from the list.
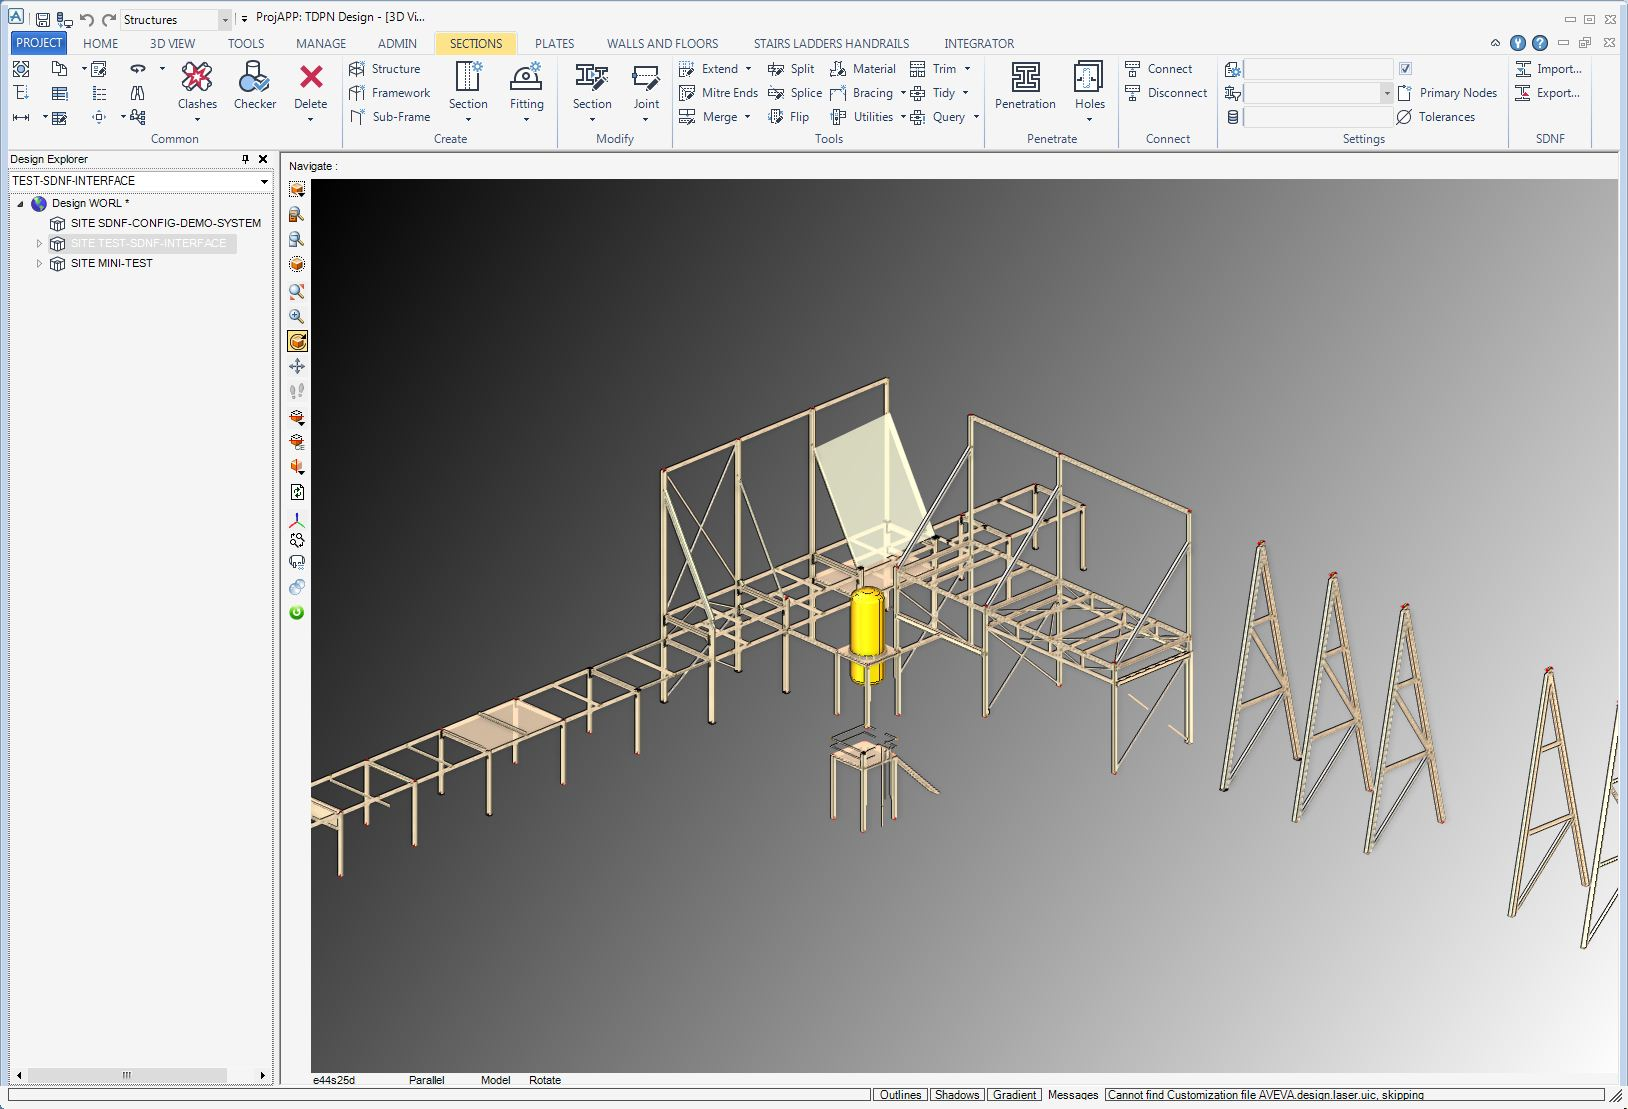
On any sub tab page of the Structural discipline ribbon bar, select the SDNF Import option to display AVEVA SDNF - Import window.
Click Source information on the AVEVA SDNF - Import window to display the Source Information window.
Select the Auto mode toggle option and select "AVEVA" from the list of Source Packages on the Source Package selector gadget on the right hand side of the window. This causes the system to automatically detect the Source Package's Profile mapping table and Material mapping table.
Click Import information on the AVEVA SDNF - Import window to display the Import Information window.
Select the Save Reference Model? option in order to safe any reference model.
Finally, the user needs to sort any new members added to the model by material type. Select the Sort on Material type? option.
If the user wants to perform a validity check on the incoming data prior to importing it, refer to Performing a Validity Check.
Select the SITE into which the SDNF file is to be imported. Select SITE /TEST-SDNF-INTERFACE in the form's Members list and click CE by Store in:.
A two stage import is then performed. Comparing the models first before Merging. So, select the Compare (+ Merge) radio button.
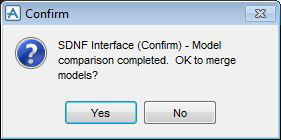
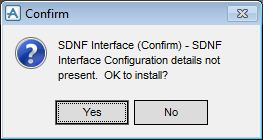
After the first stage of Import has take place, the user will be asked by a Prompt window with the following message. "SDNF (Confirm) - Model comparison completed. OK to merge models?". Click YES to continue with the Merge process.
The user will then be asked if they want to inspect the log file. If they do, they can save it with the File > Save as option in the SDNF File Viewer window to bring up a File Browser, or by clicking Save as to the suggested filename. The log file window can be closed by the Cancel.
The user can then Export the merged model to a file SDNF-Test-Mrg.sdn and compare the new SDNF file with the one provided in the test/results/import folder.
If the user wants to perform a validity check on the incoming data before they actually import it bring up the Run Information window from the main Import window. Select GLOBAL for the Duplicate Mark Number search criterion. Click OK and fill in all the details on the main window as described above.
Once all the details are correct on the Import window, click OK. The validation process will be performed and in due course the user will be prompted to view the log file. Save the log file as SDNF-Test-Vfy.log and compare it with the results supplied in the test/results/import folder.