Structural Design
User Guide
Create Wall Fittings : Create Floor Fittings
From the model explorer or 3D view, select the floor/screed where the fittings are to be positioned as the CE. On the WALLS AND FLOORS tab, from the Create group, select Floor Fitting from the drop-down list. The Floor Fittings window is displayed.
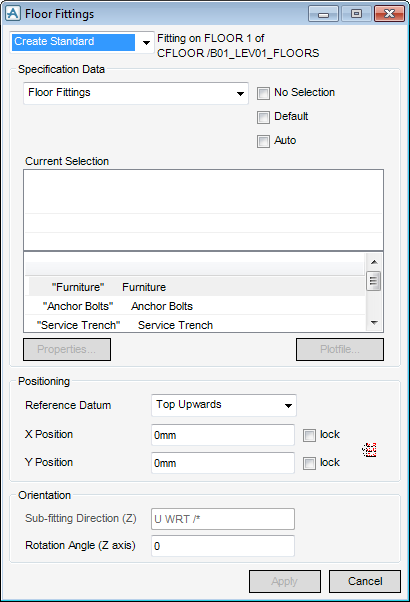
The functionality available from the Floor Fittings window is identically to that available from Wall Fittings (for more information on Wall Fittings, refer to Create Wall Fittings) with these exception:
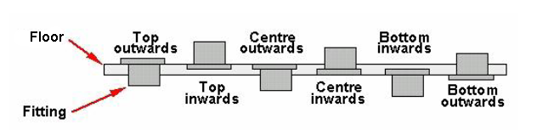
From the Positioning pane of the Floor Fittings window, select the reference datum from the available list.
The location of the fitting on the floor is set by the input of the X Position and Y position. These two dimensions are measured from the origin of the owning wall indicated by the aid line in the graphic display.
Select Position fitting to display the Positioning Control toolbar, the user is prompted to ‘Position Floor Fitting (Snap) Snap’ to position the fitting directly on the floor.
Click Apply to insert the floor fitting or click Cancel to discard any information and close the Floor Fittings window.