DRAW
User Guide
Add Annotation : Leader Line Gaps : Leader Line Gap with Specified Radius
To add gaps with a specified radius to the leader lines of the currently selected labels, on the Label Tools Format tab, in the Gaps group, click Gap.
Alternatively, on the Annotate tab, in the Annotate group, click Gap. The user is prompted to Select objects to apply gaps to, click to identify the required labels and press Enter.
The user is prompted to Specify first point or <Finish>
The user is then prompted to Specify centre or <Finish>
Input values in the dimension fields and press Enter or click to identify the centre point of the diameter of a circle to define the gap.
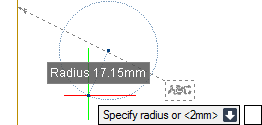
The user is then prompted to Specify radius or <#mm>
Input a dimensional value in the field and press Enter or click to identify the edge of the circle.
Throughout the gap creation process the user can press ESC to cancel the command. Additional functionality is also available.
 |
|
|
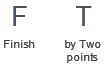
Press the down arrow key and select Finish to end the command.
|
|
|
Press the down arrow key and select by Two points to define a leader line gap with a specified diameter. Refer to Leader Line Gap with Specified Diameter for further information.
|
|