Multi-Discipline Supports
User Guide
MDS Health Check Utility (HCU) : Running the HCU
|
1.
|
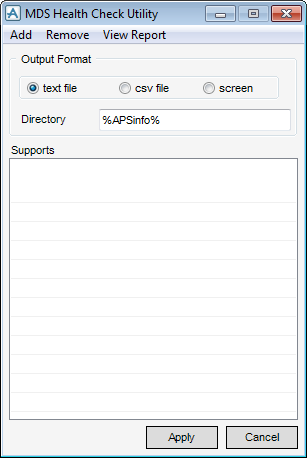
On the Supports tab, in the Tools group, click Health Check to display the MDS Health Check Utility window.
|
|
Figure 15:1.
|
|
2.
|
The list of supports is initially blank. To load supports for checking, select All or CE and Below from the Add pull-down menu.
|
The CE and Below option loads all supports below the current element (CE), or if at an element which is part of a support, e.g. SCTN of a structural support or ROD of a hanger, then that single support is loaded. Groups are counted as one support, and the group name is displayed in the list (e.g. PS05555, where the group may consist of /PS0555[1], /PS0555[2] etc. The whole group is loaded if one support, or part of one support is loaded.
The load errors file is stored in the %AVEVA_DESIGN_WORK% directory and can be viewed by selecting Load Errors Only from the View Report menu.
|
3.
|
The Remove option allows the user to either remove All entries in the Supports list, or to remove selected entries from the list.
|
|
4.
|
Click on an Output Format option to select the required format for the health check report. The options are as follows:
|
|
•
|
If the screen option is selected, the report is output to the command window.
|
|
•
|
If text file is selected, the output is written to a text file (e.g. MDS-HEALTH-CHECK-REPORT-21Mar2007-0931214.dat) in the directory specified in the Directory field. This directory defaults to %projcodeinfo%, where projcode is the Project Code (e.g. TWD). If %projcodeinfo% does not exist, then %AVEVA_DESIGN_WORK% is used as the default and is displayed in the field. If an invalid directory name is entered, an error alert is displayed and the file is not written. If the field is left blank, the default directory is used (%projcodeinfo% if it exists, otherwise %AVEVA_DESIGN_WORK%), following an error alert.
|
|
•
|
If CSV file is selected, the same directory rules apply as for a text file, but a csv (comma separated variables) file is created. The file naming convention is the same as for a text file, except that a .csv extension is used. The csv output represents data under column headings, and can be viewed in a spreadsheet application (e.g. Excel).
|
|
5.
|
Once the supports have been loaded and the output format selected, click Apply to start the health check. Once the check is complete, the report is output for screen or file, as described above. In addition to the file described in step 3, a temporary file of the report is also saved in the %AVEVA_DESIGN_WORK% directory.
|
|
6.
|
|
7.
|
Click Dismiss to exit the Health Check Utility.
|