Common Functionality
User Guide
To create a new export template, on the Tools tab, in the Export group, click Review, select Create from the drop-down list to display the Export window.
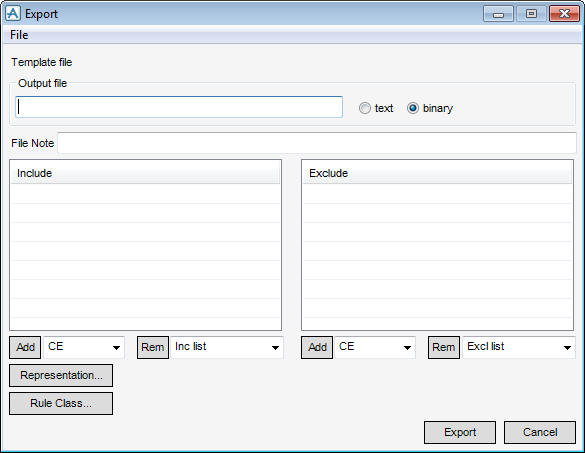
When the user is creating a new template the Template file name is blank. When the user has defined the template, they must name it by saving the settings using the File > Save as.
The Output file field displays the name of the file to which the data is exported. If no filename is given, the name of the template file, without the extension, is used. The user must select one of the two radio buttons associated with the Output file field.
|
Select text to create an ASCII file which the user can examine if the output results are not what the user requires.
|
|
|
Select binary to create a binary file suitable for reading into Review or other programs.
|
The Filenote field allows the user to type in any text, which appears at the top of the template file, up to 128 characters, for example, to help identify the template.
The user must now add the elements whose data is exported to the output file to the Include list using Add and Rem. Any elements to be excluded from the output file must be added to the Exclude list using Add and Rem.
To control how elements exported from DESIGN are displayed in the output, click Representation to display the Export Representations window.
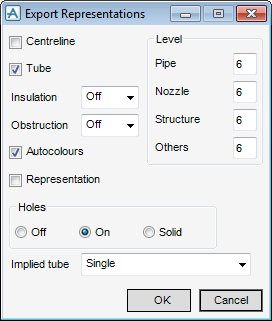
The options available on the Export Representations window are:
The user can set drawing levels for the different types of elements, type a value in the Pipe, Nozzle, Structure and Others fields.
The user can choose how Holes are displayed by selecting one of the three radio buttons.
The Implied tube drop-down menu allows the users to specify the way implied tube is managed when it is exported.
Click OK to accept the changes or Cancel to dismiss the changes made on the Export Representations window. Selecting either option returns the user back to the Export window.
The way in which elements are selected for export is determined by applying selection rules. The current rule class is displayed next to the Rule Class button. To change this, click Rule Class to display the Selecting a Rule Class window.
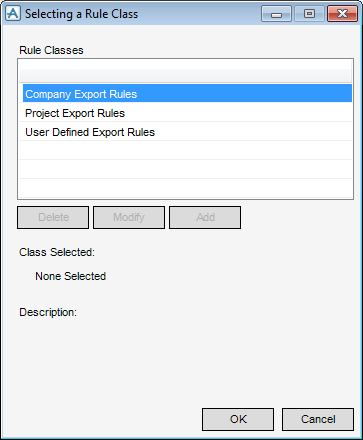
The Selecting a Rule Class window allows the user to change the rule class for the current export template and if the user has the appropriate access rights to edit the list of rule classes available.
The Rule Classes list displays all rule classes currently available to the user. The Class Selected and Description areas display information about the current selection. To change the rule class for the current template, select the required entry from the scrollable list and click OK.
When the user selects a rule class, one or more of the Delete, Modify, and Add buttons below the list can become active, depending on the users access rights for editing rule class definitions. If the user cannot modify the rule class, these buttons are greyed out.
To create a new rule class in the list adjacent to the current selection, click Add to display the Add Rule Class window.
The Add Rule Class window allows the user to specify the set of rules which make up the current rule class.
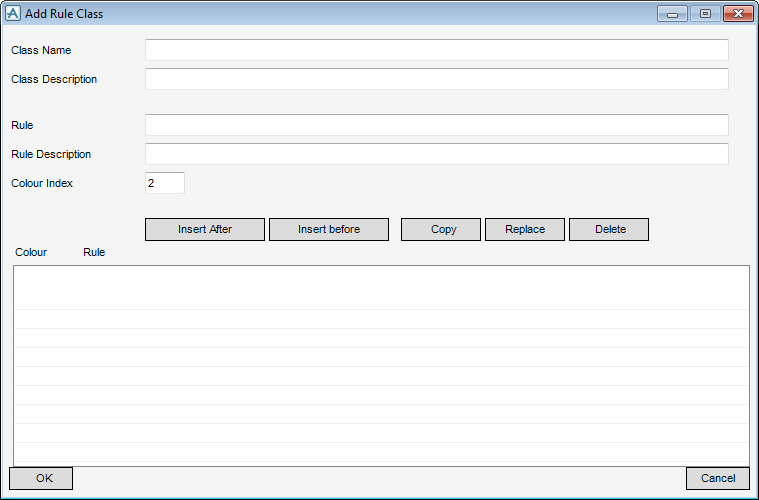
The user must input a Class Name and optionally a description of the Class Name in the Class Description field.
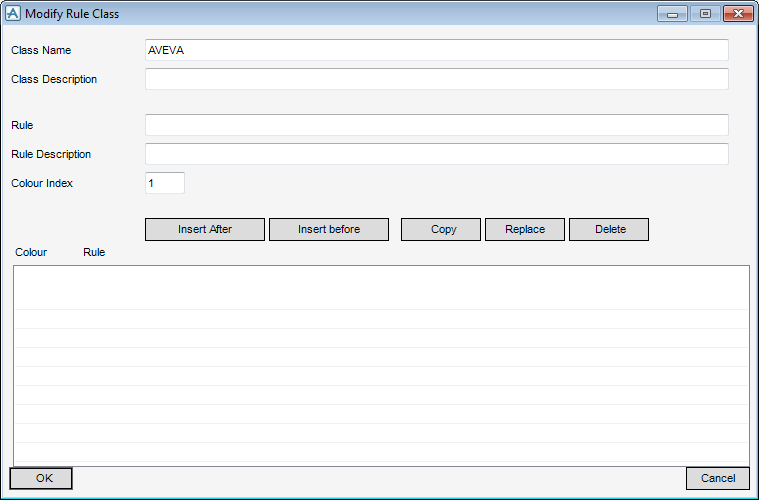
The Modify Rule Class window allows the user to modify the set of rules which make up the current rule class.