Common Functionality
User Guide
Data Check : Clashes
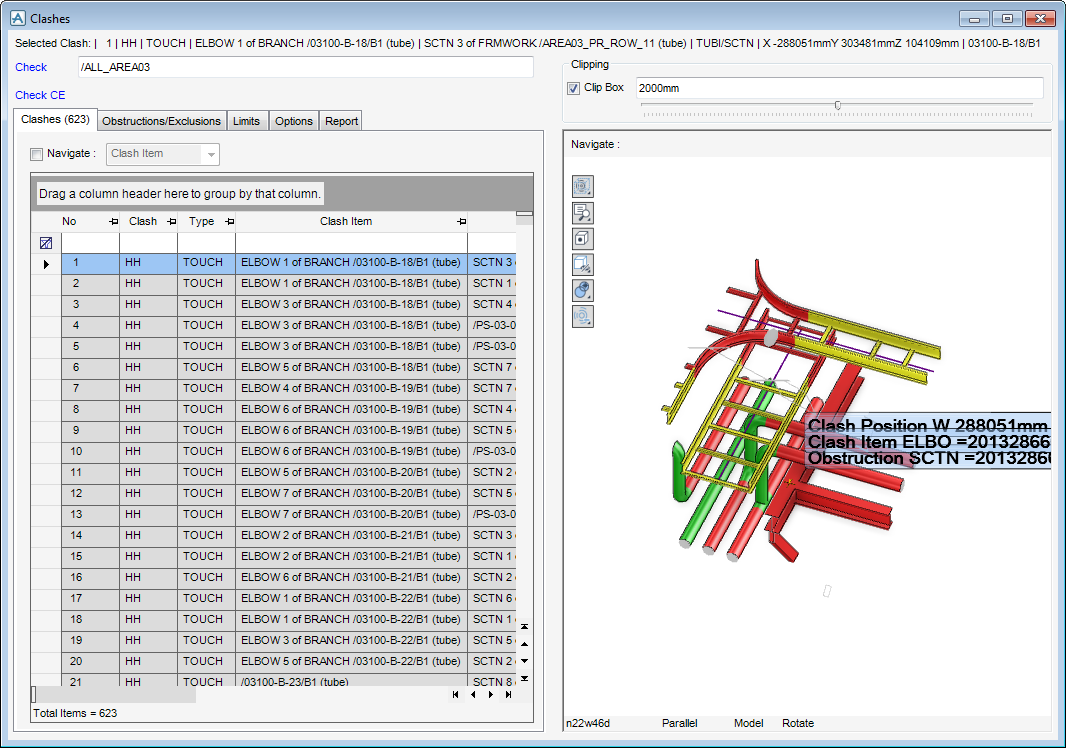
Clash Detection allows the user to continuously check the design for spatial clashes. On the Home tab, in the Common group, click Clashes, select Clashes from the drop-down list to display the Clashes window.

|
•
|
|
•
|
|
•
|
|
•
|
When the Clashes window is displayed for the first time, the current element is displayed in the Check field. The user can change this by typing any Design name or syntax.
|
Note:
|
The element name is always displayed in the Check field.
|
|
Note:
|
The user can also Check CE clashes, on the Home tab, in the Common group, click Clashes, select Check CE from the drop-down list to display the Clashes window.
|
When the user clicks Check CE, the current element name is displayed in the Check field and is then checked for clashes.
Right-click in the grid view to display a pop-up menu with the options to Print Preview and Save to Excel.
Click Print Preview to display the Print Preview window which allows the user to change the page layout and print the grid view.
Click Save to Excel to display the Save to Excel window which allows the user to select a destination and filename for the Excel file.
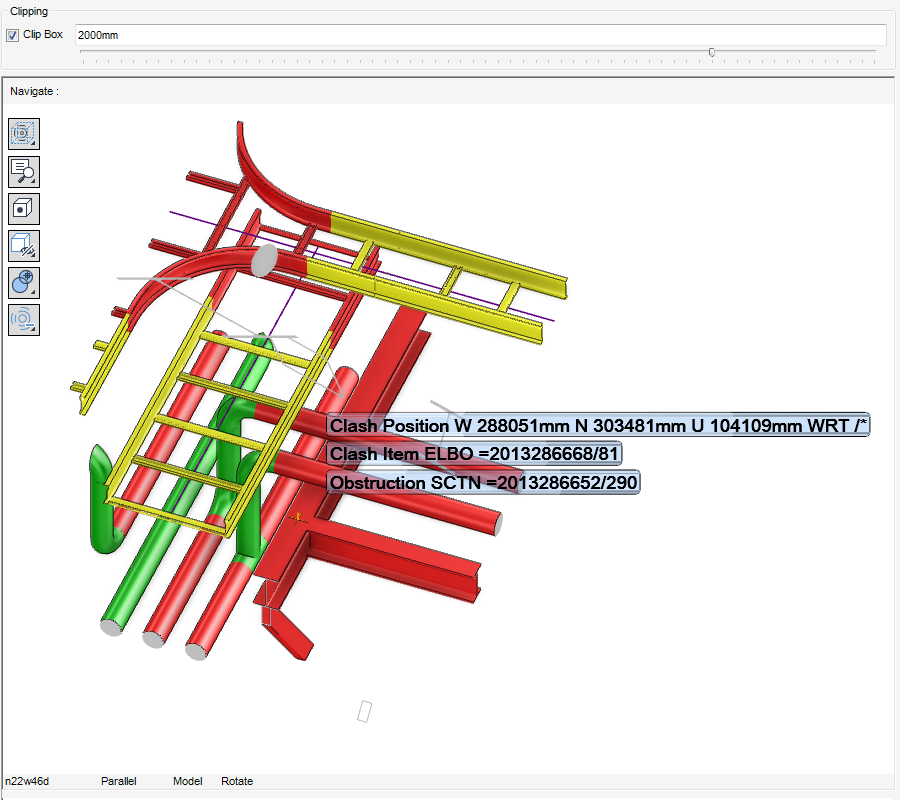
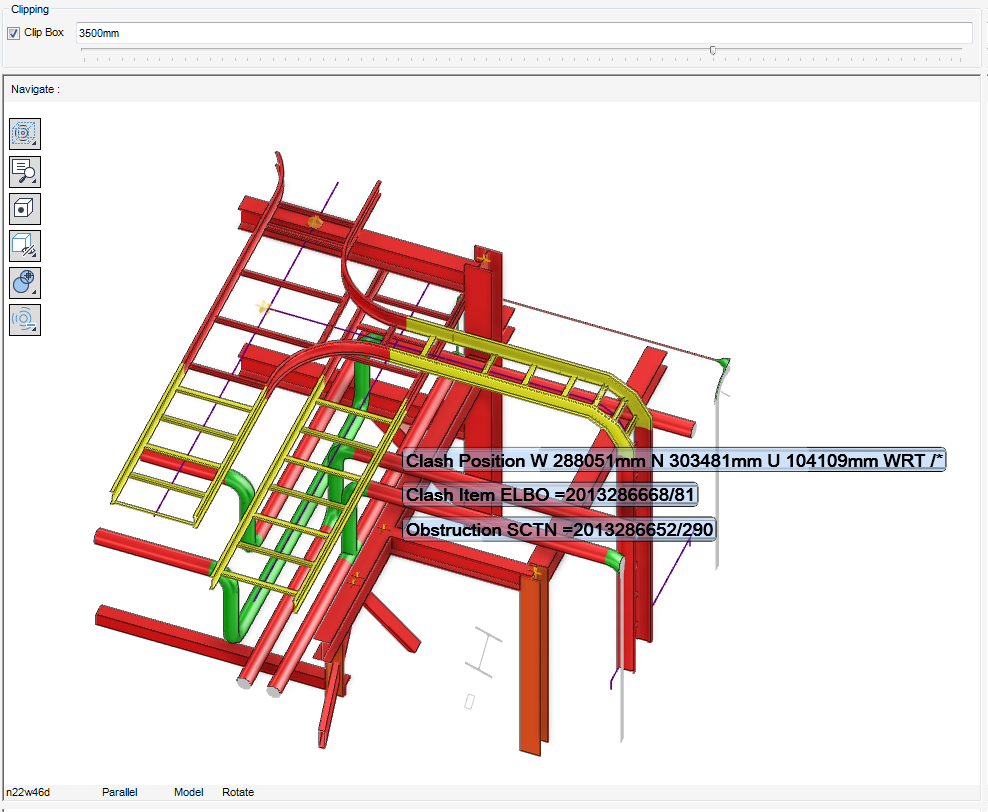
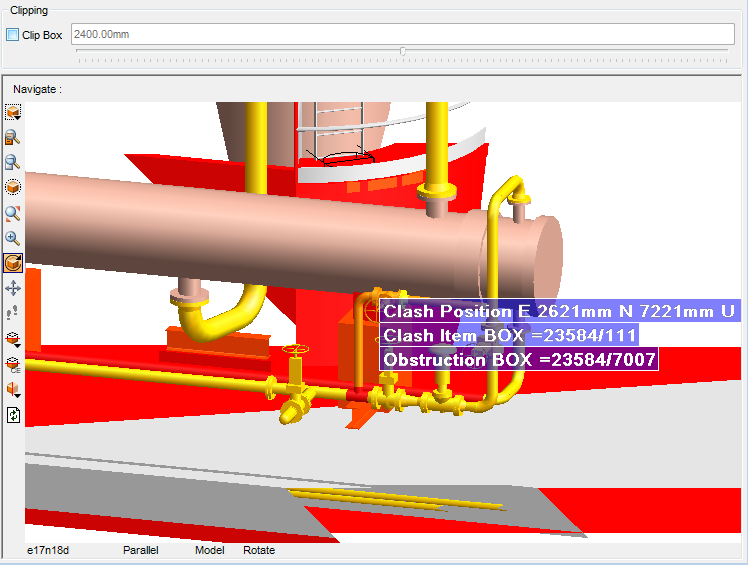
To turn the clipping off, uncheck the Clip Box.
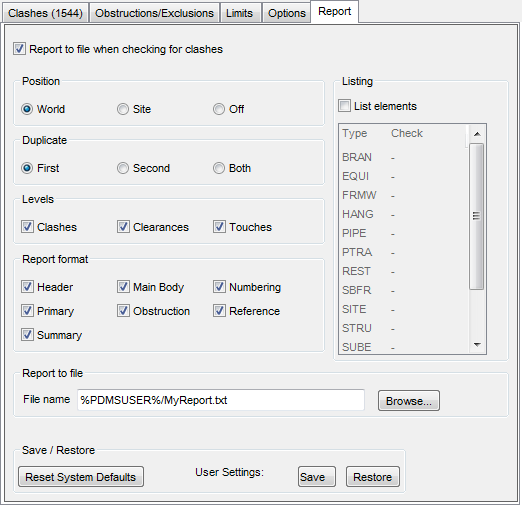
If the user requires a text report of the clashes, select Report to file when checking for clashes check box on the Report tab. A report is then written to a file each time a check is performed.
When checking for clashes the default obstruction is All which means the element is checked for clashes with everything in the database. To check for clashes against specific obstructions and exclusions, the user can set the rules using the Obstructions/Exclusions tab. The user adds the elements to the Obstructions list and can exclude elements by adding them to the Exclusions list.
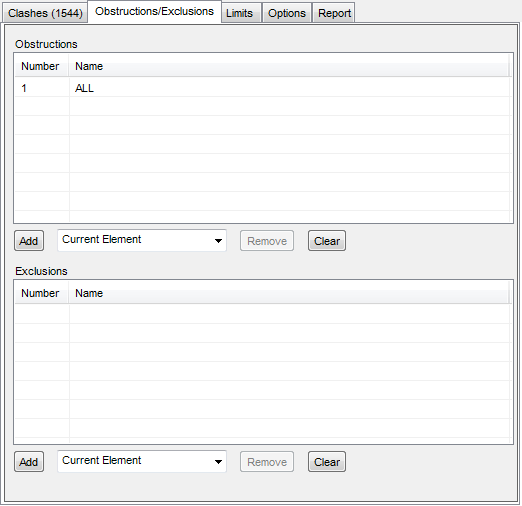
To add an element to either the Obstructions list or the Exclusion list, select the method of selection from the drop-down list, select the element, if required to do so and click Add.
|
Note:
|
By default the Obstructions list contains All the design elements in the current MDB.
|
To remove an element from either the Obstructions list or the Exclusion list, highlight the element and click on it and then click Remove.
To remove all the elements in either the Obstructions list or the Exclusion list click Clear. A Confirm window is displayed, the user needs to confirm if it wants to clear the list. Click Yes to clear the list or No to cancel the operation.
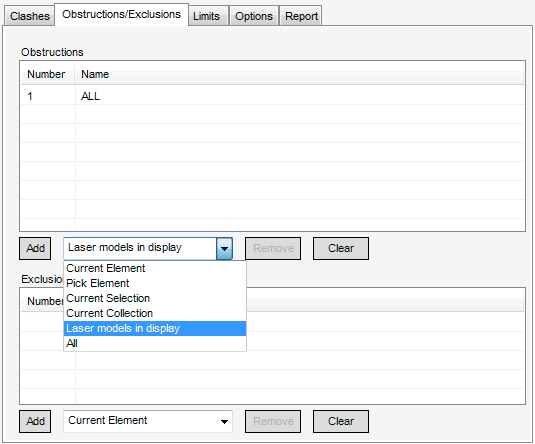
In the case of a laser survey the design data would be clash tested against existing conditions. The user will have to clear the obstruction list and set it to Laser models in display from the drop-down list and click Add.
Creating an Obstruction/Exclusion list is not the only way the user can set the obstructions. Using the Limits tab the user can create an area around items or a region to create an obstruction box. Any element that lies partly or wholly within the limits box is checked. A clash between items that lie partially within the limits box is always reported, even if the point at which the clash occurs lies outside the box.
Right-click within the From or To panes but outside of the text fields to display a pop-up menu which allows the user to change how the From and To limits are displayed.
The user can set the limits of the obstruction box, enter the values in the text fields or select an option from the Volume drop-down list.
To disable (lock) the limits of the obstruction box, select the required East, North, Up check box.
Click Clear to set the values defining the corners of the obstruction box to zero.
|
•
|
The Cell method highlights the boxes in the map where clashing takes place, allowing the user to quickly identify areas of concern within a model. The Cell method is quick because it requests less information from the Laser Modelling System (LMS) where the scanned referenced data is sourced.
|
|
•
|
The Exact method provides more detailed results, showing exactly where the AVEVA E3D™ geometry clashes with the laser model. The Exact method requires detailed point cloud data from the third party LMS, it can be slower to identify clashes, particularly in larger methods.
|
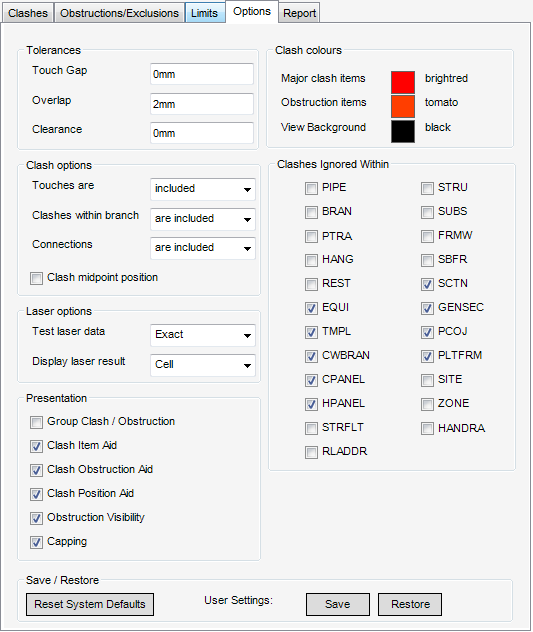
Grouping clashes per branch and then clashes against the same obstruction is a common requirement. Selecting the Group Clash/Obstruction check box presents the results using the Clash and Obstruction columns as default.
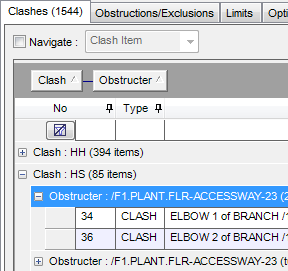
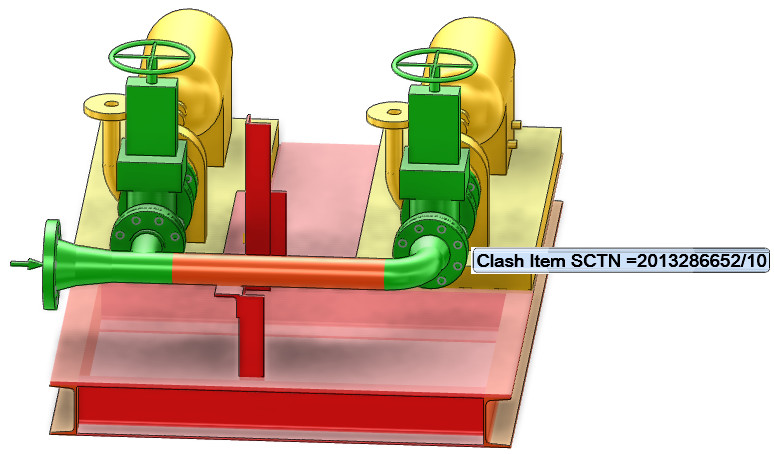
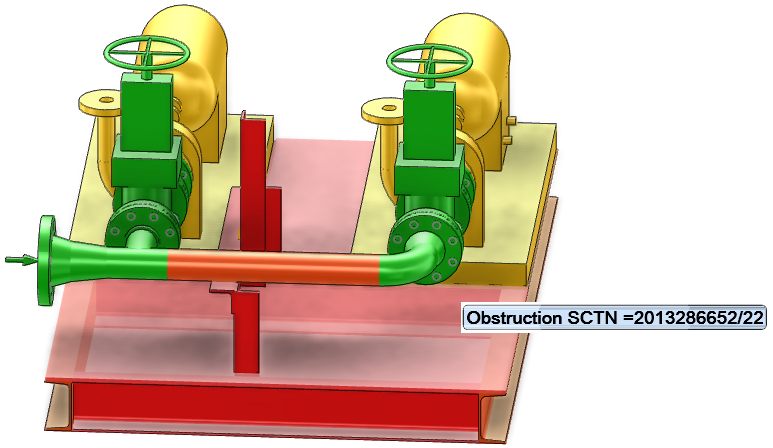
Other presentation aids are also available to the user, Clash Item Aid, Clash Obstruction Aid, Clash Position Aid, Obstruction Visibility and Capping.
 |
|
 |
|
 |
|
The user can change the colours displayed in the 3D graphical view for the Major Clash Items, Obstruction Items and the View Background. Click on any of the three options to display a colour palette window. Select the required colour and click Dismiss.
Click Reset System Defaults to restore all the system defaults back to the original installation settings.
User Settings allows the user to click Save to any changes made during a session to a file. Click Restore during a session changes the settings back to the user saved settings.
The Report tab allows the user to report to a file when checking for clashes, by default the option is turned off and needs to be activated, select Report to file when checking for clashes check box.
|
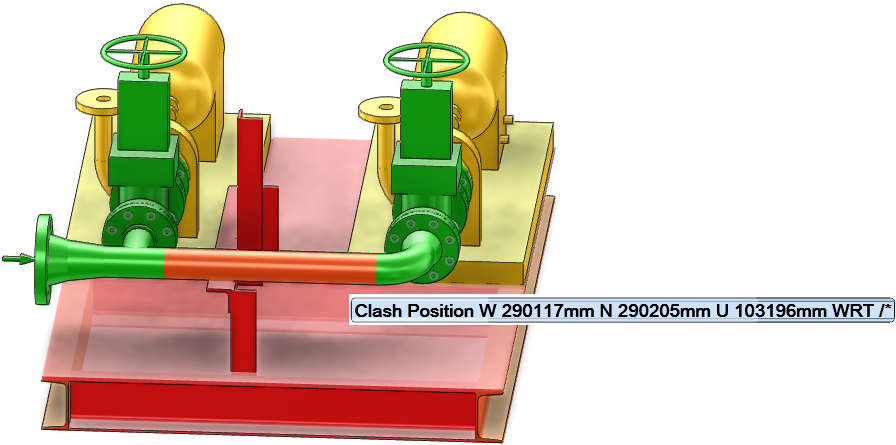
Allows the user to display the AT World Coordinates against each clash element in the clash report. Click to select World or Site and not to display the clash element in the clash report, click to select Off.
|
|
|
Allows the user to choose if the clash report is on Clashes, Clearances or Touches or a combination of the three.
|
|
|
Allows the user to turn ON/OFF the Check for various types of elements. Select List Elements check box to display the Check status. Click on an elements type to change the status.
|
|
|
Allows the user to enter a name for the report in the File name text field or click Browse to open a browser window which allows the user to navigate to a folder and save the file.
|
|
|
Allows the user to click Reset System Defaults to restore all the system defaults back to the original installation settings. The User Settings allows the user to click Save to any changes made during a session to a file. Click Restore during a session changes the settings back to the user saved settings.
|