Cable Design
User Guide
Cable : Modify Cable : Define Route
From the Tasks part of the Modify Cable window, click Define Route to display the Modify Route window. If a route has not been defined for the cable then suitable points will automatically be selected in the Cable Branch Entry and Cable Branch Exit parts of the Route Cable window. If a route has been defined then the corresponding entry and exit points will be selected.
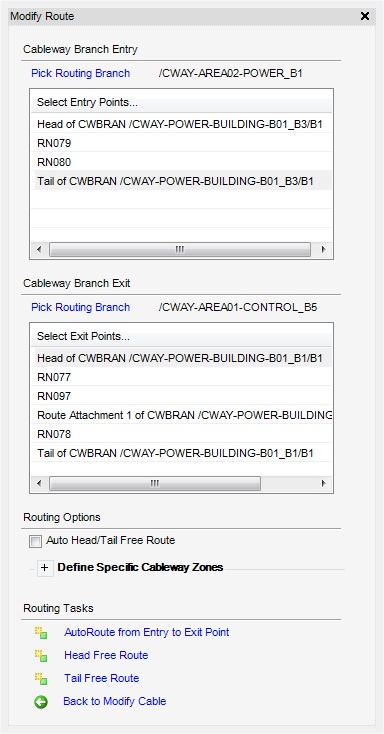
The user must specify the entry point for the cable on a suitable cableway branch, from the Cableway Branch Entry part of the Route Cable window:
If Pick Routing Branch is selected, the user is prompted to Identify Cableway Branch in the 3D view. When selected, the name of the cableway branch is displayed on the window and its valid entry points are displayed in the Select Entry Points list.
The required entry point must then be selected from the Select Entry Points list.
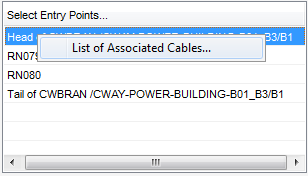
Right click on any item in the Select Entry Points or Select Exit Points lists will give the user the option to open the List of Associated Cables form. The user will be shown other cables that have been routed through the same point.
The user must then specify the exit point for the cable on a suitable cableway branch, from the Cableway Branch Exit part of the Route Cable window:
The Auto Head/Tail Free Route check box must be selected if the user wants the head and tail of the cable to be automatically free-routed. Which will route the cable outside of the cableway by creating POINTR elements from the cables head/tail to the selected entry/exit point.
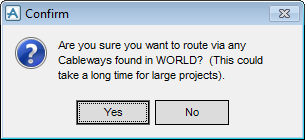
The Define Specific Cableway Zones fold-up list allows the user to select which cableway zones can be used to route the cable. If no zones are defined, then cableway from all zones found in WORLD will be used to route the cable. For large projects this will take a long time. Right click on a zone in the list to give the option to navigate to the zone in the Model Explorer.
When the cableway entry and exit points have been specified, the user can route the cable, click AutoRoute from Entry to Exit Point.
If the Auto Head/Tail Free Route is unchecked but free routing of the ends is required to make cable routing complete, the user will be given the option to route both Head and Tail. A Confirm window will be shown.
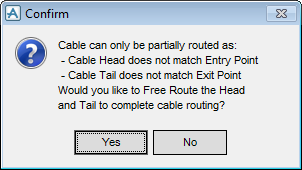
If the start position of the cable does not match the position of the entry point, the cable will not be fully routed. To complete the routing click Head Free Route. Which will create POINTR elements from the cables head to the selected cableway entry point.