Cable Design
User Guide
Cable : Create Cable
To create a cable element, on the Cabling System tab, in the Create group, click Cable to display the Create Cable window:

A cable can be assigned to a system by selecting from the Primary System drop-down menu.
The Basic Data part of the Create Cable window allows the user to input the general attributes for the new cable element.
After inputting the general attributes for the new cable element, the user can choose to automatically check the fill level. In the Fill Check drop-down menu, select from either On or Off, the default is Off.
The Excess Lengths fields specifies head and tail excesses which are used when the cable cutting lengths are calculated.
The Proximity Distance specifies the distance from the head, the software will start searching for cableway entry points.
|
displays the length of cable being routed outside of cableway branches, including the head and tail excess lengths. The default value is 0 and the Start and End of the cable free length is 0 by default.
|
The Specification part of the Create Cable window, allows the user to select a cable. Click Choose Cable to display the Choose Table window. Refer to Choose Cable for further information.
|
Note:
|
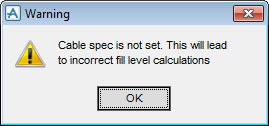
If a cable specification is not chosen, it will lead to inaccurate cable tray fill level calculations, when the routing the cable. When the user selects Create Cable, the following warning will appear.
|
Using the Start part of the Create Cable window, the user must now choose a Start Ref (starting point) in the 3D view or a piece of equipment for the cable to start at.
If Pick is selected, the user is prompted to Identify Equi/Valve/Pcom/Elconn for Start Ref: in the 3D view. the Reference field is automatically populated with the reference.
If List Equipment is selected, the List of Equipment window is displayed. The user can choose a piece of equipment from the List Equipment for Selection part of the window. Select Apply to choose the piece of equipment and close the List of Equipment window. Select Cancel to discard any inputs and close the List of Equipment window.
Using the End part of the Create Cable window, the user must now choose a End Ref (finishing point) in the 3D view or a piece of equipment for the cable to end at.
If Pick is selected, the user is prompted to Identify Equi/Valve/Pcom/Elconn for Start Ref: in the 3D view. the Reference field is automatically populated with the reference.
If List Equipment is selected, the List of Equipment window is displayed. The user can choose a piece of equipment from the List Equipment for Selection part of the window. Select Apply to choose the piece of equipment and close the List of Equipment window. Select Cancel to discard any inputs and close the List of Equipment window.
The user can now create a cable, to do this, from the Tasks part of the Choose Cable window, select Create Cable. A cable element is created and displayed in the design hierarchy and the Modify Cable window is displayed. Refer to Modify Cable for further information.