Structural Design
User Guide
Sections : Create Sections : Curved Sections
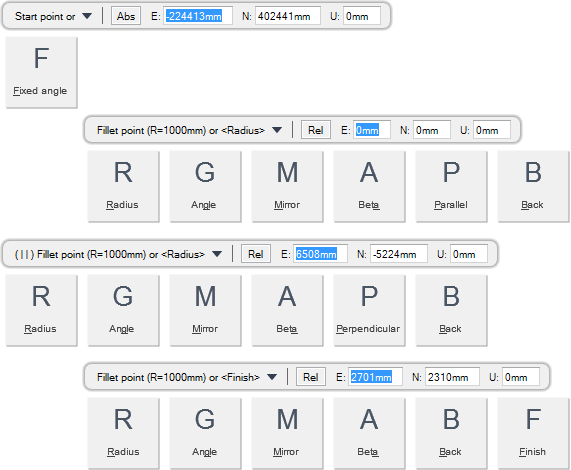
You are prompted to Start point or
Input values in the dimension fields and press Enter or click to identify the start position.
You are then prompted to Fillet point (R=#mm) or <Radius>
Input values in the dimension fields and press Enter or click to identify the fillet position.
You are then prompted to Fillet point (R=#mm) or <Radius>
Input values in the dimension fields and press Enter or click to identify the fillet position.
You are then prompted to Fillet point (R=#mm) or <Finish>
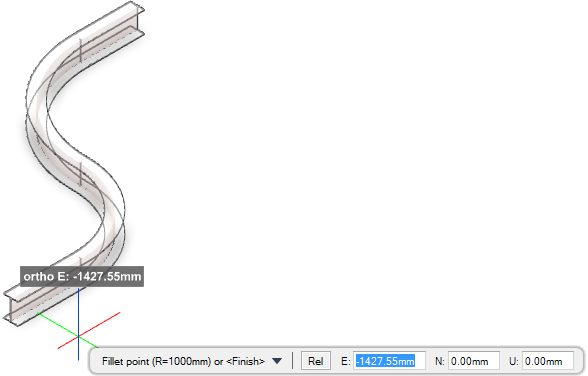
Input F at the prompt and press Enter to end the command. A curved section is created and displays in the 3D view.
Throughout the section creation process you can press ESC to cancel the command. Additional functionality is also available.
|
Press the down arrow key and select Fixed angle to create curved sections with a specified fixed angle. Refer to Create Fixed Angle Curved Sections for further information.
|
|
|
Press the down arrow key and select Radius to modify the radii of the curved section.
You are prompted to Curve radius <#>
Input a dimensional value in the field and press Enter to set the radii of the curved section.
|
|
|
Press the down arrow key and select Angle to create a curved section with a specified angle.
You are prompted to Curve angle <#>
Input an angular value in the field and press Enter to set the angle of the curved section.
|
|
|
Press the down arrow key and select Mirror to reposition the section as a reflection of the original position.
|
|
|
Press the down arrow key and select Beta to rotate the section.
You are prompted to Beta angle <#>
Input an angular value in the field and press Enter to set the angle of the curved section.
|
|
|
Press the down arrow key and select Parallel to orientate the web of the section parallel to the X, Y plane of the LCS.
|
|
|
Press the down arrow key and select Back to undo the last action.
|
|
|
Press the down arrow key and select Perpendicular to orientate the web of the section perpendicular to the X, Y plane of the LCS. The default creation mode is perpendicular.
|
|
|
Press the down arrow key and select Finish to end the command.
|
|
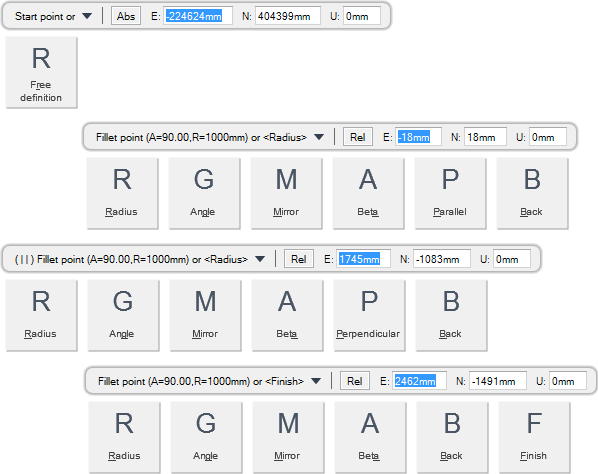
You are prompted to Start point or
Input values in the dimension fields and press Enter or click to identify the start position.
You are then prompted to Fillet point (A=#,R=#mm) or <Radius>
Input values in the dimension fields and press Enter or click to identify the fillet position.
You are then prompted to Fillet point (A=#,R=#mm) or <Radius>
Input values in the dimension fields and press Enter or click to identify the fillet position.
You are then prompted to Fillet point (A=#,R=#mm) or <Finish>
Input values in the dimension fields and press Enter or click to identify the fillet position.
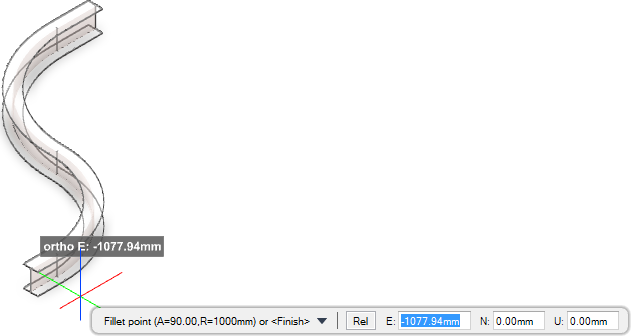
Input F at the prompt and press Enter to end the command. A curved section is created and displays in the 3D view.
Throughout the section creation process you can press ESC to cancel the command. Additional functionality is also available.
|
Press the down arrow key and select Free definition to create curved sections without a fixed angle. Refer to Create Free Definition Curved Sections for further information.
|
|
|
Press the down arrow key and select Radius to modify the radii of the curved section.
You are prompted to Curve radius <#>
Input a dimensional value in the field and press Enter to set the radii of the curved section.
|
|
|
Press the down arrow key and select Angle to create a curved section with a specified angle.
You are prompted to Curve angle <#>
Input an angular value in the field and press Enter to set the angle of the curved section.
|
|
|
Press the down arrow key and select Mirror to reposition the section as a reflection of the original position.
|
|
|
Press the down arrow key and select Beta to rotate the section.
You are prompted to Beta angle <#>
Input an angular value in the field and press Enter to set the angle of the curved section.
|
|
|
Press the down arrow key and select Parallel to orientate the web of the section parallel to the X, Y plane of the LCS.
|
|
|
Press the down arrow key and select Back to undo the last action.
|
|
|
Press the down arrow key and select Perpendicular to orientate the web of the section perpendicular to the X, Y plane of the LCS. The default creation mode is perpendicular.
|
|
|
Press the down arrow key and select Finish to end the command.
|
|
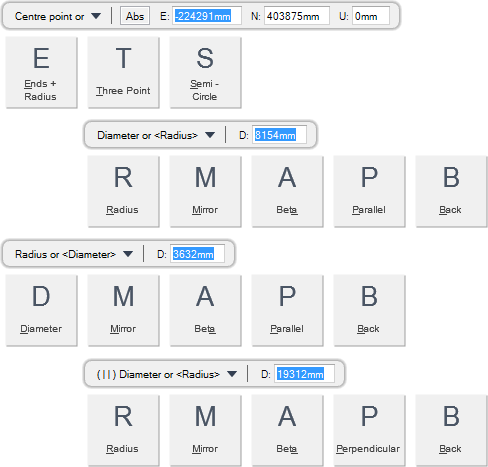
You are prompted to Centre point or
Input values in the dimension fields and press Enter or click to identify the centre point position.
You are then prompted to Diameter or <Radius>
Input a dimensional value in the field and press Enter or click to identify the diameter of the arc section.
You are then prompted to Start angle or <#deg>
Input an angular value in the field and press Enter or click to identify the start point.
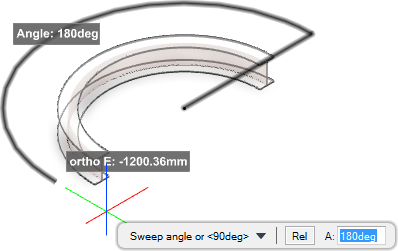
You are then prompted to Sweep angle or <#deg>
Input an angular value in the field and press Enter or click to identify the end point. An arc section is created and displays in the 3D view.
Throughout the section creation process you can press ESC to cancel the command. Additional functionality is also available.
|
Press the down arrow key and select Ends + Radius to create an arc with specified end points and a radius. Refer to Create Arc Section with Specified End Points and Radius for further information.
|
|
|
Press the down arrow key and select Three Point to create an arc with three specified points. Refer to Create Arc Section with Three Specified Points for further information.
|
|
|
Press the down arrow key and select Semi-Circle to create a semi-circle arc. Refer to Create Semi-Circle Arc Section for further information.
|
|
|
Press the down arrow key and select Radius to modify the radii of the arc section.
You are prompted to Radius or <Diameter>
Input a dimensional value in the field and press Enter to set the radii of the arc section.
|
|
|
Press the down arrow key and select Mirror to reposition the section as a reflection of the original position.
|
|
|
Press the down arrow key and select Beta to rotate the section.
You are prompted to Beta angle <#>
Input an angular value in the field and press Enter to set the angle of the arc section.
|
|
|
Press the down arrow key and select Parallel to orientate the web of the section parallel to the X, Y plane of the LCS.
|
|
|
Press the down arrow key and select Back to undo the last action.
|
|
|
Press the down arrow key and select Diameter to create an arc section with a fixed diameter.
You are prompted to Diameter or <Radius>
Input a dimensional value in the field and press Enter to set the diameter of the arc section.
|
|
|
Press the down arrow key and select Perpendicular to orientate the web of the section perpendicular to the X, Y plane of the LCS. The default creation mode is perpendicular.
|
|
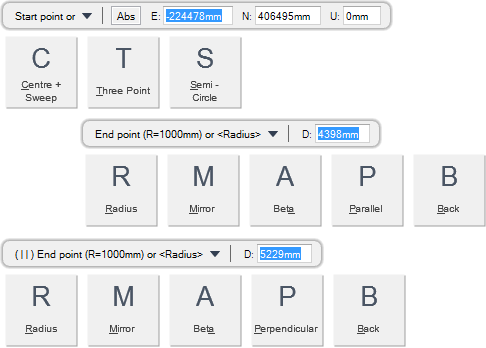
You are prompted to Start point or
Input values in the dimension fields and press Enter or click to identify the start point position.
You are then prompted to End point (R=#mm) or <Radius>
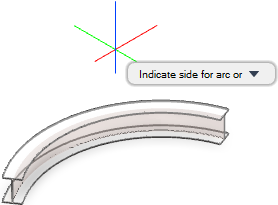
You are then prompted to Indicate side for arc or
Throughout the section creation process you can press ESC to cancel the command. Additional functionality is also available.
|
Press the down arrow key and select Centre + Sweep to create an arc with a specified centre point and sweep angle. Refer to Create Arc Section with Specified Centre Point and Sweep Angle for further information.
|
|
|
Press the down arrow key and select Three Point to create an arc with three specified points. Refer to Create Arc Section with Three Specified Points for further information.
|
|
|
Press the down arrow key and select Semi-Circle to create a semi-circle arc. Refer to Create Semi-Circle Arc Section for further information.
|
|
|
Press the down arrow key and select Radius to modify the radii of the arc section.
You are prompted to Curve radius <#>
Input a dimensional value in the field and press Enter to set the radii of the arc section.
|
|
|
Press the down arrow key and select Mirror to reposition the section as a reflection of the original position.
|
|
|
Press the down arrow key and select Beta to rotate the section.
You are prompted to Beta angle <#>
Input an angular value in the field and press Enter to set the angle of the arc section.
|
|
|
Press the down arrow key and select Parallel to orientate the web of the section parallel to the X, Y plane of the LCS.
|
|
|
Press the down arrow key and select Back to undo the last action.
|
|
|
Press the down arrow key and select Perpendicular to orientate the web of the section perpendicular to the X, Y plane of the LCS. The default creation mode is perpendicular.
|
|
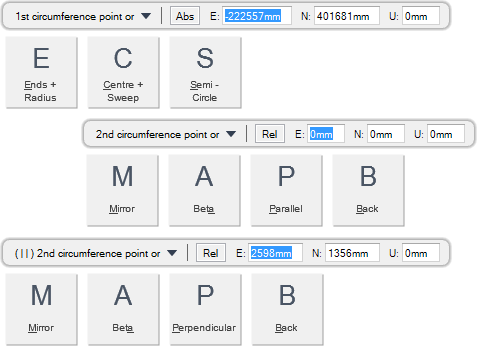
You are prompted to 1st circumference point or
Input values in the dimension fields and press Enter or click to identify the first circumference point position.
You are then prompted to 2nd circumference point or
Input values in the dimension fields and press Enter or click to identify the second circumference point position.
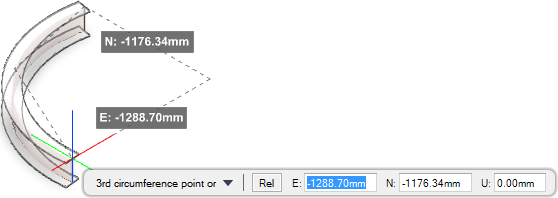
You are then prompted to 3rd circumference point or
Input values in the dimension fields and press Enter or click to identify the third circumference point position. An arc section is created and displays in the 3D view.
Throughout the section creation process you can press ESC to cancel the command. Additional functionality is also available.
|
Press the down arrow key and select Ends + Radius to create an arc with specified end points and a radius. Refer to Create Arc Section with Specified End Points and Radius for further information.
|
|
|
Press the down arrow key and select Centre + Sweep to create an arc with a specified centre point and sweep angle. Refer to Create Arc Section with Specified Centre Point and Sweep Angle for further information.
|
|
|
Press the down arrow key and select Semi-Circle to create a semi-circle arc. Refer to Create Semi-Circle Arc Section for further information.
|
|
|
Press the down arrow key and select Mirror to reposition the section as a reflection of the original position.
|
|
|
Press the down arrow key and select Beta to rotate the section.
You are prompted to Beta angle <#>
Input an angular value in the field and press Enter to set the angle of the arc section.
|
|
|
Press the down arrow key and select Parallel to orientate the web of the section parallel to the X, Y plane of the LCS.
|
|
|
Press the down arrow key and select Back to undo the last action.
|
|
|
Press the down arrow key and select Perpendicular to orientate the web of the section perpendicular to the X, Y plane of the LCS. The default creation mode is perpendicular.
|
|
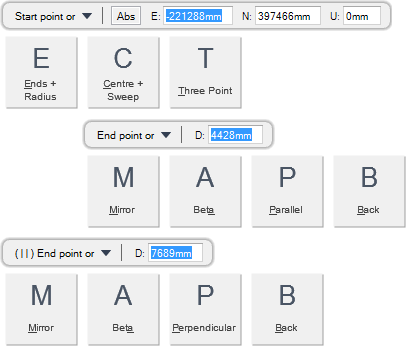
You are prompted to Start point or
Input values in the dimension fields and press Enter or click to identify the start point position.
You are then prompted to End point or
Input a dimensional value in the field and press Enter or click to identify the end point position.
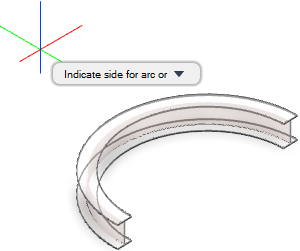
You are then prompted to Indicate side for arc or
Throughout the section creation process you can press ESC to cancel the command. Additional functionality is also available.
|
Press the down arrow key and select Ends + Radius to create an arc with specified end points and a radius. Refer to Create Arc Section with Specified End Points and Radius for further information.
|
|
|
Press the down arrow key and select Centre + Sweep to create an arc with a specified centre point and sweep angle. Refer to Create Arc Section with Specified Centre Point and Sweep Angle for further information.
|
|
|
Press the down arrow key and select Three Point to create an arc with three specified points. Refer to Create Arc Section with Three Specified Points for further information.
|
|
|
Press the down arrow key and select Mirror to reposition the section as a reflection of the original position.
|
|
|
Press the down arrow key and select Beta to rotate the section.
You are prompted to Beta angle <#>
Input an angular value in the field and press Enter to set the angle of the arc section.
|
|
|
Press the down arrow key and select Parallel to orientate the web of the section parallel to the X, Y plane of the LCS.
|
|
|
Press the down arrow key and select Back to undo the last action.
|
|
|
Press the down arrow key and select Perpendicular to orientate the web of the section perpendicular to the X, Y plane of the LCS. The default creation mode is perpendicular.
|
|
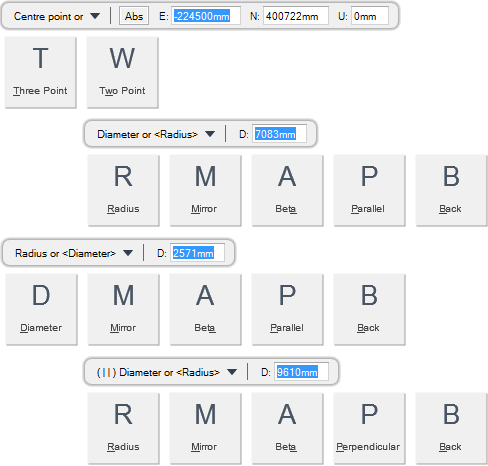
You are prompted to Centre point or
Input values in the dimension fields and press Enter or click to identify the centre point position.
You are then prompted to Diameter or <Radius>
Input a dimensional value in the field and press Enter or click to identify the diameter of the ring section.
Throughout the section creation process you can press ESC to cancel the command. Additional functionality is also available.
|
Press the down arrow key and select Three Point to create a ring with three specified points. Refer to Create Ring Section with Three Specified Points for further information.
|
|
|
Press the down arrow key and select Two Point to create a ring with two specified points. Refer to Create Ring Section with Two Specified Points for further information.
|
|
|
Press the down arrow key and select Radius to modify the radii of the ring section.
You are prompted to Radius or <Diameter>
Input a dimensional value in the field and press Enter to set the radii of the ring section.
|
|
|
Press the down arrow key and select Mirror to reposition the section as a reflection of the original position.
|
|
|
Press the down arrow key and select Beta to rotate the section.
You are prompted to Beta angle <#>
Input an angular value in the field and press Enter to set the angle of the ring section.
|
|
|
Press the down arrow key and select Parallel to orientate the web of the section parallel to the X, Y plane of the LCS.
|
|
|
Press the down arrow key and select Back to undo the last action.
|
|
|
Press the down arrow key and select Diameter to create a ring section with a fixed diameter.
You are prompted to Diameter or <Radius>
Input a dimensional value in the field and press Enter to set the diameter of the ring section.
|
|
|
Press the down arrow key and select Perpendicular to orientate the web of the section perpendicular to the X, Y plane of the LCS. The default creation mode is perpendicular.
|
|
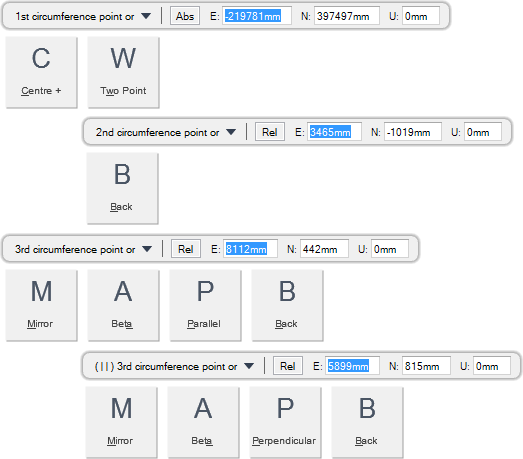
You are prompted to 1st Circumference point or
Input values in the dimension fields and press Enter or click to identify the first circumference point position.
You are then prompted to 2nd Circumference point or
Input values in the dimension fields and press Enter or click to identify the second circumference point position.
You are then prompted to 3rd Circumference point or
Input values in the dimension fields and press Enter or click to identify the third circumference point position. A ring section is created and displays in the 3D view.
Throughout the section creation process you can press ESC to cancel the command. Additional functionality is also available.
|
Press the down arrow key and select Centre + to create a ring with a specified centre point. Refer to Create Ring Section with Specified Centre Point for further information.
|
|
|
Press the down arrow key and select Two Point to create a ring with two specified points. Refer to Create Ring Section with Two Specified Points for further information.
|
|
|
Press the down arrow key and select Back to undo the last action.
|
|
|
Press the down arrow key and select Mirror to reposition the section as a reflection of the original position.
|
|
|
Press the down arrow key and select Beta to rotate the section.
You are prompted to Beta angle <#>
Input an angular value in the field and press Enter to set the angle of the ring section.
|
|
|
Press the down arrow key and select Parallel to orientate the web of the section parallel to the X, Y plane of the LCS.
|
|
|
Press the down arrow key and select Perpendicular to orientate the web of the section perpendicular to the X, Y plane of the LCS. The default creation mode is perpendicular.
|
|
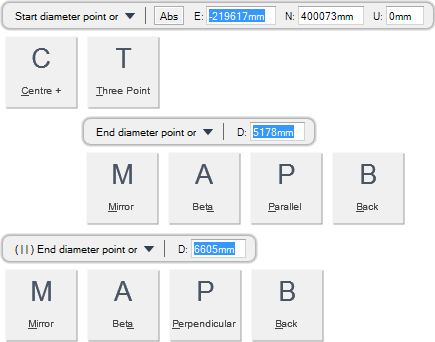
You are prompted to Start diameter point or
Input values in the dimension fields and press Enter or click to identify the first diameter point position.
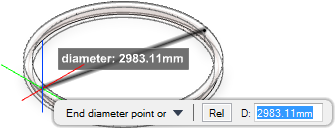
You are then prompted to End diameter point or
Input a dimensional value in the field and press Enter or click to identify the diameter of the ring section. A ring section is created and displays in the 3D view.
Throughout the section creation process you can press ESC to cancel the command. Additional functionality is also available.
|
Press the down arrow key and select Centre + to create a ring with a specified centre point. Refer to Create Ring Section with Specified Centre Point for further information.
|
|
|
Press the down arrow key and select Three Point to create a ring with three specified points. Refer to Create Ring Section with Three Specified Points for further information.
|
|
|
Press the down arrow key and select Mirror to reposition the section as a reflection of the original position.
|
|
|
Press the down arrow key and select Beta to rotate the section.
You are prompted to Beta angle <#>
Input an angular value in the field and press Enter to set the angle of the ring section.
|
|
|
Press the down arrow key and select Parallel to orientate the web of the section parallel to the X, Y plane of the LCS.
|
|
|
Press the down arrow key and select Back to undo the last action.
|
|
|
Press the down arrow key and select Perpendicular to orientate the web of the section perpendicular to the X, Y plane of the LCS. The default creation mode is perpendicular.
|
|

