Structural Design
User Guide
Walls and Floors : Modify Walls : Modify Wall Definition
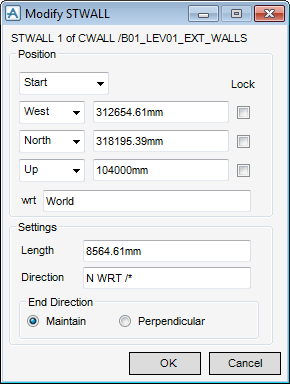
By default the Start position of the current element displays as East, North and Up co-ordinates with respect to the world.
The Start position is indicated in the 3D view.
The Position options allow you to specify the point on the element to which the position co-ordinates apply. You can specify Start, End or Centre from the drop-down list.
To define a position by reference to design items that already exist, use the Positioning Control window and the cursor to identify the required position using a cursor pick in the 3D view. Refer to Positioning Control for further information.
The Settings option allows you to change the length and direction of the wall.
The End Direction option allows you to change the end direction to Perpendicular or you can Maintain the original direction.
Click OK to apply the changes or click Cancel to discard any inputs and close the Modify STWALL window.
By default, the Positioning Control window displays. Refer to Positioning Control for further information.
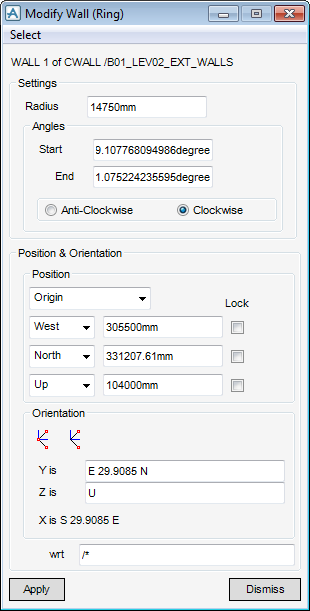
By default, the Start and End positions, and the orientation of the current element are displayed in the Modify Wall (Ring) window.
Click Select to define the CE or to pick a curved section using a cursor pick in the 3D view.
The Settings options allows you to change the radius of the ring wall.
The Angles option allows you to change the point on the circle of the ring wall where the Start and End are located.
In the Position and Orientation window, click the Position drop-down menu to select the Origin, Radius or Start and End Angles to change. If required, use the Lock check boxes to fix the current co-ordinate along any axis.
The Orientation option allows you to change the orientation of the wall. The settings are mirrored by the axes that display the 3D view. Only the Y and Z axes can be changed.
Click Apply to accept the changes or click Dismiss to discard any inputs and close the Modify Wall (Ring) window.


