DRAW
User Guide
Add and Modify Drawing Objects : Add Construction Lines : Add XLines
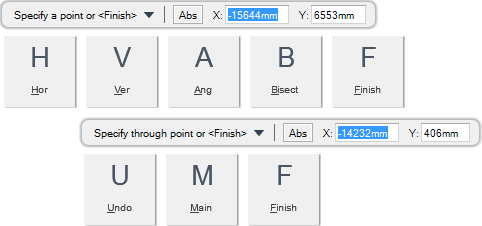
You are prompted to Specify a point or <Finish>
Input values in the dimension fields and press Enter or click to identify the first point through which the line is drawn.
You are then prompted to Specify through point or <Finish>
Input values in the dimension fields and press Enter or click to identify the second point through which the line is drawn. A line is drawn through the two points.
Throughout the Xline creation process you can press ESC to cancel the command. Additional functionality is also available.
|
Press the down arrow key and select Hor to add horizontal XLines. Refer to Add Horizontal XLines for further information.
|
|
|
Press the down arrow key and select Ver to add vertical XLines. Refer to Add Vertical XLines for further information.
|
|
|
Press the down arrow key and select Ang to add XLines by specifying the angle. Refer to Add XLines with a Specified Angle for further information.
|
|
|
Press the down arrow key and select Bisect to add bisecting XLines. Refer to Add Bisect XLines for further information.
|
|
|
Press the down arrow key and select Finish to end the command.
|
|
|
Press the down arrow key and select Undo to undo the last action.
|
|
|
Press the down arrow key and select Main to add a different XLine type. Refer to Add XLines for further information.
|
|
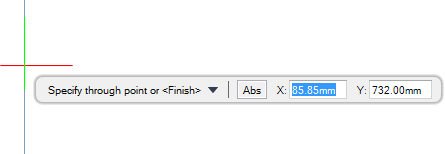
You are prompted to Specify through point or <Finish>
Input values in the dimension fields and press Enter or click to identify a point through which the line is drawn. A line is drawn horizontally through this point.
Throughout the Xline creation process you can press ESC to cancel the command. Additional functionality is also available.
|
Press the down arrow key and select Undo to undo the last action.
|
|
|
Press the down arrow key and select Main to add a different XLine type. Refer to Add XLines for further information.
|
|
|
Press the down arrow key and select Finish to end the command.
|
|
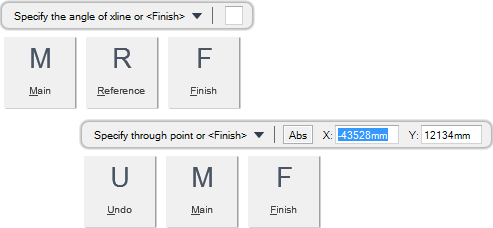
You are prompted to Specify the angle of xline or <Finish>
You are then prompted to Specify through point or <Finish>
Input values in the dimension fields and press Enter or click to identify a point through which the line is drawn. A line is drawn at the specified angle through this point.
Throughout the Xline creation process you can press ESC to cancel the command. Additional functionality is also available.
|
Press the down arrow key and select Main to add a different XLine type. Refer to Add XLines for further information.
|
|
|
Press the down arrow key and select Reference to select a line object to act as a reference for specifying the angle. Refer to Add XLines with a Reference Line to Specify an Angle for further information.
|
|
|
Press the down arrow key and select Finish to end the command.
|
|
|
Press the down arrow key and select Undo to undo the last action.
|
|
You are prompted to Specify angle of XLine or <Finish>
You are then prompted to Select a line object
You are then prompted to Specify the angle of xline or <0>
Press Enter to use the angle of the identified line as the angle for the XLine.
You are then prompted to Specify through point or <Finish>
Input values in the dimension fields and press Enter or click to identify a point through which the line is drawn. A line is drawn at the specified angle through this point.
Throughout the Xline creation process you can press ESC to cancel the command. Additional functionality is also available.
|
Press the down arrow key and select Undo to undo the last action.
|
|
|
Press the down arrow key and select Main to add a different XLine type. Refer to Add XLines for further information.
|
|
|
Press the down arrow key and select Finish to end the command.
|
|
You are prompted to Specify insertion point or <Finish>
Input values in the dimension fields and press Enter or click to identify the point at which the XLines bisect.
You are then prompted to Specify the angle start point or <Finish>
Input values in the dimension fields and press Enter or click to identify the first point from which the angle of the XLine(s) is determined.
You are then prompted to Specify the angle end point or <Finish>
Input values in the dimension fields and press Enter or click to identify the second point from which the angle of the XLine(s) is determined. A line is drawn through this point at the specified angle.
Throughout the Xline creation process you can press ESC to cancel the command. Additional functionality is also available.
|
Press the down arrow key and select Undo to undo the last action.
|
|
|
Press the down arrow key and select Main to add a different XLine type. Refer to Add XLines for further information.
|
|
|
Press the down arrow key and select Finish to end the command.
|
|


