DRAW
User Guide
Isometric Automatic Drawing Production : Isometric Drawings Production : Modify Settings
Isometric ADP has many Default Settings, many of which are only able to be changed by the administrator, refer to Isometric Automatic Drawing Production for further information. However, you can modify some of the default settings.
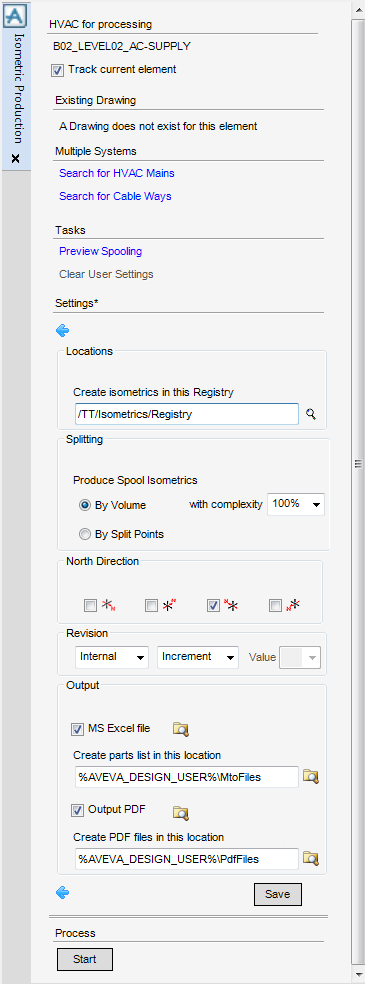
On the Tasks part of the Isometric Production window, click Modify User Settings, to populate the Isometric Production window with the user settings.
On the Locations part of the Isometric Production window, input another location in the Create Isometrics in this Registry field or click Browse Registries.
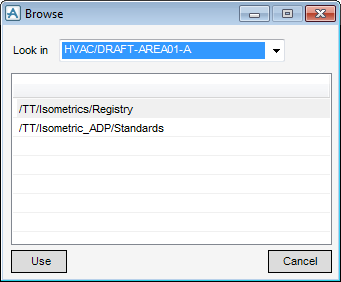
The Browse window displays all available rewritable registries.
To select a registry, select a database from the Look in drop-down list. All registries that the you can write to are listed. Select the registry where drawings are to be located.
Click Use to apply the registry location setting or Cancel to discard any inputs and close the Browse window.
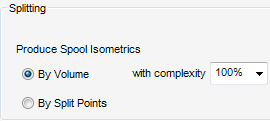
To produce spool isometrics By Volume, on the Splitting part of the Isometric Production window, select the By Volume option button.
You must also select the level of complexity from the with complexity drop-down list, which affects the number of spools created and the number of drawings produced.
You can check the effect of changing the complexity using a Spool Preview, refer to Preview Spooling for further information. If the Preview Spooling window is open when the splitting method is changed, the 3D view is updated, by default.
To produce spool isometrics By Split Points, on the Splitting part of the Isometric Production window, select the By Split Points option button. Refer to Spooling for further information.
The administrator sets the default Look Direction for all Isometric drawings, but in some cases this is not suitable for a particular branch. Select the relevant North Direction check box to change the look direction when the drawings are produced. If the Preview Spooling window is open, the view changes to suit the new North Direction.
The values for each of the Issue Types are set by the administrator, the default being Alphabetical for Internal Issues and Numeric for External Issues.
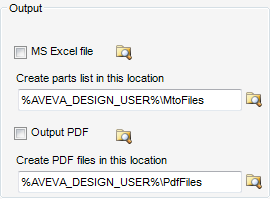
The Output part of the Isometric Production window allows you to define the location of the Excel file and the PDF output.
|
Click Browse for Excel files to browse for existing Excel sheets.
|
|
|
Click Browse Folders to modify the output location for the Material Parts Table.
A standard Browse for Folder window displays. You must specify the folder into which the Material Parts Table is to be located and click OK to proceed.
|
|
|
Click Browse for PDF files to browse for existing PDF files.
|
|
|
Click Browse Folders to modify the output location for the PDF file.
A standard Browse for Folder window displays. You must specify the folder into which the PDF file is to be located and click OK to proceed.
|
When any of the Isometric ADP settings are changed, the title of the Settings part of the Isometric Production window changes to Settings* indicating that one or more settings values have changed.
Click Save to save all changed settings. On re-entry to the module at a later time, the settings are reloaded, by default.
To remove the saved settings, on the Tasks part of the Isometric Production window, click Clear User Settings.


