Reporting
User Guide
Create Reports : Styles and Conditional Formatting : Store and Restore Style Sheets
It is possible to store a report's style sheet (containing all the report's styles) in an external REPSS file and to restore a report's appearance from this file. Refer to Styles Concepts for further information on using styles in Reporting,
|
•
|
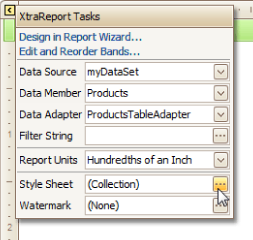
Click the report's Smart Tag, and in the displayed actions list, locate the Style Sheet property and click the ellipsis.
|
|
•
|
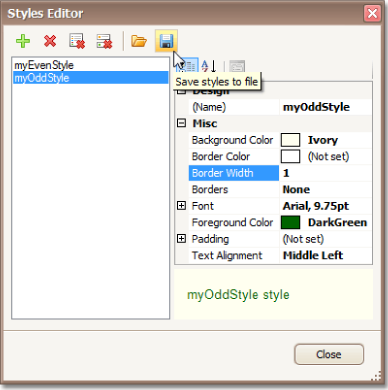
In the Styles Editor that is then displayed, click
|
|
•
|
|
•
|
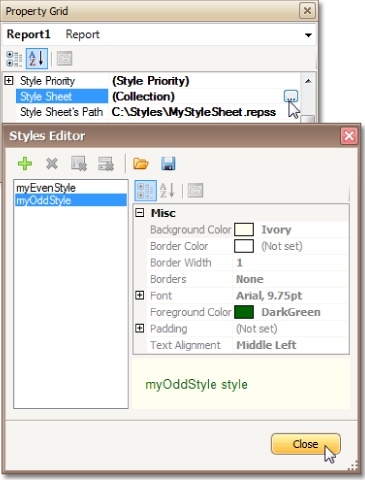
Select the report by clicking anywhere on the blank area around its bands. In the Property Grid, locate the Style Sheet Path property and click the ellipsis. Using the Open File window, select and load the created REPSS file.
|
Click the Style Sheet properties ellipsis. In the Styles Editor, observe that the properties of the styles are read-only. This is because the Style Sheet Path property is being used to define the styles.
If the Style Sheet Path property is subsequently set to None, and a style sheet is loaded into a report using the Style Sheet property, all the styles loaded from the style sheet file will still be stored in the report, but will become editable.
|
•
|
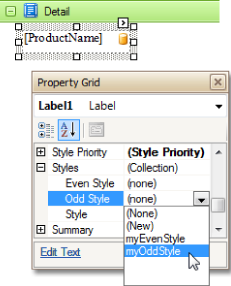
Next, assign the styles to the report controls by using their Styles properties. In this example, the created styles are assigned to the control's Odd Style and Even Style properties. Refer to Use of Odd and Even Styles for further information.
|
|
Note:
|
The styles loaded from a style sheet file have a higher priority than the styles which exist in a report's style sheet, returned by the Style Sheet property. This means that if the styles stored in the report have the same names as the styles loaded from a style sheet file, then the styles in the file will substitute for their namesakes. The styles loaded from a file cannot be edited in a report. Refer to Styles Concepts for further information.
|


