Schematic 3D Integrator
User Guide
Work Area : Main Table
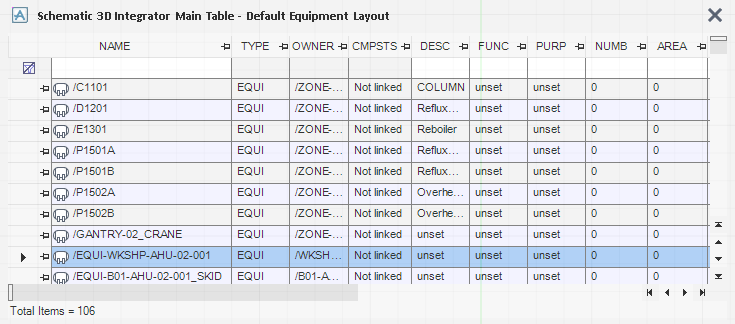
The Integrator main table contains all the instances of the main object types from the master database or only those instances from all pages of the diagram for the currently displayed page. Refer to Main Table Menu for further information. Each main table has one or more associated sub types tables, the tables display elements owned by the selected elements in the main table. Refer to Subtype Tables for further information.
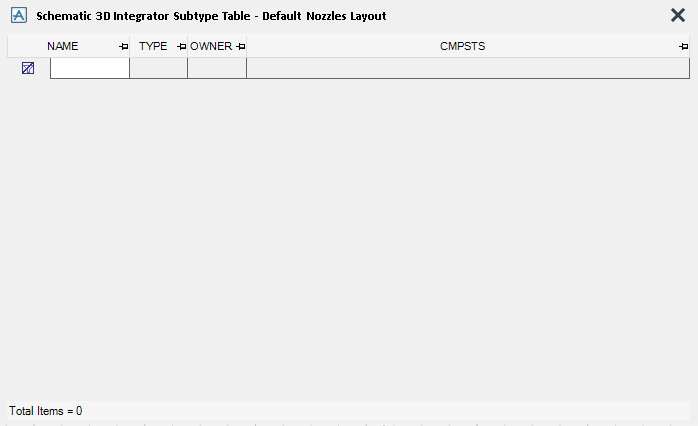
The subtype table displays elements owned by the selected object(s) in the main table, for example: schematic nozzles in a schematic equipment, or components in a pipeline. To display the subtype table select Main Table Menu > Subtype Table.
Select Main Table Menu > Main Object Type to select a new main object type from the submenu. The full list of available main object types are:
|
•
|
|
•
|
|
•
|
To select whether the table will include all instances of the Main Object Type from the current MDB, or only those instances from all pages of the Diagram for the currently displayed Page (default), or only those instances on the currently displayed Page. Select Main Table Menu > Scope for Schematic Types.
Use the Column Setup window to view the columns already defined for the table, add or delete columns and add standard attributes. Select Main Table Menu > Column Setup to display the table column setup window.
The functionality available from the Column Setup window is common throughout AVEVA E3D™, refer to Set Columns in the Search Results for further information.
The release to 3D status for a schematic object can be displayed in the main table using the attribute RESTAT. The compare status can be displayed using the attribute CMPSTS. To filter the main table on schematic elements that have been released but have not been linked, filter on RESTAT equal to 1 and CMPSTS equal to 'Not linked'. For more details of schematic to 3D links refer to Schematic to 3D Links.
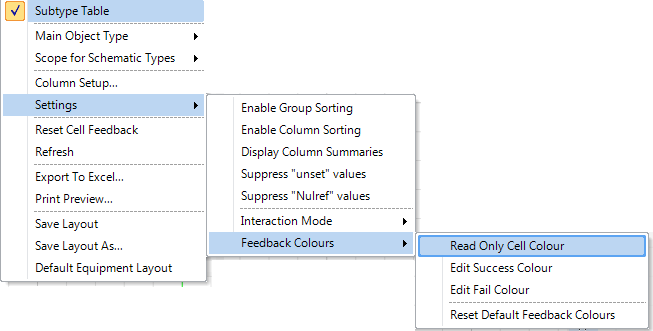
Use the functionality available from the Settings menu, is common throughout AVEVA E3D™, refer to Search Results Settings for further information. Select Main Table Menu > Settings to display the menu.
To edit attribute data in the main table, select Main Table Menu > Settings > Interactive Mode to display the menu, select an appropriate Interaction Mode:
|
Default. Read only cells are shown with grey background (or the selected colour if Feedback Colours have been changed). Cells may be read only for a variety of reasons, including data from a read only database, an object claimed by another user, or non-editable attributes such as Owner or Type.
|
|
|
Allows multiple cells to be edited at the same time. In Bulk Cell Edit, Fill Down, Fill Up and Copy/Paste operations apply to all cells currently selected.
In Bulk Cell Edit mode, Name is read only. Following an edit, the results (success or failure) are displayed using cell colours and tooltips. These can be cleared by selecting Reset Cell Feedback.
|
Integrator has out of the box default feedback colours, to edit the default colours for read only, edit success and edit fail colours. Select Main Table Menu > Settings > Feedback Colours to display the menu.
To refresh all cell values from the database, selecting Main Table Menu > Refresh.
The current table layout and content can be saved to an Excel file. Select Main Table Menu > Export To Excel and enter a filename in the file browser.
To view a print preview of the current table layout and content. Select Main Table Menu > Print Preview.
Select Main Table Menu > Save Layout to save the current main table layout. If the current layout has not yet been saved as a named layout, a prompt to enter a name in the Save Layout As window is displayed.
Select Main Table Menu > Save Layout As to save the current main table layout as a named layout for the current main type. Multiple named layouts for each main object type can be saved. For example, you may choose to display different attribute and column filters for pumps and vessels, and save them accordingly.
To discard any changes and return the main table to the default schematic equipment layout, select Default Schematic Equipment Layout.
The Subtype Table Menu main right click menu are accessed by clicking the right mouse button in the Subtype Table column title bar, either with no rows selected, or by clicking in the column title area if one or more rows are selected.
The functionality available from the Subtype menu window is common throughout AVEVA E3D™, refer to Main Table Menu for further information.


