Supports
User Guide
Supports Tools : Add Snipes to Steelwork Members
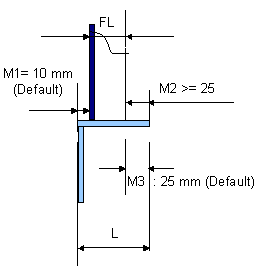
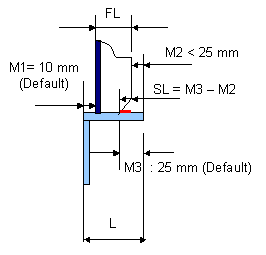
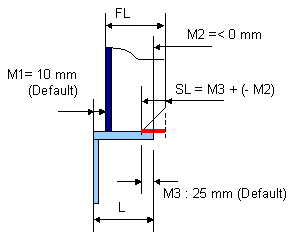
When the support structural member is not attached to a stiffener the following calculation is used:
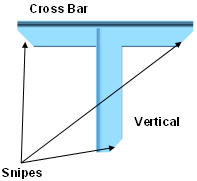
The snipes described in Snipe on Free End of Support Structural Member have been added to angle support structural members of all templates in databases MDS/DESITMPL-DIN and MDS/DESITMPL-DIN-ORI. The list of modified templates is as follows:
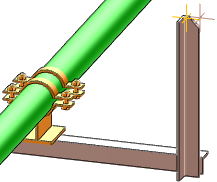
If the support leg is attached to a stiffener and the configuration conforms to the conditions described in Snipe on End of Leg Attached to Stiffener, snipes are automatically created when a support framework is created or modified (using the support framework window).
Snipes created in this way can be modified or deleted. Refer to Manually Create Snipes for further information.
You are prompted to Pick Section :
Click to identify the support structural member using a cursor pick in the 3D view to display the Snipes window.
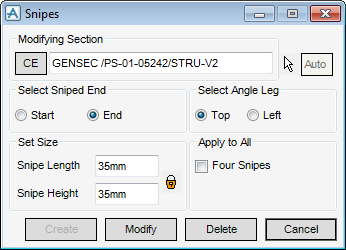
The Snipes window allows you to create, modify, delete, position and size snipes.
|
You are prompted Pick SNIPE edge or leg of end of angle where you want it to be created:
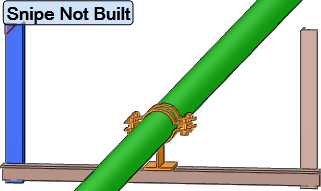
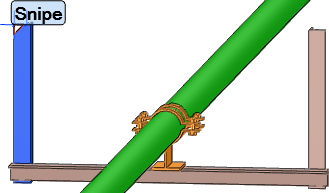
The 3D view indicates the position of the Snipe and that it has not been created. Click Apply to create the Snipe.
|
||
|
Click Auto to identify the end of the support structural member to be associated with the snipe using a cursor pick in the 3D view.
You are prompted Pick SNIPE edge or leg of end of angle where you want it to be created:
You can continue to identify additional support structural member ends to be associated with Snipes.
Click Auto again to disable the functionality.
|
||
|
Select the Start option button to associate the start of the currently selected support structural member with the Snipe.
Select the End option button to associate the end of the currently selected support structural member with the Snipe.
|
||
|
Select the Top option button to associate the top of the currently selected support structural member with the Snipe.
Select the Left option button to associate the top of the currently selected support structural member with the Snipe.
|
||
|
Click Lock to lock the values of the Snipe Length and Snipe Height fields. If you input a value into one of the fields, the other field is populated with the same value, by default
Click Lock again to disable the functionality.
|
||
Click Create to create a snipe.
Click Modify to modify an existing snipe.
Click Delete to delete an existing snipe.

