HVAC
HVAC Components : Create/Modify HVAC Component
All HVAC Component windows are dual purpose windows use it to either Create a new HVAC Component element (by default) or Modify the attributes of an existing HVAC Component element.
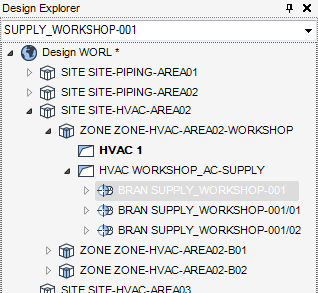
Referring to the HVAC Hierarchy section, an HVAC Component must reside below an existing HVAC Branch element. For a detailed explanation of creating an HVAC Branch refer to HVAC Main Branch or HVAC Side Branch.
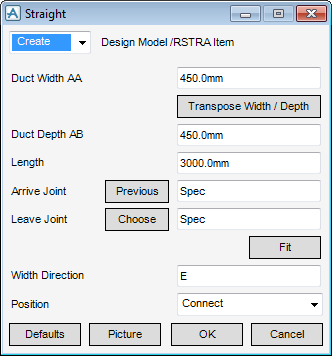
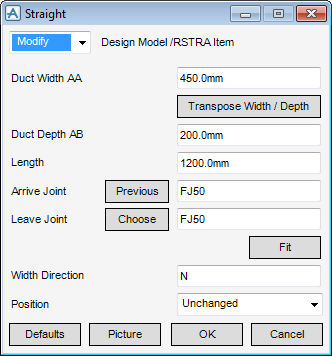
The task of creating an HVAC Component is initiated from the HVAC Window. Select Rectangular in the Categories drop-down list and then Straight in the Available Type drop-down list to display the Straight window:
|
Note:
|
|
•
|
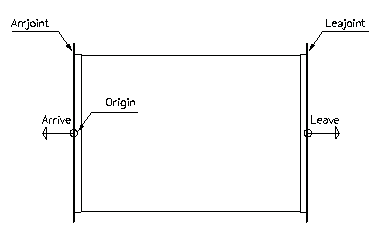
To visualise how the dimensions equate to the actual piece of HVAC click Picture to display a detailed drawing for Straight.
|
Note:
|
Specify from a selection of industry standard joints, an Arrive Joint (Arrjoint) for the inlet side of the component and a Leave Joint (Leajoint) for the outlet side of the component by clicking Choose. The default for the Arrjoint value will be set to detailing specification, for more information on detailing specification, refer to Default Detailing Specification).
When the Arrjoint is selected, click Prev. The software will then automatically select the Leajoint used on the adjacent piece of HVAC to use for the Arrjoint on the new piece of HVAC. If no adjacent piece of software exists an Error message will be displayed.
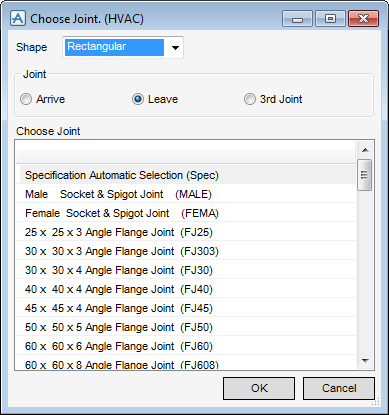
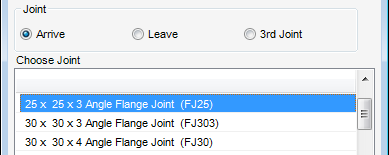
The Choose Joint window displays a selection of industry joints, choose from:
The Shape drop-down list by default will be set to the shape of the HVAC component being created. In this example the Choose Joint window has been opened from the Rectangular Straight window, so the Shape is set to Rectangular. The Shape can be changed to Circular or Flat Oval by clicking in the drop-down list and selecting the required Shape.
Using the Joint option buttons choose which end of the HVAC component the joint will be used for. By default Leave will be selected, but this can be changed to either Arrive or 3rd Joint.
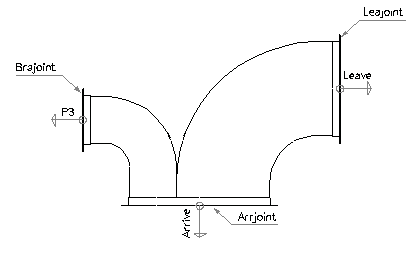
In the case of a Rectangular Straight only the Leave and Arrive Joint is relevant as displayed in the diagram below:
The 3rd Joint would be the joint used for a third connecting end of a piece of HVAC such as a Rectangular Twin Bend Three Way as shown below:
After clicking the Arrive, Leave or 3rd Joint option button, choose a type of joint from the available list.
Click OK to close the Choose Joint window and return to the Straight window. The selected Joint type will be copied into the relevant input field of the Straight window.
In the Width Direction specify the Axis that should be used E (East), N (North), U (Up), -E (negative East), -N (negative North) or -U (Negative Up).
|
•
|
Click Connect (default when create is selected) - connects the piece of HVAC to the previous one.
|
|
•
|
Click Unchanged (default when modify is selected) - positions the component at the co-ordinates 0.00.
|
|
Note:
|
Unchanged is usually used, when Modify is selected, it does not connect the component but positions it at 0.00, in effect in a floating position.
|
Click Defaults to clear all the dimensions currently in the Straight window and set them to the dimensions when the window was first opened.
Click Fit to orientate the piece of HVAC to automatically match the outlet (p-leave) of the previous piece of HVAC to the inlet (p-arrive) of the next piece.
Click OK to create the Straight element in the Design database and close the Straight window. The HVAC window is displayed.
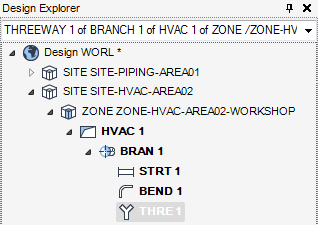
To Modify an existing HVAC Component element first select an existing HVAC Component element in the Model Explorer.
From the HVAC Window select Rectangular in the Categories drop-down list and then Straight in the Available Type drop-down list, to display the Straight window.
The Straight window will be populated with the attributes of the currently selected element.
Type in new attribute dimensions for the HVAC Component element and then click OK to commit the change.

