HVAC
Components : Rectangular : Turning Vanes
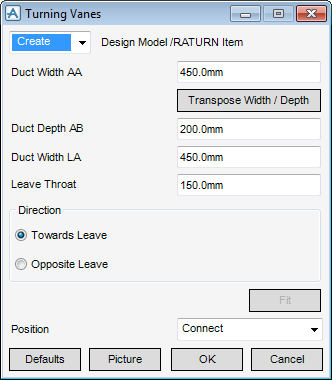
Select Rectangular in the Categories drop-down list and then Turning Vanes in the Available Type drop-down list to display the Turning Vanes window:
To visualise how the dimensions equate to the actual piece of HVAC, click Picture to display a detailed drawing for Turning Vanes.
|
Note:
|
Using the Direction option buttons you can choose which direction the air turning vanes are be directed relative to the Leave Direction.
|
•
|
|
•
|
Click Unchanged (default when Modify is selected) - positions the piece of HVAC at the co-ordinates 0.00.
|
|
Note:
|
Unchanged is usually used, when Modify is selected, it does not connect the piece of HVAC but positions it at 0.00, in effect in a floating position.
|
Click Fit to orientate the Turning Vanes to automatically match the outlet (p-leave) of the previous piece of HVAC to the inlet (p-arrive) of the next piece.
Click OK to create the Turning Vanes component and close the Turning Vanes Window. You will be returned to the HVAC Window.

