DRAW Administrator Guide
Defaults : Set System Defaults
|
After modifying the System Defaults window you can save the updated settings.
|
|
|
After modifying the System Defaults window you can save the updated setting to a new filename. Click to display a Save Defaults window which allows you to navigate to a location and name the file.
|
|
|
Displays the Default Load Errors window which lists any loading errors.
|
|
|
A confirm window displays asking you to OK re-loading of the default files. Click Yes to load the files.
|
|
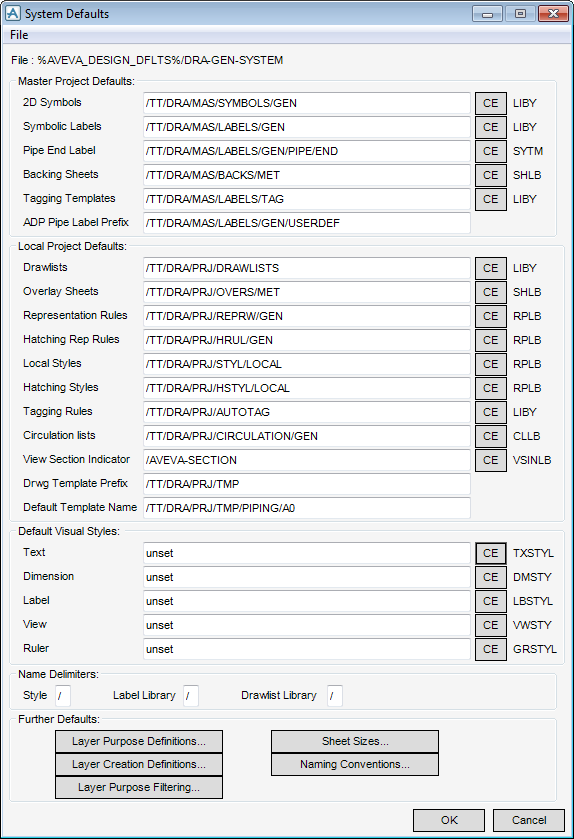
The Master Project Defaults and Local Project Defaults sections of the window display the default settings of the pointers to the DRAW Libraries. To change any of these, either type the new element name into the text box, or navigate to the required element and click CE. The text to the right of CE displays the type of element required for each Library.
|
Note:
|
The library reference defaults also display on the User Defaults window. On the Tools tab, in the Defaults group, click User Defaults. Refer to Modify User Defaults for further information.The User Defaults window is initialised with the settings from the System Defaults window after the defaults have been loaded from file. Subsequent changes made on the User Defaults window override, but do not change the settings on the System Defaults window, allowing a user some flexibility in the use of available libraries during drawing production.
|
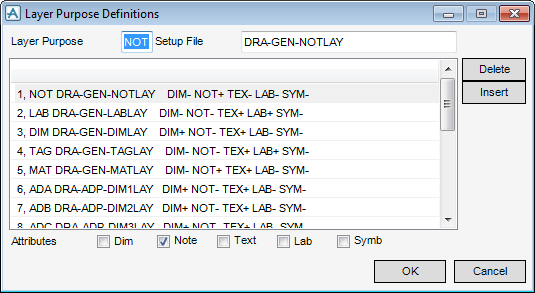
All layers have a PURP attribute which is set to a four character keyword which identifies the purpose for which that layer is intended to be used. Layer purposes cannot be duplicated under any one owning View. The Layer Purpose box on the window allows you to specify the purpose as a three-character string (the fourth character is added automatically when setting PURP so that multiple layers of a given type can be created under a single View).
The Setup File box is used to specify the macro file that is executed to set the layer attributes after a layer has been created. Default macro files are supplied with the product. For example, DRA-GEN-DEFLAY defines the default attribute values for layers which allows users to create layer annotations to a common standard.
The Attribute Group check boxes, Dim, Note, Text, Lab and Symb allow you to specify which attribute types display on the Layer Attributes window. The combination which applies to each of the currently defined layers is indicated by the + (selected) and - (unselected) codes in the scrollable list. To change these, turn the attributes on and off as required.
Click OK to set the layer defaults or Cancel to discard any changes and close the Layer Purpose Definitions window.
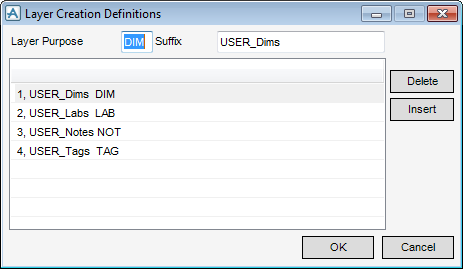
Click OK to set the layer creation definitions or Cancel to discard any changes and close the Layer Creation Definitions window.
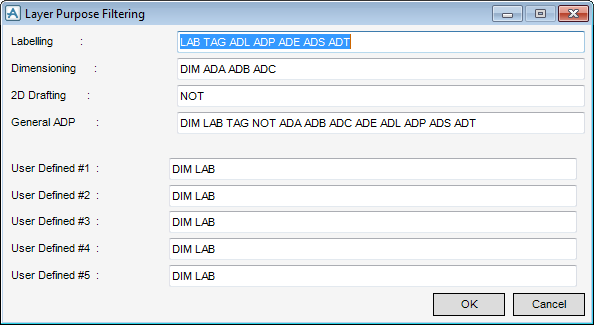
Sets the visible layers in the Layer Note drop-down list.
Click OK to define the settings or Cancel to discard any changes and close the Layer Purpose Filtering window.
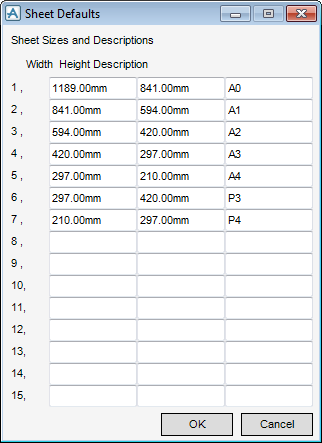
Click OK to define the sheet sizes and descriptions or Cancel to discard any changes and close the Sheet Defaults window.
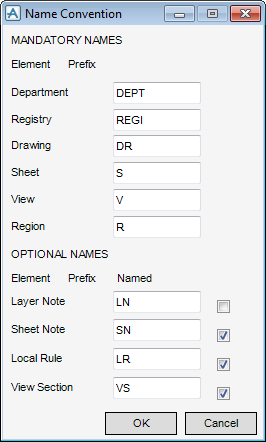
Names for the elements which must be named in order for the application to function correctly: DEPT, REGI, DRWG, SHEE, VIEW and REGION. For example, drawing numbers typically have a common project related prefix, which are input, in the Prefix field for the drawing element.
Elements which do not need to be named for the application to function: VNOT, NOTE, RRUL and VSEC. For these elements, use the Named check box to specify whether or not automatic naming is required.
Click OK to define the naming conventions or Cancel to discard any changes and close the Name Convention window.

