Cable Design
User Guide
Modify : Modify Cable
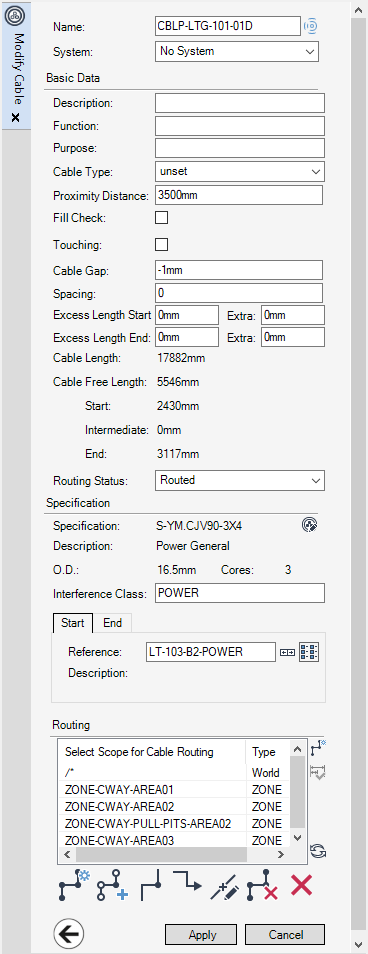
Use to modify the currently selected cable element, this can also be used to route a cable.The Modify Cable window has the same common layout as the Create Cable window with the exception of the Disconnect and Define Auto Routing functionality.
Disconnect the selected or newly created cable, to disconnect the cable from its starting point. On the Start tab (Default), click Disconnect Start. A message window is displayed requiring confirmation. To disconnect a cable from its finishing point, click to select the End tab, then click Disconnect End.
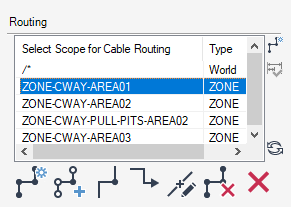
Click the expand arrow to display the auto routing options, then select the zone for cable routing from the list of available options.
Once the zone for cable routing has been selected, the cable can be routed orthogonally between the starting and ending points; click Auto-Route Cable.
To reload the zones containing cables, or to reset selection. Click Reload Zones/Deselect All. Right click on a zone in the list to navigate to the zone in the Model Explorer.
|
Use to define the route of the cable; refer to Define Route for further information.
|
||
|
Use to define the route through PRPs; refer to Define Route Through Preliminary Route Points (PRPs) for further information
|
||
|
Use to manually route the cable; refer to Manual Route Cable for further information
|
||
|
Use to free route the cable; refer to Free Route Cable for further information
|
||
|
Use to modify free points; refer to Modify Route Point for further information
|
||
|
Use to un-route the cable; refer to Unroute Cables for further information
|
||
|
Use to delete the currently selected cable; refer to Delete Cable for further information.
|
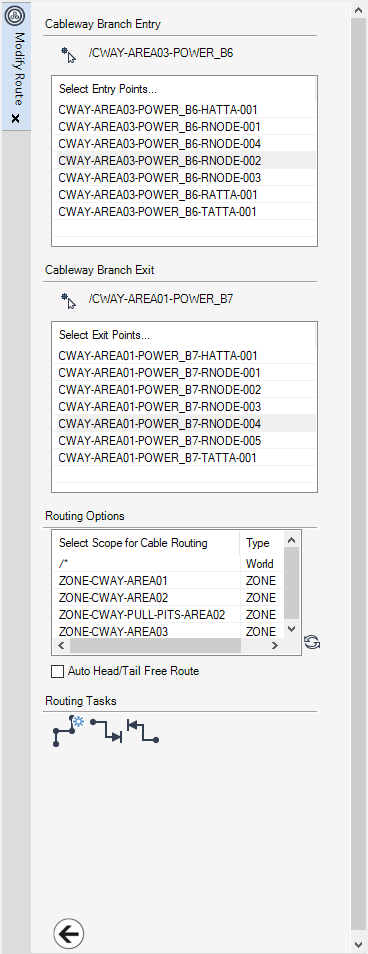
Cables can be routed by the selection of an entry and exit point on valid cableway branches. If a route has not been defined for the cable then suitable points will automatically be selected in the Cable Branch Entry and Cable Branch Exit parts of the Route Cable window. If a route has been defined then the corresponding entry and exit points will be selected.
The entry point for the cable on a suitable cableway branch must be specified, from the Cableway Branch Entry part of the Route Cable window:
If Pick Routing Branch is selected, a prompt to Identify Cableway Branch in the 3D view is displayed. When selected, the name of the cableway branch is displayed on the window and its valid entry points are displayed in the Select Entry Points list. The required entry point must then be selected from the Select Entry Points list.
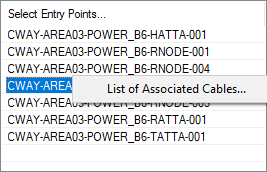
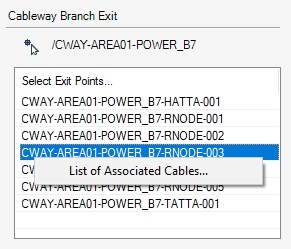
Right clicking on any item in the Select Entry Points or Select Exit Points lists displays the option to open the List of Associated Cables. Other cables that have been routed through the same point are displayed in the List of Cables window.
Specify the exit point for the cable on a suitable cableway branch, from the Cableway Branch Exit part of the Route Cable window.
The Auto Head/Tail Free Route check box must be selected if the head and tail of the cable is to be automatically free-routed. This routes the cable outside of the cableway by creating POINTR elements from the cable’s head/tail to the selected entry/exit point.
After clicking the Define Specific Cableway Zones expand arrow, select which cableway zones can be used to route the cable. If no zones are defined, then cableways from all zones found in WORLD will be used to route the cable. For large projects this will take a long time. Right click on a zone in the list to give the option to navigate to the zone in the Model Explorer.
|
When the cableway entry and exit points have been specified, the cable can be routed; click AutoRoute from Entry to Exit Point.
|
||
|
If the Auto Head/Tail Free Route check box is not selected but free routing of the ends is required to make cable routing complete, a prompt will be displayed giving the option to route both Head and Tail.
If the start position of the cable does not match the position of the entry point, the cable will not be fully routed. To complete the routing click Head Free Route which will create POINTR elements from the cable’s head to the selected cableway entry point.
|
||
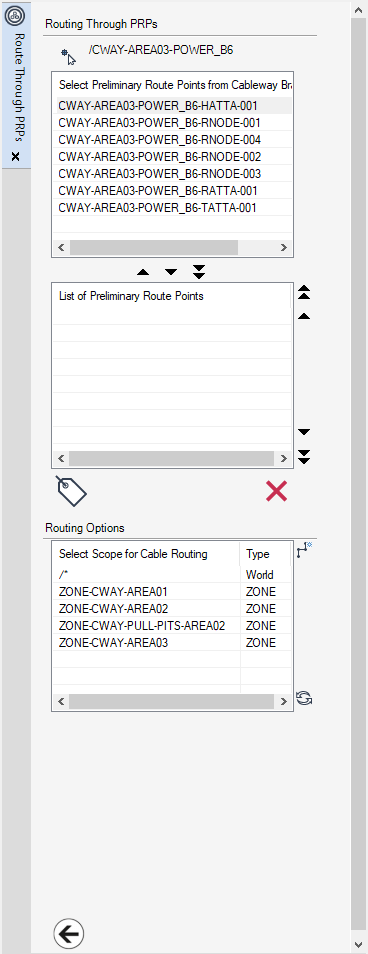
If a route has not been defined for the cable, then a list of suitable routing branches will be displayed. Select a route point from Select Preliminary Route Points from Cwbranch list. If a route has been defined then the chosen PRPs will be displayed in the List of Preliminary Route Points list.
From the Routing Through PRPs part of the Route Through PRPs window, select the cableway branch and then the PRPs to route the cable on the branch.
Populates the Select Preliminary Route Points from Cwbranch list with route points contained within the picked branch. Right click on one of the points in the list to give the option to open the List of Associated Cables window, which will show other cables that have been routed through the same point.
|
Inserts the selected point above the PRP selected in the List of Preliminary Route Points.
|
|
|
Inserts the selected point at the bottom of the List of Preliminary Route Points.
|
Items in the List of Preliminary Route Points can be organised using the buttons to the right of the list:
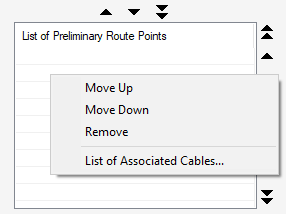
Right click on an item in the List of Preliminary Route Points to display options to organise the list and to open the List of Associated Cables window.
After clicking the Define Specific Cableway Zones expand arrow, select which cableway zones can be used to route the cable. If no zones are defined, then cableway from all zones found in WORLD will be used to route the cable. For large projects this will take a long time. Right click on a zone in the list to give the option to Navigate To the zone in the Model Explorer. If required click Reload Zones/Deselect All.
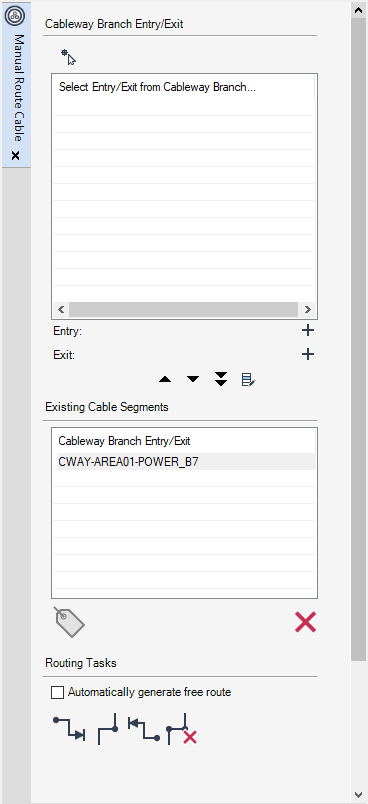
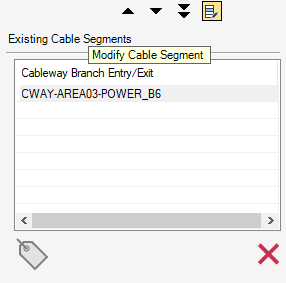
Allows cables to be routed manually or a cable route modified between its start and end references. The current cable segments, if existing, are automatically displayed in the Existing Cable Segments part of the Manual Route Cable window.
Select the cableway branch to create the segment of the cable route, click Pick Routing Branch and then select a cableway branch from the 3D view. The Select Entry/Exit from select Cableway Branch list will populate and display the points along the cableway branch that can be used as entry and exit points. Select a point from the list and then click Add (either of them) next to Entry or Exit shown below the list. The selected entry and exit points for the segment must be on the same cableway branch.
To insert the segment in between existing segments, select a segment from the Existing Cable Segments list.
|
Note:
|
When selecting different creations methods with entry and exit points already selected, a Confirm window to clear the selected Entry/Exit points will be displayed. Click Yes to accept or No to cancel.
|
An existing cable segment can be modified. Select a segment from the Existing Cable Segments list which will fill the Entry and Exit lines and can then be changed in a similar way to the creation method. When new entry and exit points have been selected, the changes can be made. Click Modify Selected Segment.
The entry (head) and exit (tail) points of the cable can be selected in the 3D view through the selected cableway. The head free route and tail free route are created using the same process. A prompt to Pick to define position <Esc> to finish (Snap) Snap: is displayed and the Positioning window is displayed.
After the two points have been selected and labelled in the 3D view, press esc; a Confirm window is displayed.
Click Yes to route the cable between the two points and display the Modify Free Point window with Modification selected as the default, which allows the modification of a route point.
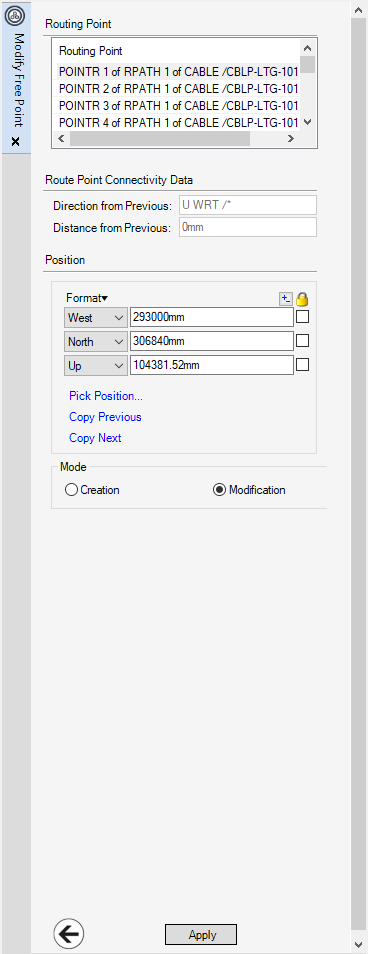
The Modify Free Point window is dual-purpose window, which allows the creation or modification of a free point and acts as a task hub for all the options available for free points. The Modify Free Point window is automatically displayed populated with all the routing points of the cableway.
Select the routing point to be modified, the Modify Free Point window is automatically populated with the attributes for the selected routing point. The Route Point Connectivity Data part of the Modify Free Point window, displays the direction and distance of the currently selected route point from the previous one.
If a change in direction from the previous route point is required, enter a new direction in the Direction from Previous field. If a change in distance from the previous route point is required, in the Distance from Previous field, enter a new distance.
The Position part of the Modify Free Point window, displays the co-ordinates of the currently selected free point. Position the route point using the generic positioning options.
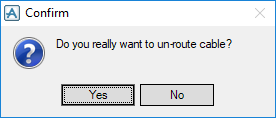
It may be necessary to unroute a previously routed cable as part of the design process. Select the routed cable to be unrouted in the 3D view or in the Model Explorer. A Confirm window is displayed.
Click Yes to unroute the cable and remove it from the 3D view or No to discard any inputs and close the Confirm window.
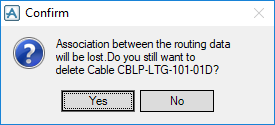
Use to delete the currently selected element in the 3D view. Click Yes to delete the association or No to maintain the association.

