Bocad Steel Interface
Bocad Steel Interface : Export/Import : Export to AVEVA Bocad Steel
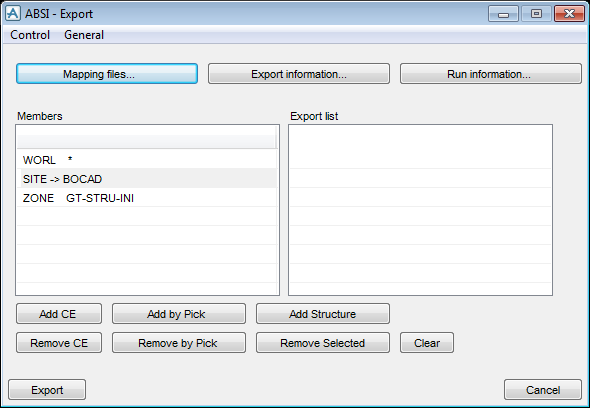
To export a steel structure to an ABS file, on the TOOLS tab in the Export group select AVEVA Bocad Steel to display the ABSI - Export window.
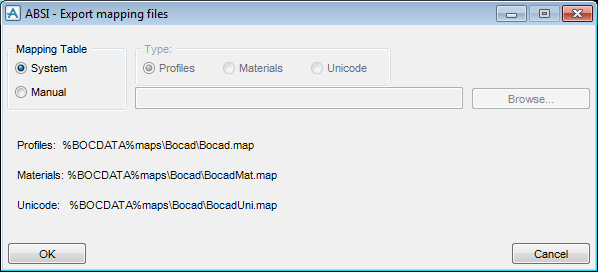
Click Mapping files to display the Export mapping files window which contains information about the mapping files that are to be used in the Export process.
The interface requires at least two external mapping tables to enable it to check that AVEVA Bocad Steel can accept the data. It also may use the Unicode mapping table if necessary. The mapping tables are for the Profiles and Materials between base product and the neutral file. The Unicode mapping table is to translate the base product Unicode strings into ASCII strings. The section Customise tells you how to arrange these files on the file system and what format they are to be. The interface also needs to know where the external mapping files are located on your computer network. For this, internal mapping tables are required. Refer to Internal Mapping Files which explains how to configure the interface to tell it where all the files are located.
The current file settings are indicated on the ABSI - Export mappings file window. Do not be concerned that the path name may be truncated by the insertion of the ellipsis (…): it is modified only for display purposes on the window.
The system also checks that these files are compatible with AVEVA Bocad Steel by checking only the identification line at the top of each mapping table. Refer to External Mapping Files for details about the format of these mapping files.
The two main options are System and Manual which are activated by selecting the appropriate radio button.
System causes the interface to select automatically the mapping tables for AVEVA Bocad Steel according to the system configuration files.
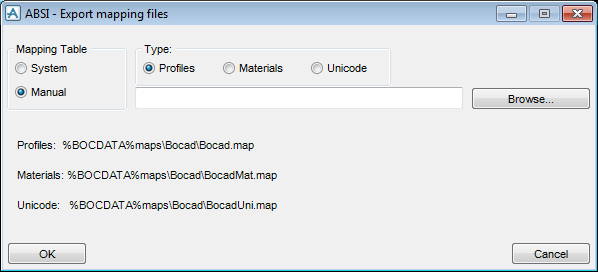
Manual activates other radio buttons, which are initially greyed out for the System option. Selecting this option changes the window to be similar to below.
You can select the file type using the Profiles, Materials or Unicode radio buttons and enter the full path name of the file in the data entry area. You can also include system environment variables in the path name as long as they are in the proper base product format, for example AVEVA Bocad Steel %ENVVAR% being the base product representation of the ENVVAR environment variable.
You can choose by hand which mapping file to use by either entering its name in the text data entry field, or by using the Browse option to bring up a File Browser. You may use this browser to search for the relevant mapping file.
Once you have entered all the correct data on the Export Mapping Files window, click OK the interface variables are updated. Click Cancel to close the window, leaving the original interface variables unchanged.
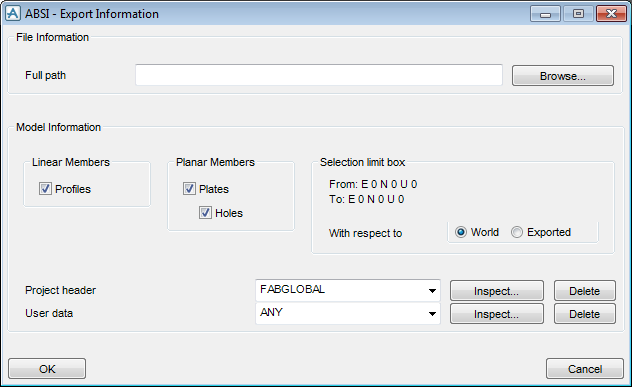
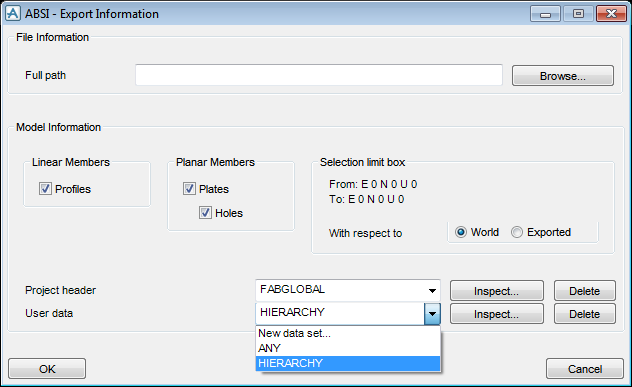
Click Export Information to display the ABSI - Export Information window which contains information about the export process.
You can either type the full path name of the output file, or click Browse to display a File Browser. The interface tests to see if the file exists and if it does, you will be asked whether you wish to overwrite it. If the file does exist and you want to overwrite it, the file mode beside Browse will change from WRITE to OVERWRITE. The output file is rechecked for write/overwrite status during the actual Export process. This is because you can perform Exports repeatedly without changing the output file name.
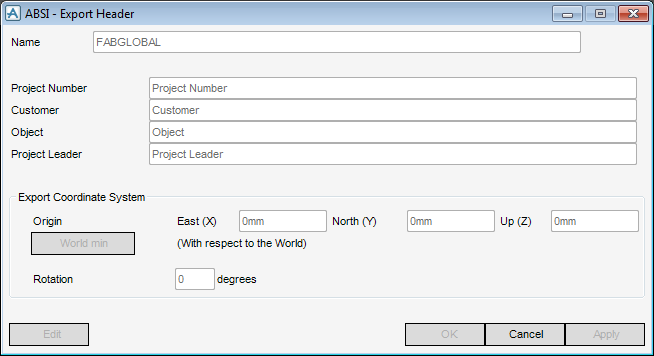
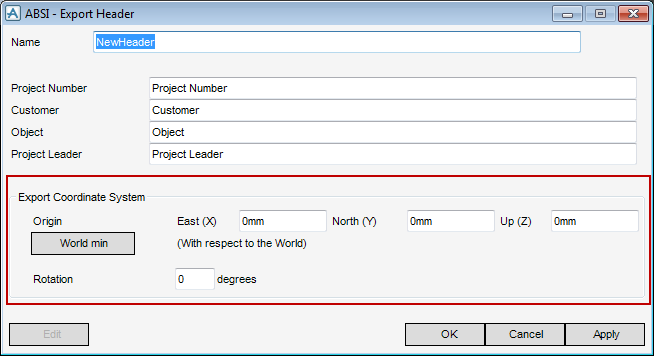
You can view the information contained by the chosen header element by clicking Inspect which displays the ABSI - Export Header window.
At first the entry fields are inactive so you can just read the contents. To modify the contents of the fields click Edit on the Export File Header Details window and the fields become active allowing you to enter any revised data. Click Apply and the data will be transferred back to the chosen header object, overwriting the original data. Click Cancel to leave all the data unchanged.
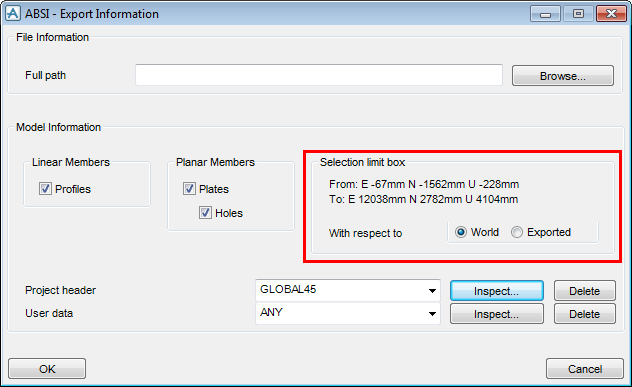
Using the toggles on the ABSI - Export Information window, you can select whether to export Straight or Curved members, and Plates, with the additional option of including their holes. You are able to export Plates without their holes.
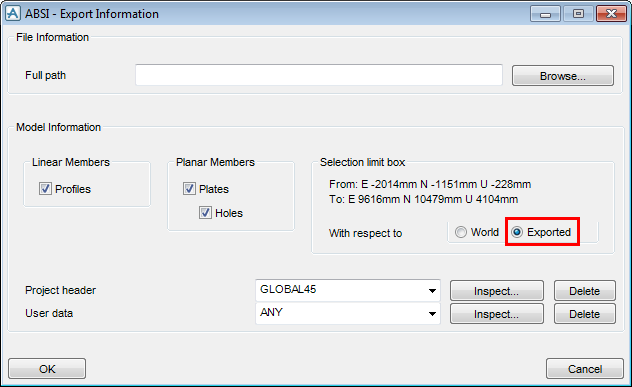
If you have already selected something to Export, the Export Information window is updated to include the 3d world limit box of the export items.
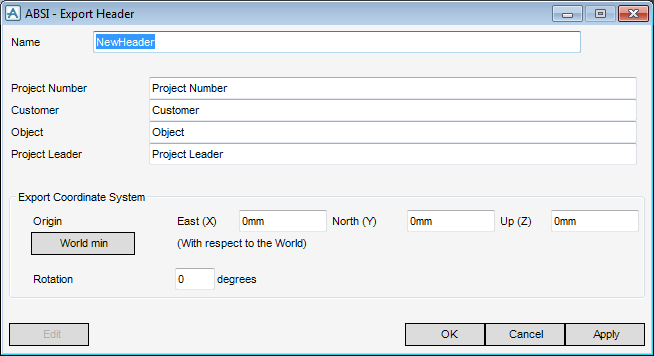
AVEVA Bocad Steel cannot handle such large coordinates as other AVEVA products, and here there is the opportunity to define in the file header a local origin, offset position and orientation in world coordinates. The model offset and orientation are used to translate the model in the ABS file. The East/North/Up position is entered in the fields indicated. It might take an iteration or two for the AVEVA model to be compatible with the AVEVA Bocad Steel model, such that the user of each system is happy with the Model Offset value. Once this is achieved, the Model Offset will be locked and it becomes fixed for future transfers. If you later try to modify these values, it must be an explicit decision. Refer to Managing the Model Limits and Offsets for more information.
The ABSI - Export Header window is displayed, you can populate the window with all the relevant details. Remember to fill in the name to appear in the header drop down list. This must be the basis of a valid Dabacon element name.
The Model Rotation is a rotation angle measured in degrees about the global Z axis following the right hand screw rule. It is usually assumed that the header is locked to prevent accidental changes
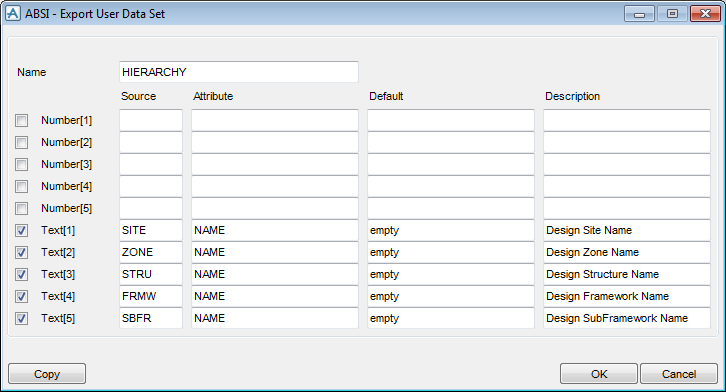
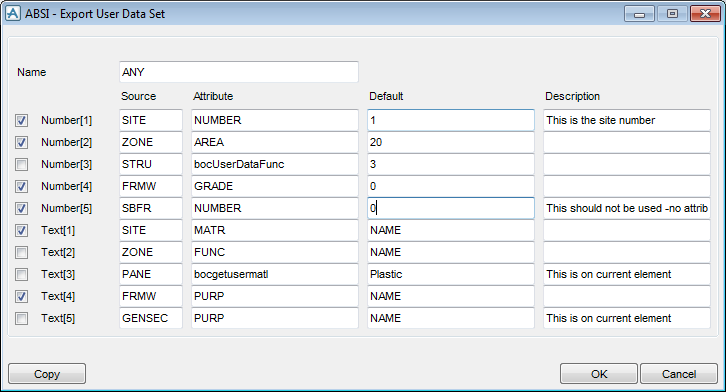
By default the system is suppled with two configurations, ANY and HIERARCHY. When viewing the HIERARCHY, ABSI Export User Data Set window is populated as follows:
This information is not stored in the database, but in the configuration file, which can be loaded by other projects. Refer to Customise in Chapter Export/Import for more information.
Once all the correct data has been entered on the Export Information window, click OK and the interface variables will be updated. Click Cancel to close the window, leaving the original interface variables unchanged.
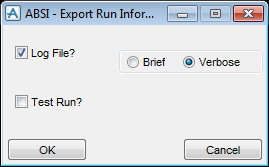
Click Run Information to display the Export window which allows you to view the Log File after the export process is complete by clicking to select the Log File? check box.
The Test Run? option allows you to suppress the updating of all the Export flags. This is so that you can see if there will be a successful Export of the model. You may find that the Profile or Material mapping files are not quite up to date which might cause a failure in the Export process. Therefore, you can select this option to define this as a test run.
After the Export process has completed, Test Run? is reset to false. This is so that you are forced to state categorically each time the model is Exported that the run is a trial.
Once all the correct data has been entered on the Run Information window, click OK and the interface variables will be updated. Click Cancel to close the window, leaving the original interface variables unchanged.
If you add something to the Export list and has the item on display in a 3D Volume View it will be enhanced by changing its colour. The Export list is managed such that duplicate elements are removed and that items are exported only once.
|
Note:
|
|
Allows you to select an item from the 3D Volume View. It is similar to other pick functions. Selection of this option brings up a Status window and puts you into a mode where an item from the 3D Volume View can be picked. You can also pick a sequence of items in succession to add to the Export list. Press Esc when complete. If you do not want to continue, press Esc.
|
|
|
There is also a set of methods by which you can remove items from the Export list. These options work only on entries in the Export list, rather than in the model. As with adding to the Export list, removing from the Export list will cause the item or items removed to be returned to the default colour as defined by this interface.
|
|
|
Allows you to select something from the 3D Volume View and, if it is present in the Export list, the name will be removed. As with the Add by Pick option, you may select a series of items to attempt to remove from the Export list until Esc is pressed.
|
|
Export executes the Export process. As it proceeds you are kept informed of the progress by means of messages at the bottom of the main window as well as by windows and prompts.
The Control drop-down menu has four options; Re-initialise, Configure, Map Converter and Exit. Changing any mapping files or any other variables:
|
•
|
Re-initialise reloads files to save you having to rebuild the whole user interface from scratch
|
|
•
|
Configure enables you to define run parameters, model parameters, display colours and environment parameters. Refer to System Configuration for further information
|
|
•
|
Map Converter starts the tool that helps you rebuild Profile mapping files
|
|
•
|
Exit removes all forms and menus and global variables associated with the interface.
|
The General drop-down menu has two options, Highlight and Clear ABSI History. Highlight displays the Highlighter window enabling you to identify new, changed and deleted items in the model. This has more relevance to the Import process, refer to Highlighting Changes in the Design for further information. Clear ABSI History enables one to clear the import/export history on the current element and all elements below that have date and time UDAs that are relevant to the AVEVA Bocad Steel Interface.
All reference data, such as any pre-existing reference model from the current session are removed before exporting anything. For more details on Importing and for details about saving the reference model, refer to Import from AVEVA Bocad Steel.
In addition, there is an specific UDA, :FABEXCLUDE, attached to certain base product elements by which you can define whether the item is to be exported or not. Setting this logical flag to true will exclude the item from the Export process. Refer to UDAs for further information.
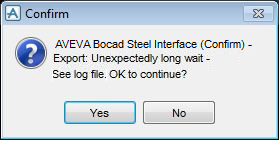
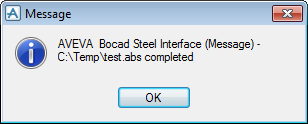
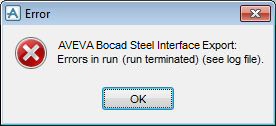
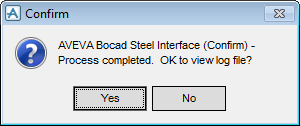
Click Yes and the interface will wait for another period of time. Click No to stop the interface where it is. Finally the system will indicate its completion, whether successful or not. This completion message should be read in conjunction with the log file, if any errors are indicated (if that option has been selected on the Run Information window).
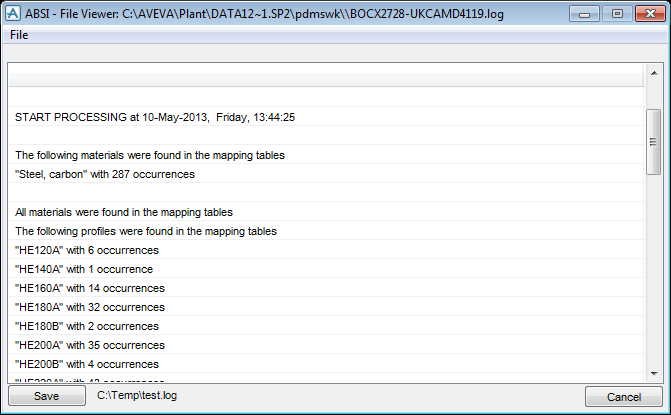
To inspect the log file later, save it with the File > Save as option in the File Viewer window which will bring up a File Browser, or by clicking Save as to the suggested filename. Either way, if the file already exists, you will be asked whether to overwrite it. The log file window may then be closed by clicking Cancel.
If the Brief mode has been chosen on the Run Information window for displaying the log file, the window displaying the log file will filter out all Warning messages, leaving only the Error messages. Saving the log file, however, all messages will be retained in the file.
Panels in the base product are to be transferred as Plates. This covers stiffeners, floor and toe plates. Bent plates are also transferred if they are expressed as their component flat plates. If Bent Plates are to be treated as Angle linear members then they should be modelled as such.
If the base product’s penetration functionality is used to generate Catalogue holes, the resultant holes, kicker plates and stiffeners are not exported because they are contained in a Catalogue definition. Some holes and negative primitives can be exported. Refer to Transferring Holes for further information.

